Specs from Sensors
- Print
Specs from Sensors
- Print
Article summary
Did you find this summary helpful?
Thank you for your feedback!
A Sensor is "a device which detects or measures a physical property and records, indicates, or otherwise responds to it." Every Sensor in your shop should be entered as a Sensor in Steelhead for accurate and reliable acquisition of Specs data.
Contents
Setting up Sensors
Integrating Sensor Type Specs
View and Edit Sensor Dashboards
Dashboard Actions
Sensor Measurement Page
Setting up Sensors
For Spec creation it is important that Sensor Types and Spec Fields are matched together. For example, a Sensor Type of "Anodize Red Dye pH" should be matched to a Spec Field named "Anodize Red Dye pH" with the Type as "SENSOR."
For Number Sensor Types, the Unit from the Sensor Type will be applied to the Parameter.
Sensor Info:
Sensors are designed to record key measurements of the physical world. Sensors capture information such as humidity, temperature, barometric pressure and more.
In Steelhead, Sensor values can be "recorded" in 3 ways:
- From the Sensor itself
- Work Orders/Workboards
- Maintenance work flows
Sensor values simply record the value, the time, and the User who recorded it at each instance. Specs, Certs, Reports, etc. can "reference" this recorded value to validate that processing was within Parameters at the time of processing. The onus of defining Sensor value "validity window" falls on the Spec, Reporting, etc. side. For example, a Spec may dictate that humidity is measured 1x/day. If the Sensor is "measured" at 9 am that day, it is automatically populated throughout the day. If not, Specs will force measurement when the occasion arises. Work Order/Workboard integration is all prescribed via Spec functionality.
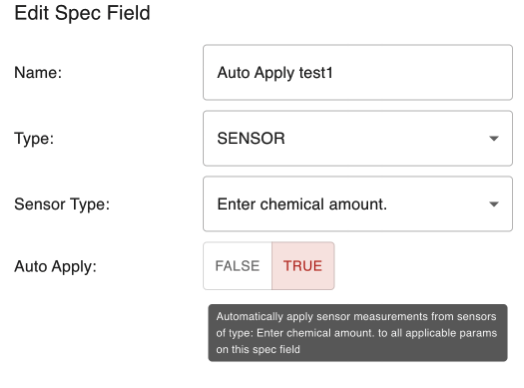
Auto-Apply Toggle:
The Auto Apply is a toggle for Sensor measurements when creating a Spec Field.
- When a User transfers Parts and valid Sensor measurements are active, it will apply them to the Parts.
- When a Sensor measurement is taken, it will create a Spec Field Param value for input to all Auto Apply Spec Fields.
- It will then link the Part Transfer Accounts of any Spec Field Params where the Sensor valid duration makes the Sensor measurement still valid.
How to use this feature:
- Create Spec Fields linked a Sensor type and Sensor(s) at a given Station or location and set Auto Apply to "true."
- Create Spec Field Params that use the Sensors.
- Add the Specs to Parts.
- Create a Sensor measurement.
- Observe that the measurement was applied to all applicable Parts.
- Move Parts with applicable Spec Field Params into the Station and observe that the measurement was applied to those Parts.
Integrating Sensor Type Specs
Create Spec Fields and Params based on Sensor Type Specs, according to the Specs Configuration article. Assign an applicable Process Node. Save your selections.
Click into the Part Number you'd like to attach a Sensor input to, and +ADD SPEC or open an existing attached Sensor Type Spec. Apply the Sensor input Params.
Or, enter the Process Tree and Process Node where you'd like to assign a Sensor input, from the Processes Dashboard. Scroll down to Spec Fields and click on +ADD SPEC FIELDS.
Process Nodes can also be associated with a Spec Field by clicking into a Spec Field Page from the Specs Dashboard, and clicking +ADD PROCESS NODE. Once added, the Node is available to be linked from a Part Number Recipe Tree.
Sensor Type Spec Field Params can be edited, also from the Spec Field Page:
- Enter the Specs Dashboard, and find or select your Sensor Type Spec.
- Scroll down and select the Spec Field which requires editing, from the list.
- Click the pencil edit icon on the line of the Default Spec Field Param which requires editing, or open the Param to review details, and click on EDIT SPEC FIELD PARAM.
Edit Sensors
You can edit the Name and set a Station for a Sensor by opening the Sensor page and clicking the edit pencil icon next to its name:
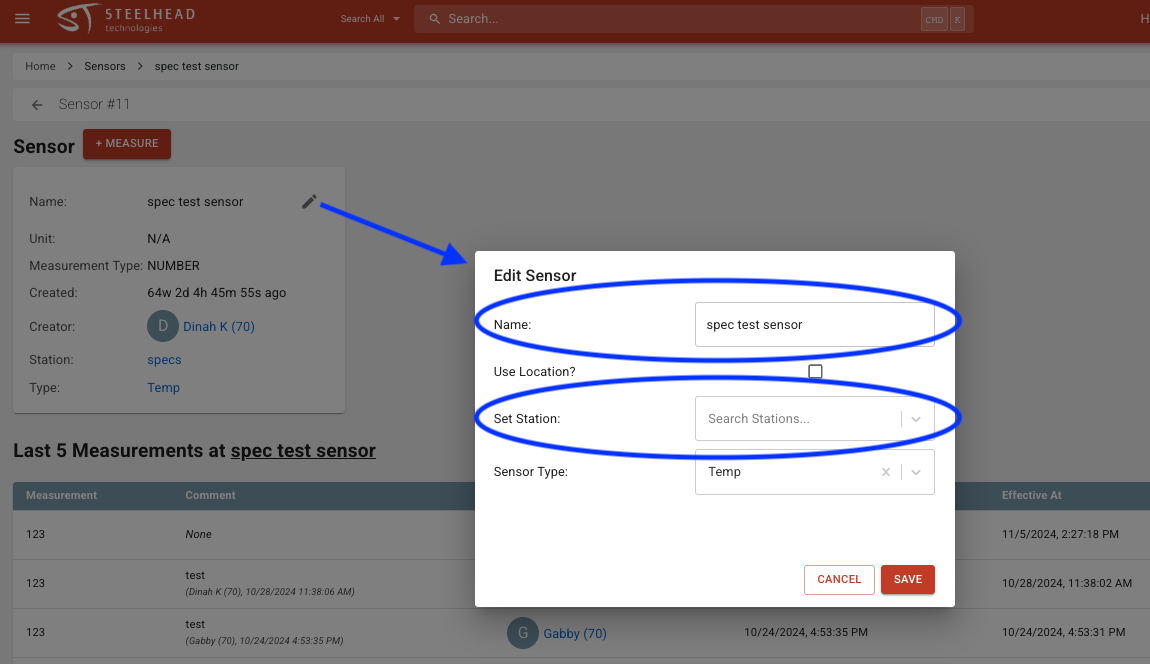
Note that "Sensor Type" may not be changed unless there have been no measurements recorded by the Sensor (in such a case, a new Sensor needs to be created with the desired Type designation).
View and Edit Sensor Dashboards
Your Sensor Dashboards compile the settings and details you have applied to your Sensors, for monitoring. They can be accessed through the sidebar menu on the Maintenance Dashboard, and are highly configurable.
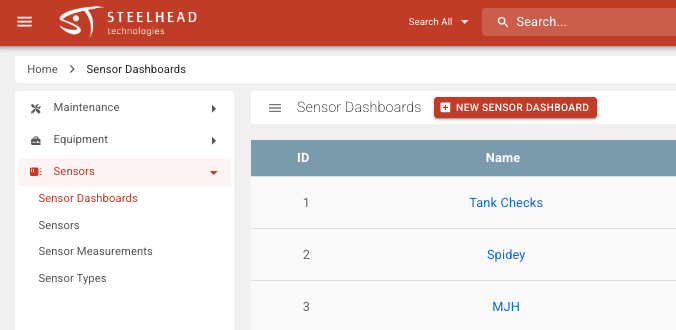
When you create (using the red button) or edit (with the clickable pencil icon to the right) a Sensor Dashboard, you'll see a checkbox to "Show Spec Markers."
This setting controls whether Spec Markers (minimum, maximum, and target values) are displayed on the Sensor charts in the Dashboard.
Spec Markers are helpful for:
- Visualizing when Sensor readings are within specification limits.
- Monitoring when readings exceed minimum or maximum thresholds.
- Tracking how close readings are to target values.
This setting is particularly useful for quality control and process monitoring, as it provides a visual reference for Spec compliance.
If you want live updates on this data without pressing the refresh button, clicking into one Dashboard and using the OPEN GRAPH MODE button will open the same chart in a view which automatically updates every five minutes.
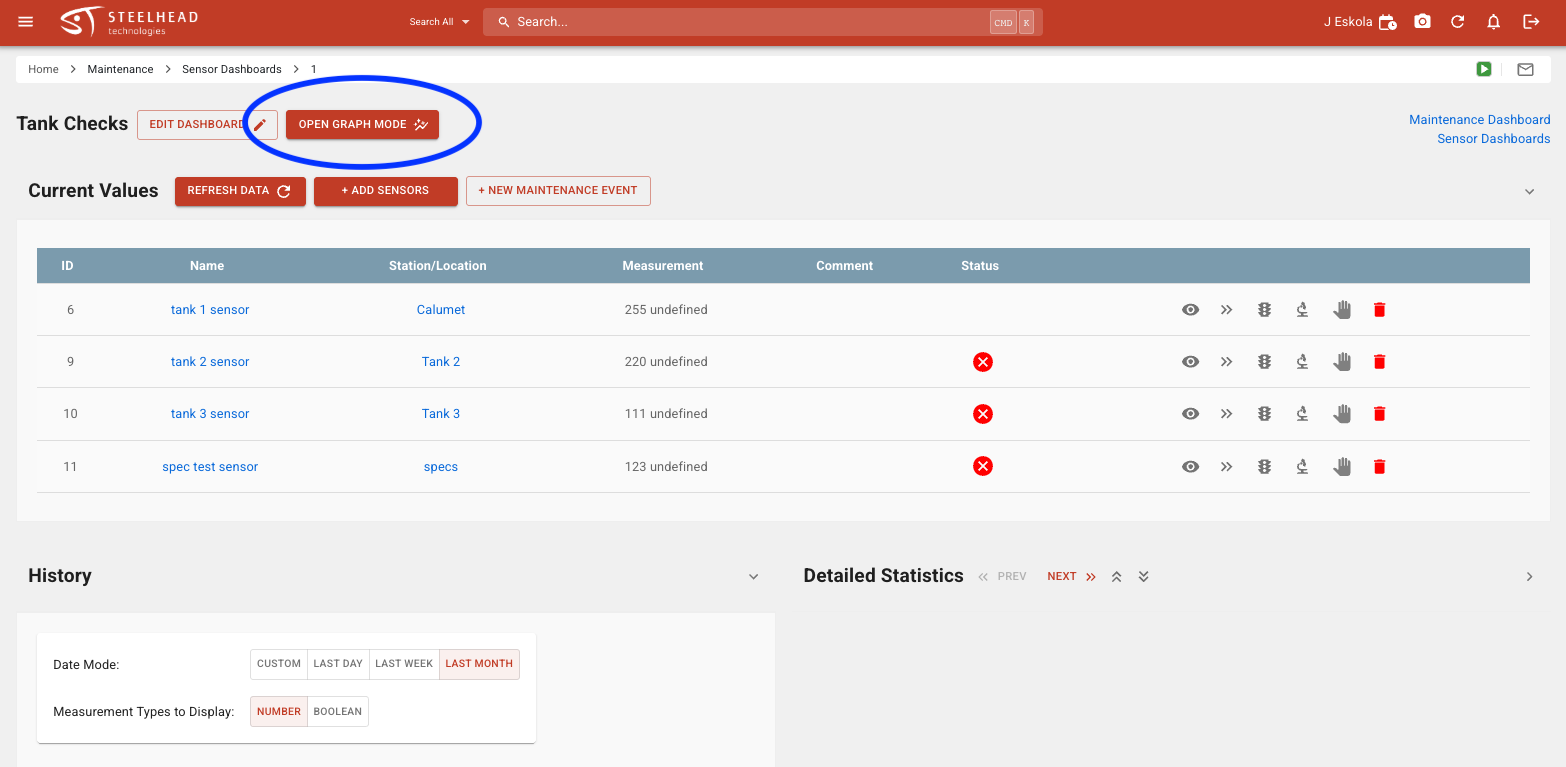
Dashboard Actions
Sensor Dashboards show a number of clickable icons. Besides the commonplace show/hide, move and delete options, we can see these clickable icons:
 "Progress" double-arrow: Show recent measurement history. History can be corrected or hidden by those with permission.
 "Limits" stoplight: Show parameterization information. Allows optional selection of a single Spec Field Param to define validity status while the other readings from that Sensor are recorded independently.
 "Observation" microscope: Create a new time-stamped Sensor input.
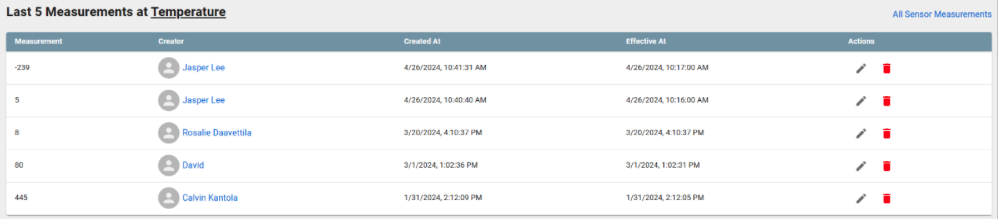
Sensor Measurement Page
- Steelhead has a Sensor measurement page for easily sorting/paging/filtering measurements.
- The table on the Sensor page shows the five most recent inputs, along with a hyperlink to an All Sensor Measurements page.
--
Was this article helpful?