- Print
Station Schedules
- Print
Station Schedule Introduction
To see the list of schedules for all stations, click into the active Schedule. This page displays a list of Schedule Boards, and below that is a list of all stations (arranged by number of tasks).
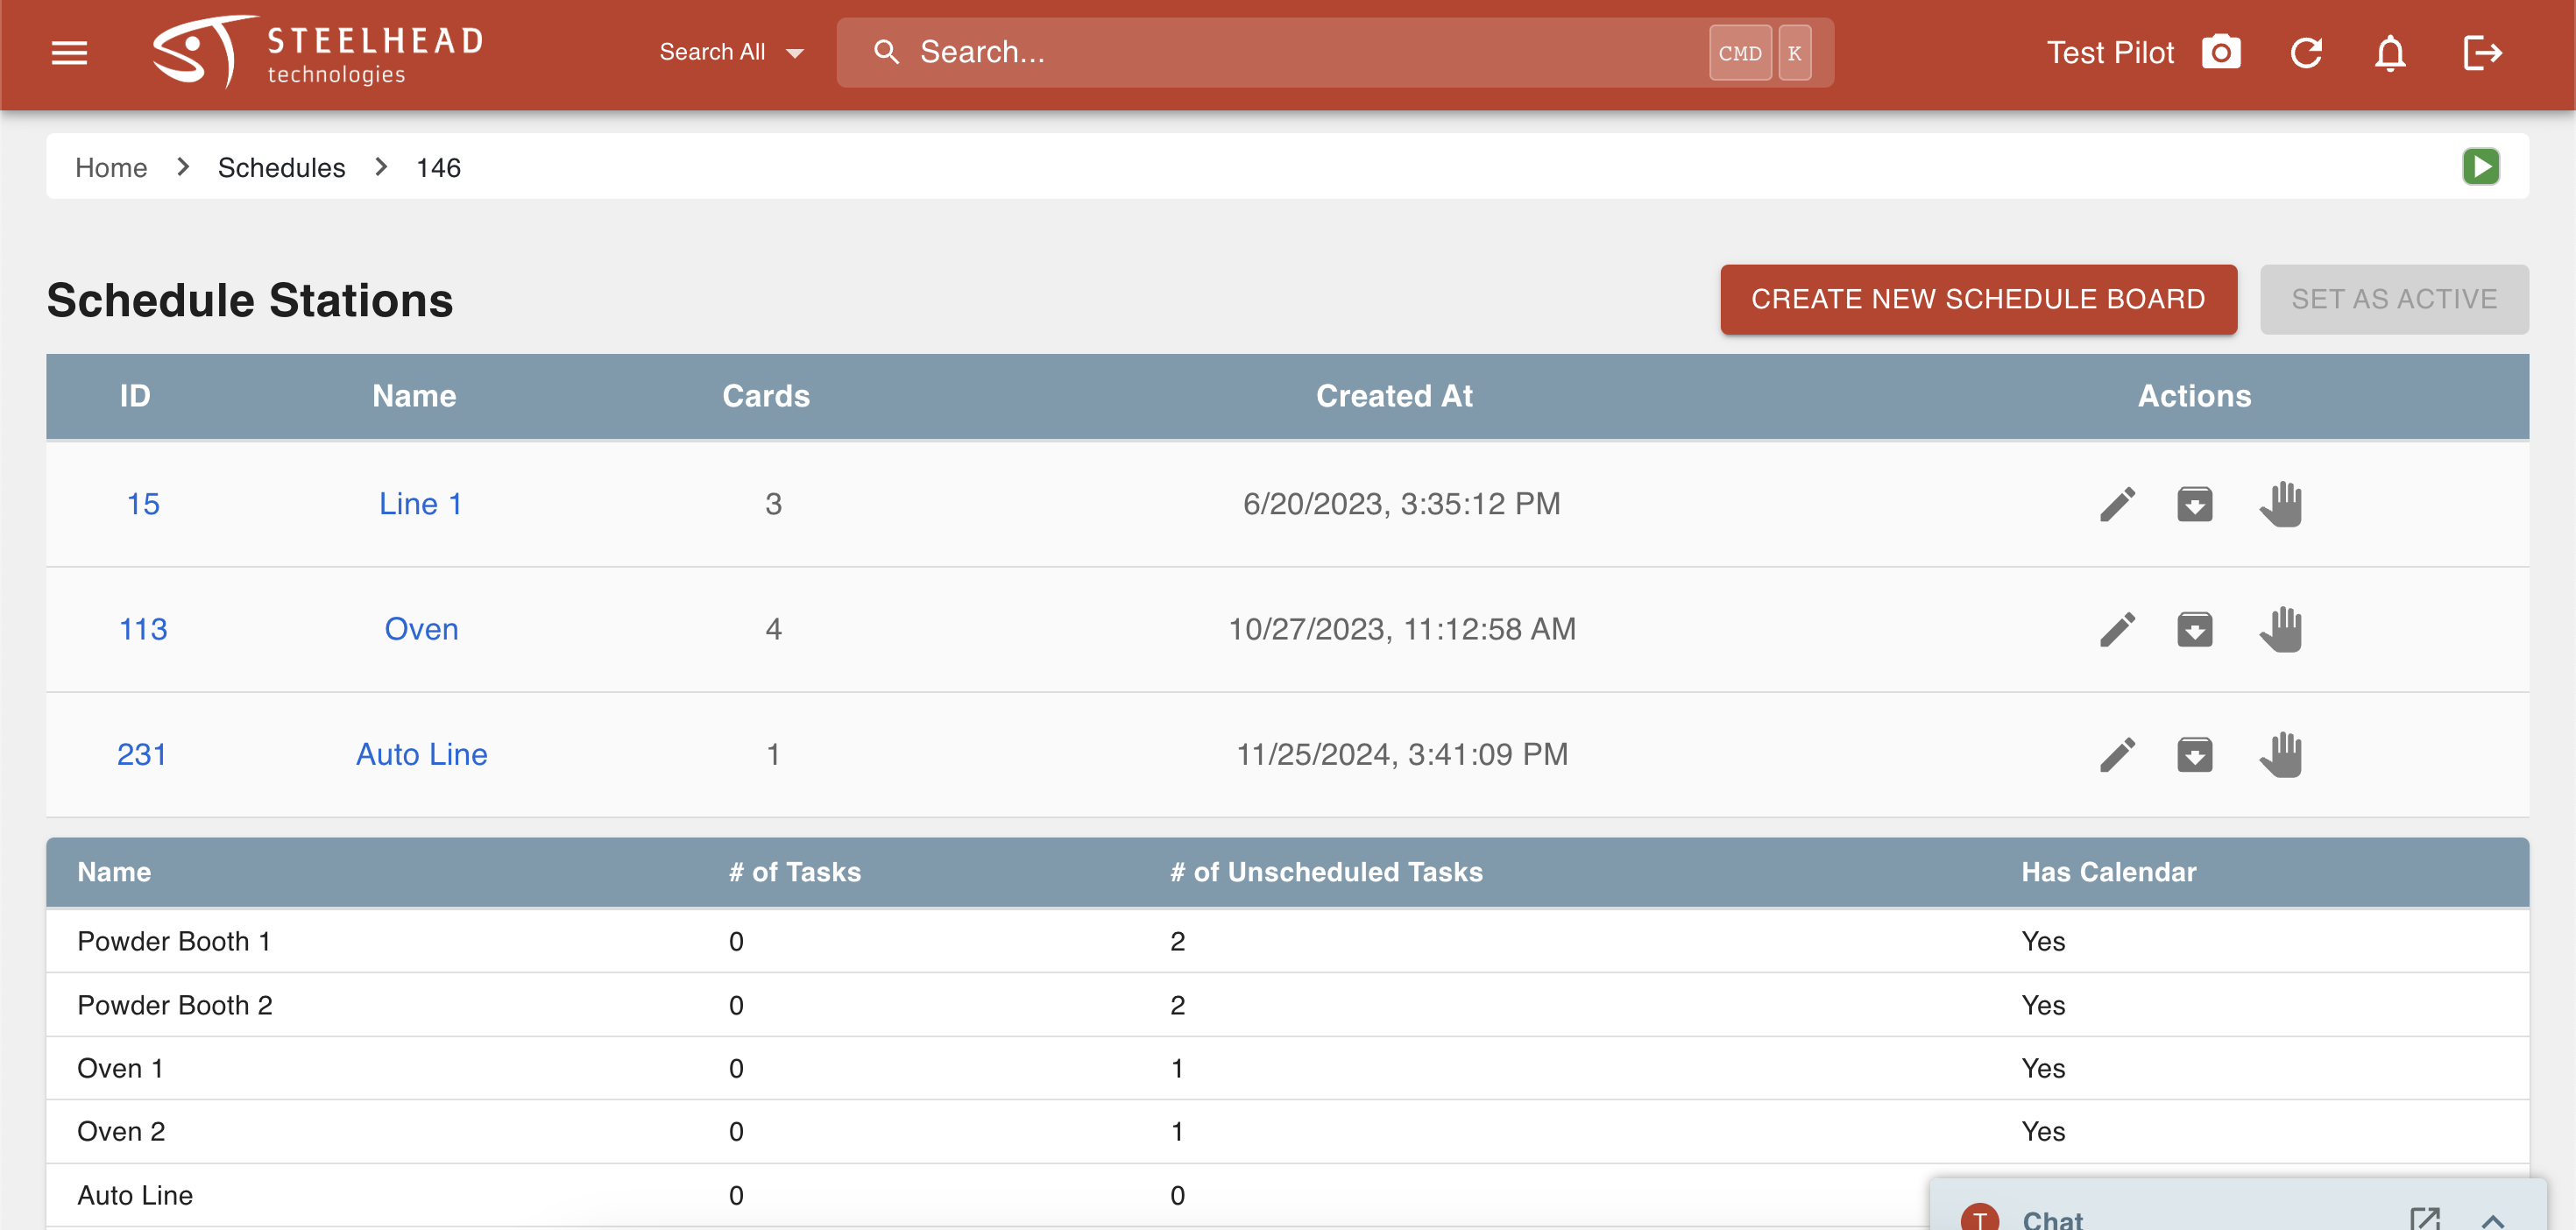
Clicking on one of the Schedule Boards (top section) or Stations (bottom section) will open up an interface that contains a wealth of settings for managing the way station workflow is planned, with two main sections being the Schedule Settings and the Unscheduled Tasks drop-down.
Schedule Board Page:

Station Schedule Page:
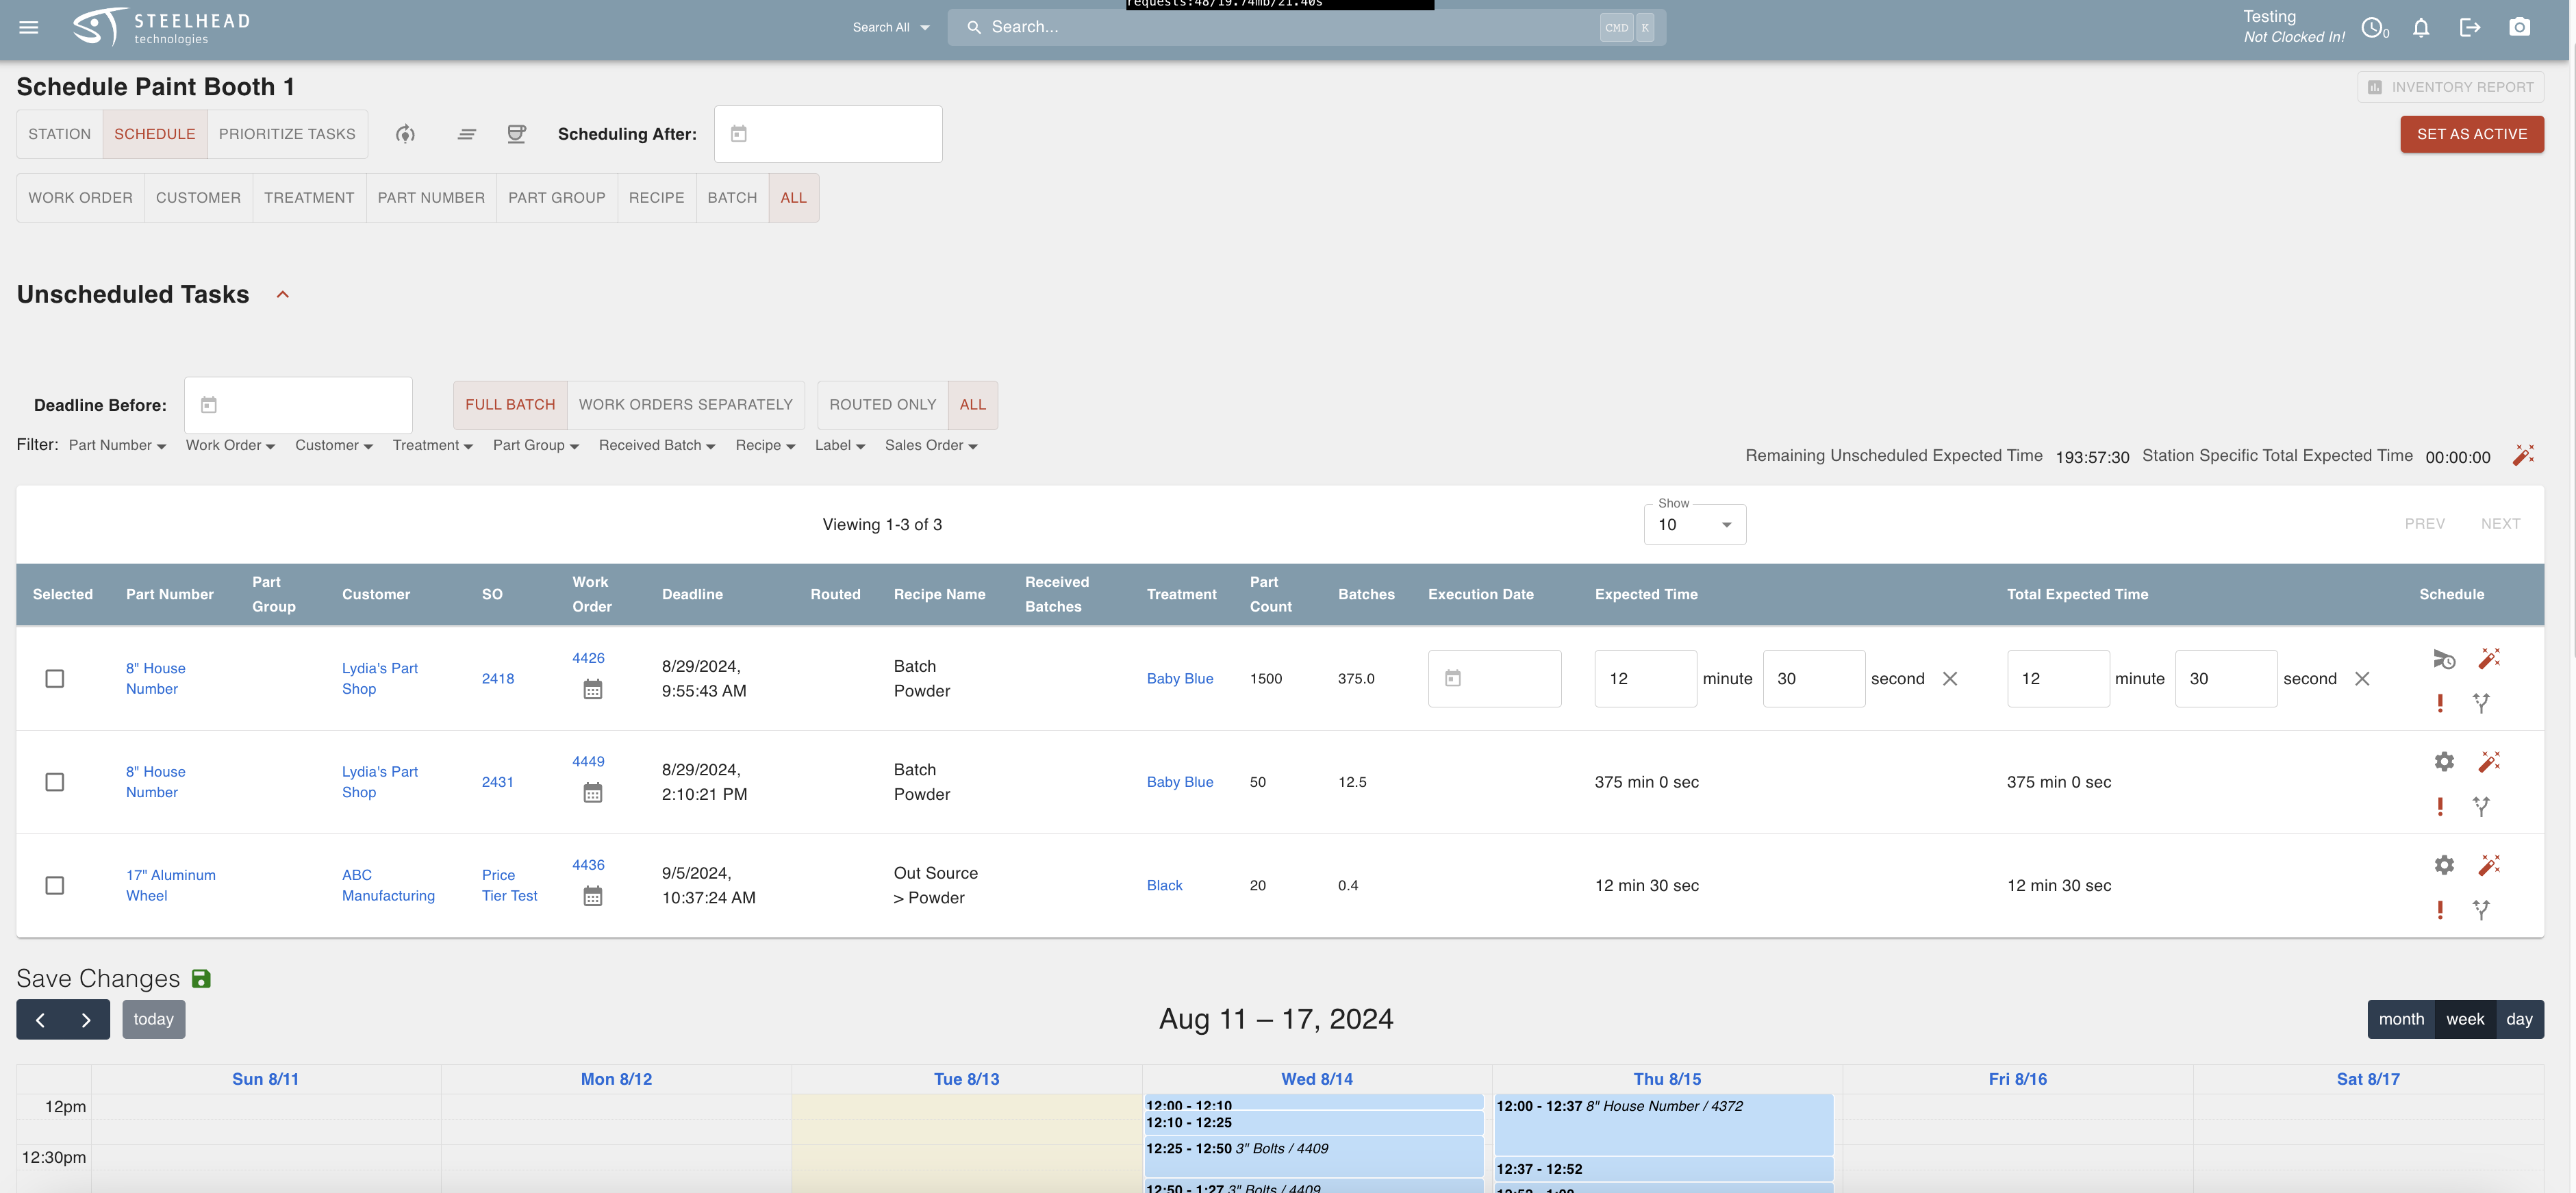
Schedule Settings

View Modes
The top three tabs allow you to Switch between Station Calendar view, Schedule view, and Prioritize Tasks view.
- Station Calendars show all of a Station's uptime, logged by default as the whole work week.
- Normal Schedules are similar, and show "blank canvas" that can have tasks scheduled onto it.
- tasks can only be scheduled during Station calendar uptime.
- Prioritize Tasks view will display a table that shows all scheduled tasks in their categories as either "PRIORITY" or "INTENTIONAL".
Utility Buttons
There are a few Utility buttons across the top of the page:
- Reschedule using Current Priority reschedules all auto-scheduled tasks automatically using Current Priority and Date settings. This clickable icon is called Model Training and appears as a clockwise-pointed arrow around a light bulb.
- Clicking this icon will reschedule tasks based on your priority list.
- Even if there is time available earlier in day, the parts will be scheduled in priority order.

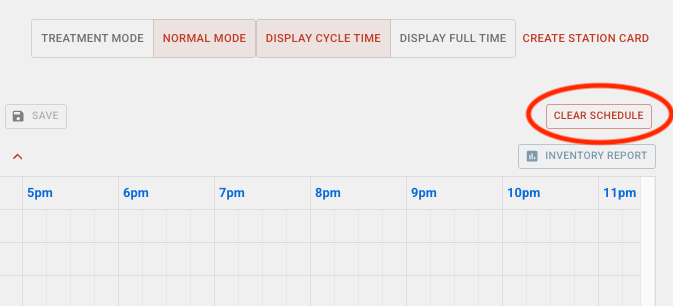
- Clear Schedule (a button on the right of the page) removes all tasks from the schedule.
- Schedule Station Tasks (Coffee Cup icon) adds a Station Event such as equipment change-overs, lunch, or break.

Within the Schedule Station Tasks dialog, you can create Recurrent Station Tasks:
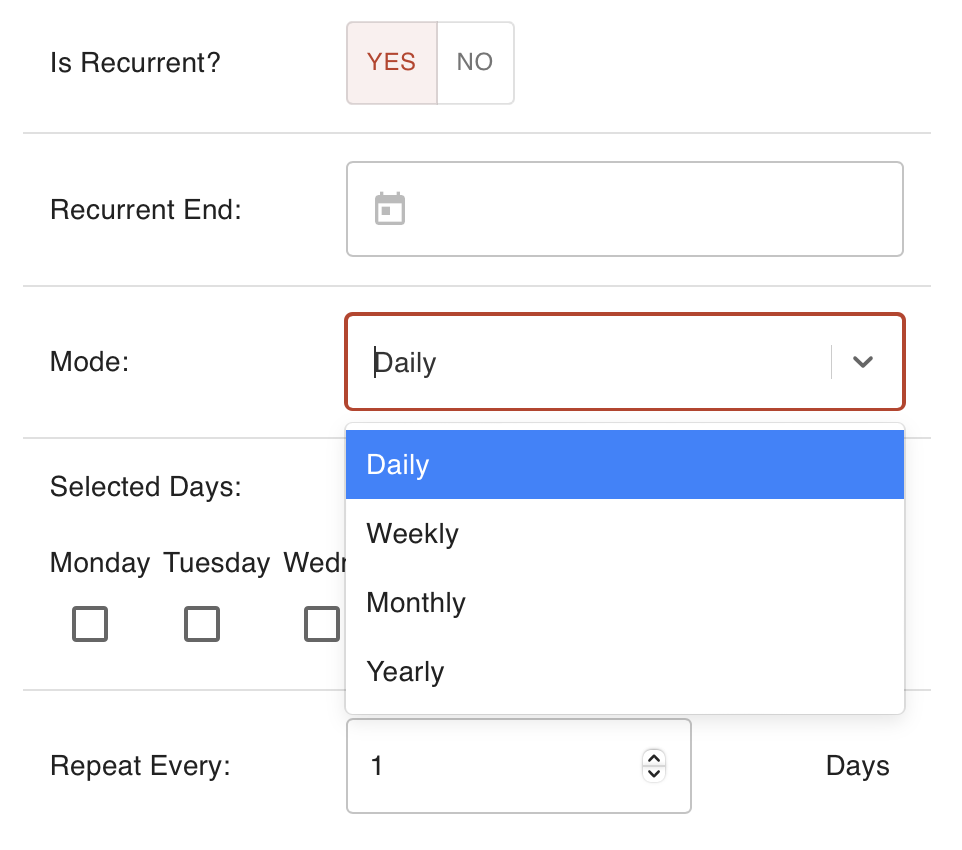
- This allows users to schedule multiple Station tasks at a time.
- Set a Station task to repeat at intervals or for a count.
- Relieves operators from having to schedule tasks that occur at the same time every day.
- An auto-scheduled Station task deletes when its adjacent Work Tasks are deleted.
- Schedule After: Enter a date and time here that will be used as the start time for auto-scheduling and rescheduling.

- If you ignore this menu, the current date and time will be used.
- The red line on a Schedule board will show this selection. Nothing before the red line is considered for this.
View Type Selector

These tabs will show you different information about Tasks on the Schedule, including:
- Work Order
- Customer
- Treatment
- Specifications
- Part Number
- Part Group
- Recipe
- Batch
- All (shows Part Number/Work Order)
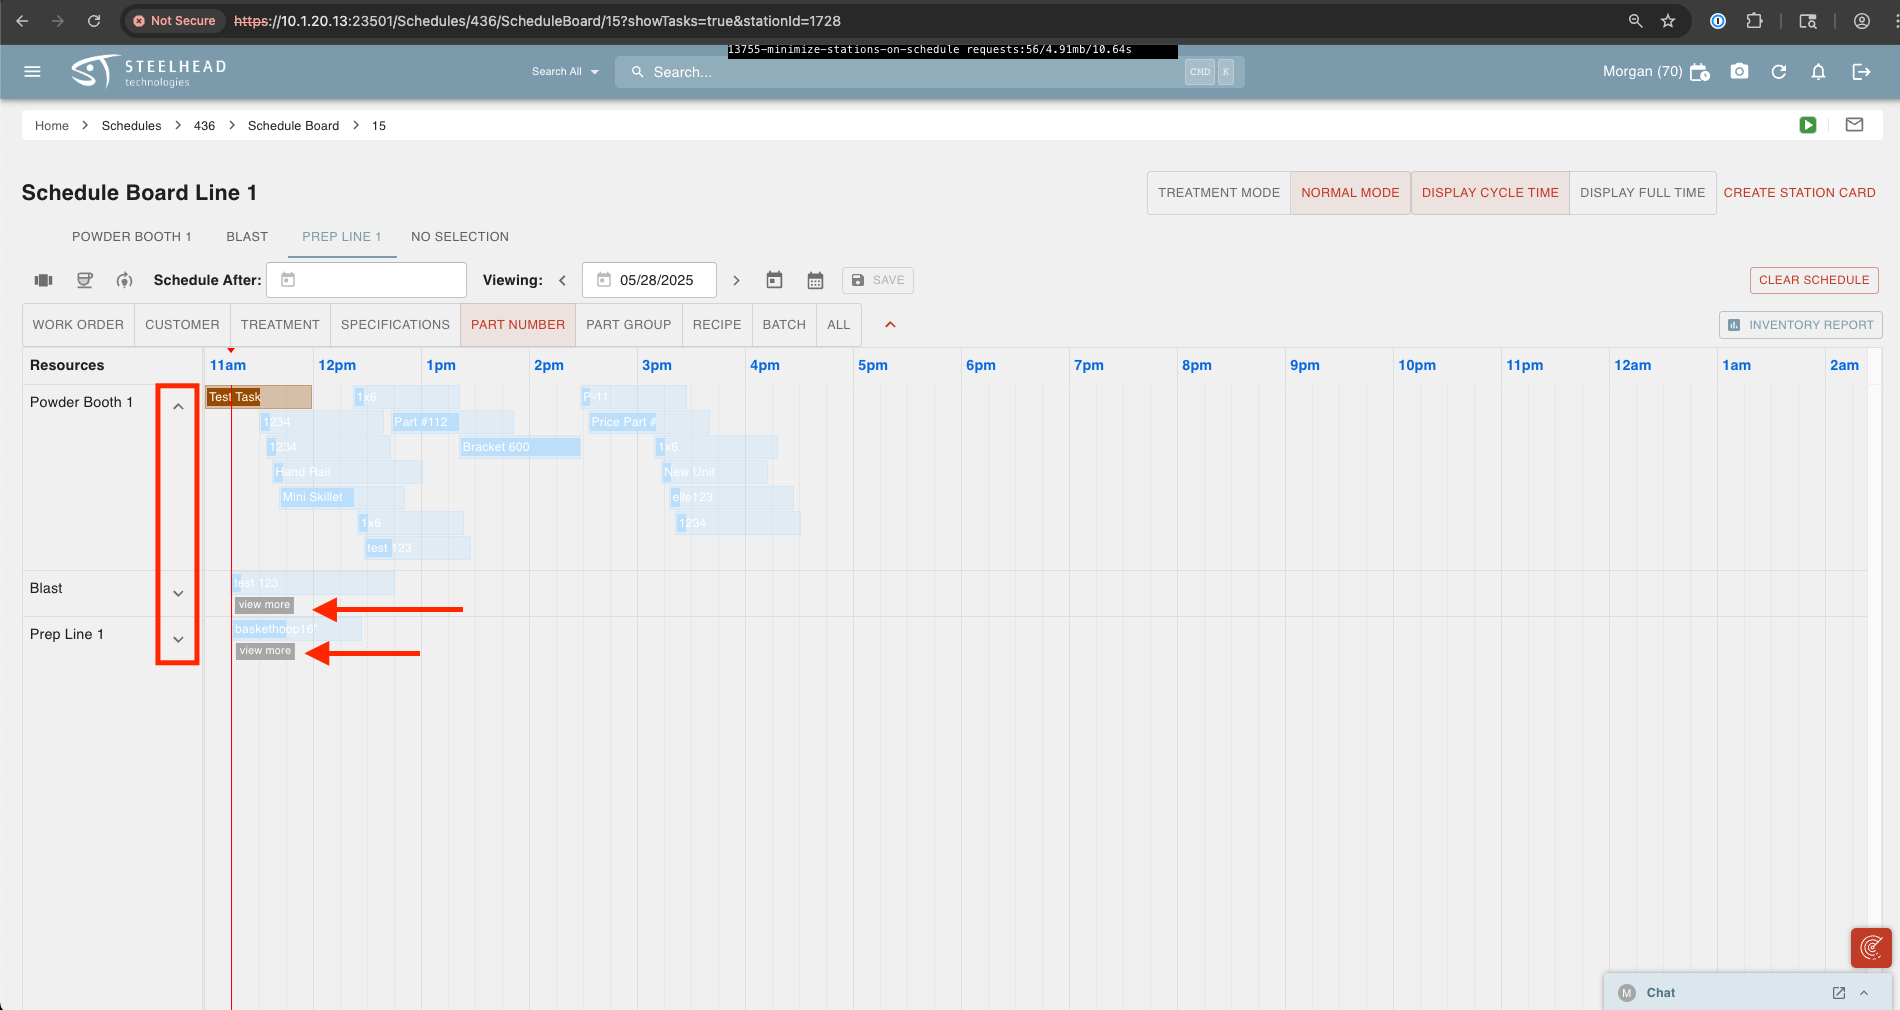
If there are multiple scheduled tasks on a Station, the up- and down-arrows (carats) on each Station line can be used to show or hide scheduled tasks:
Unscheduled Tasks
Click the red arrow to expand the Unscheduled Tasks list. This shows all work that is expected to come through this Station so that it can be added to the Schedule.

At the top of the Unschedule Tasks are several filters.

Deadline Before:
- Enter a deadline to view all tasks before a set date.
Dense vs. Distinct Processing:
Full Batch/Work Orders Separately
- This switch will determine whether the cycle time for a task is governed by the number of Batches assigned or by Work Order.
Workflow Control:
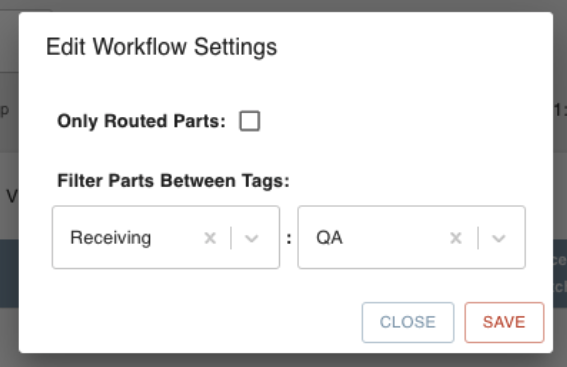
- Easily filter Parts between Tags and/or filter by Routed parts.
- This can be helpful if you want to only schedule parts that are routed.
- You can also adjust these tags in the Prioritization module.
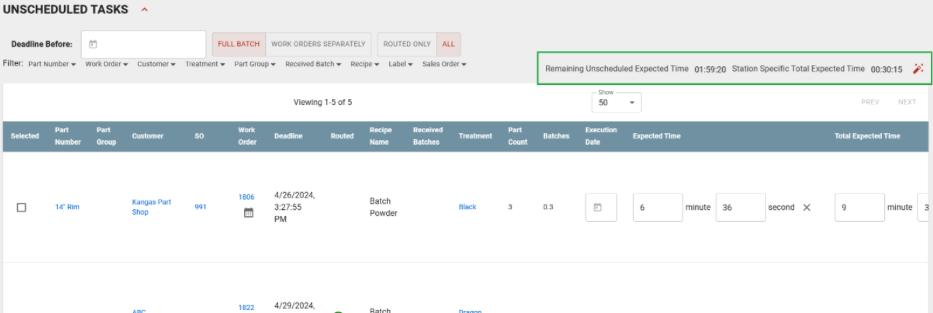
- Displays the total expected time for all unscheduled tasks & for routed tasks only.
- This also works with filters.
- The red Schedule Wand here will Auto-Schedule All Tasks.
- for this to work, all tasks must have the expected time and total expected time fields filled.
Unscheduled Tasks Table

The Unscheduled Tasks table contains sorting columns for many fields. These fields can be shown or hidden from the Scheduling tables by clicking the columns icon in the top right of the Schedules Dashboard:

- Selected (Checkbox)
- Part Number
- Part Number Description (hidden by default)
- Part Group (can change part group)
- Customer
- Sales Order
- Work Order
- Deadline
- Routed
- Recipe Name
- Received Batches
- Treatment
- Part Count
- Specs
- Batches
- Execution Date (Calendar Selector/Date Entry)
- Expected Time (Numeric Entry Fields)
- Total Expected Time (Numeric Entry Fields)
Under the columns icon, you will also find a setting to switch your task lists between a table or cards view (see the "Schedules" article for more information).
Line Item Scheduling Icons
On the right side of the table are some clickable icons to individually alter Tasks listed on the table (because of the width of this table, you may have to scroll to the right to see all columns):
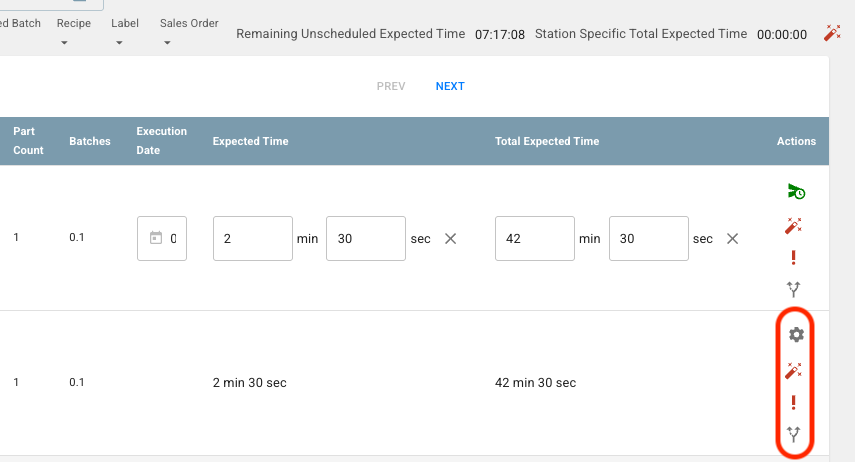
- Intentional Schedule Gear icon allows you to enter a start time and duration to add the task to the calendar. When the task has been assigned a date and time, this icon changes to a green arrow-clock icon.
- Auto Schedule Wand icon adds the task to the calendar at the soonest available slot and puts it at the last (most recent) priority.
- Exclamation Mark icon moves the task to top priority.
- Routing icon (diverging arrows) allows selection of a specific station for each of that work order's treatments.
Station Deadlines
If you think you'd like to use Work Station deadlines to help ensure that parts are moving through each station on time, Station Scheduling would be something to consider trying.
Planned Tasks for Station Endpoint
If you regularly need to prepare Station Equipment for Parts which haven't yet entered the Station - for example, to change temperature settings for a furnace ahead of time - contact Customer Support for help with writing code to allow an external client to read the planned tasks for a Station.
Priority Mode
In Priority mode (Prioritize Tasks tab), tasks that are scheduled can be viewed by whether they are classified as Priority or Intentional.

- Priority shows the auto-scheduled tasks (scheduled using the red Schedule Wand). These will automatically be sorted around the intentional tasks.
- Intentional shows manually-scheduled tasks with a set date and time that can be edited.
Priority Table

- ID
- Customer
- Work Order
- Recipe Name
- Part Number
- Part Group
- Received Batches
- Treatment
- Part Count
- Batches
- Rack Type
- Duration
- Expected Start Time
- Deadline
- Actions (Exclamation mark, Delete, Move)
Intentional Table

- Part Number
- Part Group
- SO (Sales Order)
- Work Order
- Deadline
- Routed
- Recipe Name
- Received Batches
- Treatment
- Part Count
- Batches
- Expected Duration
- Total Expected Time (min)
- Execution Date
- Actions (Edit Pencil)
Schedule Wand
To add tasks to Stations on a Schedule, press the Magic Wand button to mass-schedule many unscheduled tasks at once. These can then be click-dragged from side to side in their assigned Station. To reassign them to another Station, use the Routing feature.
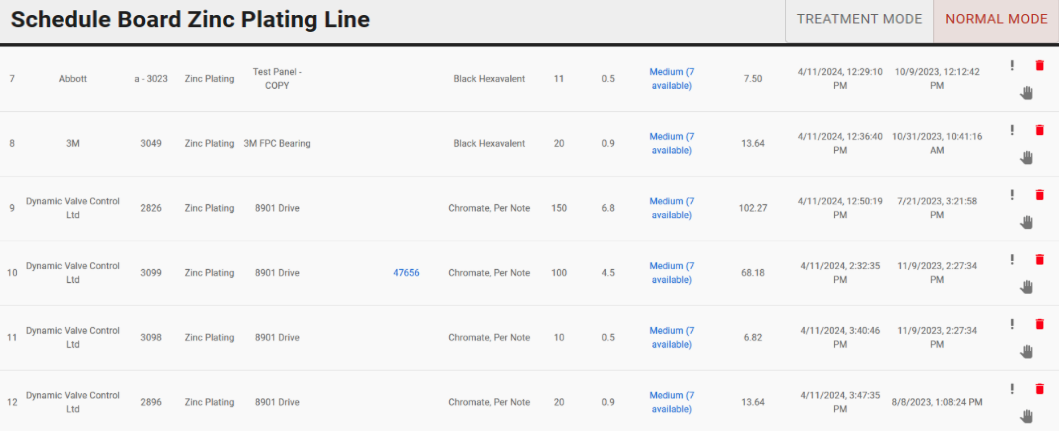
If needed, you can re-prioritize many scheduled tasks in the Priority table by selecting Treatment Mode:
- In a Schedule Board, scheduled tasks that have the same Treatment can be combined into a single entity on the priority table and the calendar.
- Click the Treatment Mode button at the top right of the table.
- Scroll down to the Priority Mode section and click the Priority table.
- Sequential tasks with the same treatment will now be grouped together for easy viewing/editing.

Power Tools Users who are fluent in Typescript can create scripts to make changes to Schedule Boards, under Edit Power Tools. Contact Customer Support for more information.
--

