Bills Overview
- Print
Bills Overview
- Print
Article summary
Did you find this summary helpful?
Thank you for your feedback!
A Bill in Steelhead is a record of an invoice issued by the vendor requesting payment. Typically the Bill will include the items being billed for, due date, and the total amount due.
Using Steelhead's Bills feature allows you to manage payments to Vendors. Bills can be created, edited, linked to Purchase Orders, synced to native or integrated accounting software, etc.
This article includes instructions to:
- Create a new bill
- View, edit, finalize, archive/void a bill after it is created
- Configure Bill Terms and Custom Inputs
Related Videos:
Video Explanation of Inventory, Purchase Orders, and Bills (Bills explanation starts around the five minute mark of the video)
Create a New Bill
Bills can be created from multiple different locations in Steelhead:
Bills main page

Purchase Orders main page

Individual Purchase Orders

The easiest way to create a bill is directly from a Purchase Order. If done this way, many fields will auto-populate based off of Purchase Order information, and it will save time.
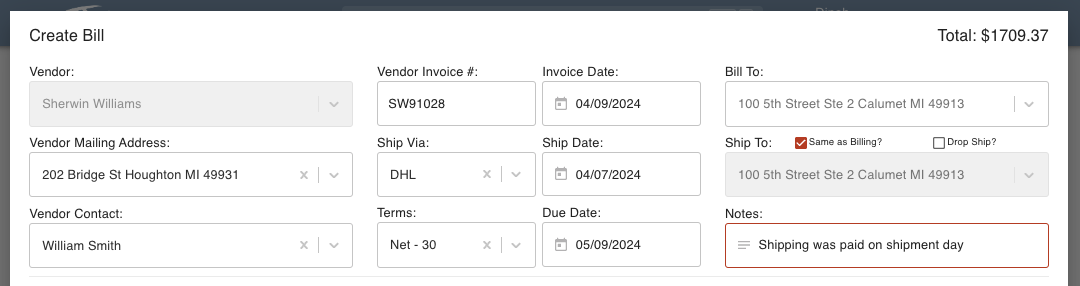
Enter Vendor and Billing Details
Here are the fields to be filled out in the top portion of a created Bill:
- Vendor
- Selecting a Vendor will pull up a page that allows for selection of Purchase Orders to add to the Bill.
- If a Vendor is already fully set up in the system, when selected, the following fields will auto-populate:
- Vendor Mailing Address
- Vendor Contact
- Terms
- Vendor Invoice #
- This is the number on the Invoice, provided by the Vendor
- Ship Via
- This is the way that the Purchase Order is shipped
- Invoice Date
- The day that the Invoice was created/sent
- Ship Date
- The day that the order was shipped
- Due Date
- The day that the Invoice payment is due
- This can auto-populate based on selected Terms
- Bill To and Ship To
- The address that the Purchase Order is billed and shipped to
- These addresses are pulled from Location addresses
- When checked, the "Same as Billing?" box will make the Ship To address identical to the Bill To address
- If enabled, check the "Drop Ship?" box to select a drop ship address
- Notes
- Any extra notes
Unstructured Address Warning
You may see a warning about an unstructured address when you create or edit the address in a Bill or Invoice:
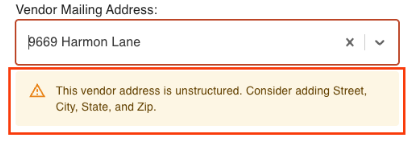
If you see this warning, Steelhead is warning you that the current address format is incomplete and not able to be integrated with accounting. Resolving the error may be as simple as adding a comma after the City name, or adding the State and/or Zip Code, so that the full address can be integrated.
If an object is not an option to be selected because it hasn't been set up, create a new one by typing the name in the field and click Create.
Information Required to Create a Bill
The following fields must be entered in order for the Bill to be saved:
- Vendor
- Vendor Mailing Address
- Vendor Invoice #
- Invoice Date
Enter Bill Line Item Details
The second portion of a created Bill is where line items can be added. Once a line is added, the following fields can be filled out:
- Line Name and Description
- Item Description
- Product
- Bill won't sync to accounting unless there is an assigned product
- Quantity
- Unit
- Unit Cost
- Total
Button Functions
Here are all button functions associated with entering details on a Bill:
+ LINE ITEM button - Will create a new empty line item.
+ FROM PURCHASE ORDER button - Will pull up associated Purchase Orders that can be selected and attached to the Bill. Bill lines will be created from the Purchase Order lines.

UPLOAD FILE button - Will attach a file to the Bill. Once saved, the file will be viewable in the Files section of the individual Bill page.
CANCEL button - Will close the dialog and erase all information previously entered.
CREATE BILL button - Will create the Bill. Once a Bill is created, all details can be edited.
Trashcan icon on a Bill Line/Line Item - Will delete the Bill Line/Line Item.
View PO Details icon on a Bill Line Item - Will pull up a small overview of the associated Purchase Order line.
Check the "Close Billing For PO Item" box to mark the Purchase Order Item as complete, once the Bill is saved. This can be undone.
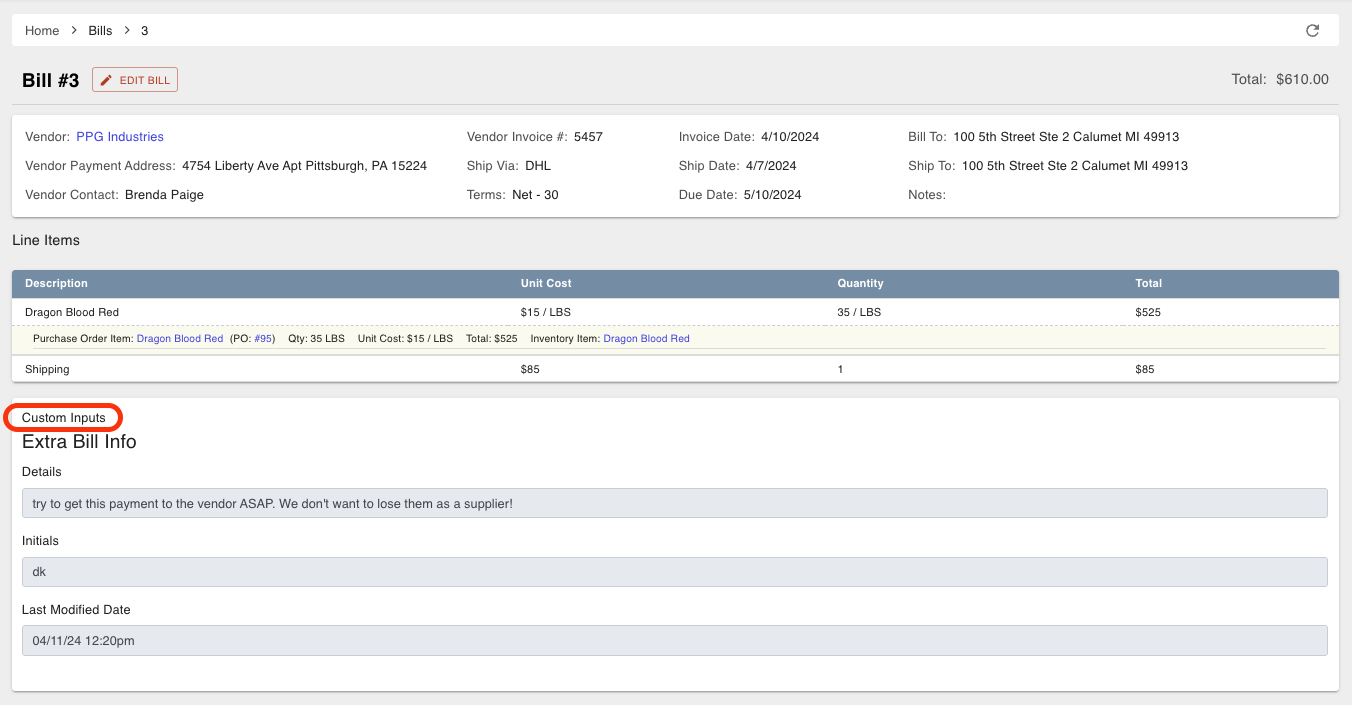
Fill out Custom Inputs, if any.

Actions After a Bill is Created
Once a Bill has been created, there are multiple actions that can be performed. The actions consist of viewing, editing, finalizing, and archiving/voiding the bill. These actions can all be performed from the main Bills page, accessed via the Inventory Section of the Homepage. With the clickable icons next to the search box, you can filter Bills by date or download a CSV file of Bills.
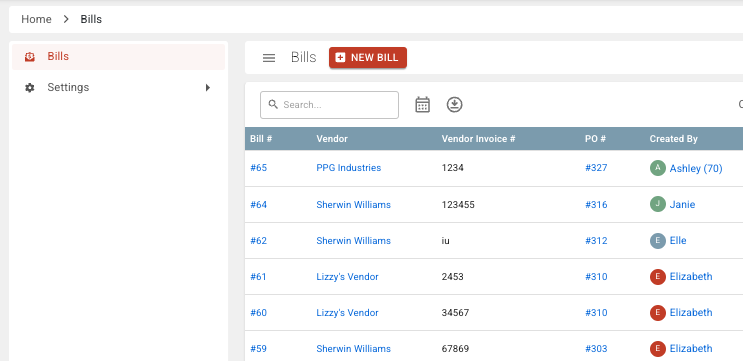
View a Created Bill
All created Bills can be viewed on the main Bills page. From there, click on any bill number to view more details about the individual Bill.
The information displayed on individual bill pages:
- Bill total
- All Vendor and billing details
- All Bill Line Item details
- All uploaded files
- Here you can upload files and delete files
- EDIT BILL button to edit the Bill
- ARCHIVE/VOID BILL button to archive and void the bill

Edit a Bill
Bills can be edited from the main Bills page, individual Bill pages, and associated purchase order pages.
Editing a Bill is similar to creating a Bill. All fields and buttons are the same.
Editing Finalized Bills
Bills cannot be edited once they are finalized.
Finalize a Bill
Before finalizing a Bill, make sure every detail is correct. Once a Bill is finalized, it cannot be edited.
To finalize a Bill, click the Finalize Bill icon (in the Actions column) on the main Bills page.
Syncing Bills to Accounting Software
- If an accounting software is integrated with the Steelhead domain, finalizing a Bill will sync the bill to the accounting software. If the Bill failed to sync, an icon will show "Not yet recorded in accounting software."
- Bills and purchasing materials, will be realized in accounting as an expense. For Bills to sync correctly from Steelhead to accounting, there needs to be an expense-type GL account for purchases to be realized against.
Archive/Void a Bill
Once a Bill is archived, it cannot be unarchived. Archiving a Bill is equivalent to voiding the Bill.
To view all archived Bills, click the "View Archived Bills" link in the top right corner of the main Bills page.
Configure Bill Terms & Custom Inputs
Bill terms and Input Schema set up pages can be accessed through Settings in the sidebar of the main Bills page.
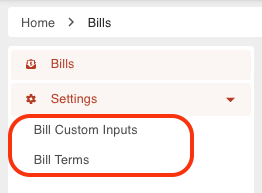
Bill Terms
Bill terms are pulled from Invoice Terms. If terms are set up fully, they will make entering Bill details very easy. Once a term is selected for a Bill, the due date will auto-populate.
Bill Custom Inputs
Configuring Input Schemas for Bills is just like configuring Input Schemas in many other places in Steelhead. Configured Input Schemas will display as custom inputs when entering Bill details. Entered custom inputs will be saved upon saving a Bill and will appear on the individual Bill page. These inputs could be any details that should be included that may not provided by the default Bill fields.
--
Was this article helpful?