- Print
Different Parts of a Spec
- Print
This page describes how to set up your Specification framework. To learn about taking measurements and using your Specs during workflow, see Gathering Spec Data.
Specification
A specification (spec) itself is home to a handful of different things such as:
- Internal & external Descriptions
- Spec Fields (See below)
- Associated Part Numbers and/or Treatments
- Revision control
- Custom input fields
- Default Process, including opt in/out and treatment selection
Specifications are commonly used to track the following types of documents:
- Internal Processing Specs
- Customer Supplied Specs
- Industry Standard Specs
- Material Manufacturer Specs
Spec Field
Spec Fields are one of the most important building blocks to collect data correctly. A Spec Field represents a metric, or type of data being recorded on a specification. Spec Fields are created independently of Specs. One Spec can have many Spec Fields, and one Spec Field can be on many Specs.
A Spec Field example could be "Powder Coat Thickness." This field is likely of the type "NUMBER" and will be used for all specifications that reference a coating thickness for powder coated parts. Whether it is a customer spec, or internal processing spec, they will both reference this singular Spec Field via Spec Field Assignment. The reason for having one spec field here is so that many specifications can be created and the same spec field ID is referenced in power tools and for reporting.
A Spec Field can have the following field types:
- Number
- Boolean
- Sensor
- Datetime
- Text
- Timer
Each type will set up the parameter differently as we would collect different data.
Spec Field Assignment
A Spec Field Assignment or "Spec Field Spec" links a spec field and a spec together. When you add a Spec Field to a Spec, an ID is created for the Spec Field Assignment which also references the Spec Field ID. A Spec Field Assignment is unique to the specification that it falls under and the parameters it receives for that spec assignment.
A Spec Field Assignment can be "generic." This means that if this Spec is applied to a part and/or treatment, the parameters changed on the Spec Field Assignment will carry over to the part number. A non-generic Spec Field Param will allow the user the ability to make unique values to the part number or treatment.
Spec Field Param
Spec Field Params set limits & requirements on a Spec Field that allow measurements to be taken. These are the parameters on the values that we are collecting and certifying. A param is unique to a Spec Field Assignment (That Spec Field applied to that Spec) and cannot be added to a Spec without a Spec Field, or to a Spec Field that isn't assigned to a Spec.
Within a parameter we will have a handful of values to set up. These will be common across all spec field types.
- Parameter Name (this shows up on workboards when taking measurements)
- Parameter Description
- Input Requested or Required
- Must Be Passing (at least one passing measurement required)
- Failure requires resolution (each failing measurement must receive a correction or explanation)
- Request Document (requires file upload)
- One at a time
- Sampling rate per part or batch
- Sampling interval
- NUMBER params pass when their entered measurement is in a specified numeric range
- TIMER params pass when the timer is stopped within a specified time range
- BOOLEAN params pass when their box is checked on measurement
There is an optional “Must be passing” requirement for Spec Field Parameters. To use this feature:
- Open the “Edit Spec Field Param” menu
- Select the checkbox labeled “must be passing”
To manage further settings for this metric:
- When you try to move parts on a Workboard, you may find them blocked because they have failing spec field params
- Simply record a new passing measurement
- If Failure requires resolution is checked, you must also resolve and archive the failing measurement
- Additionally on the quality management icon, you will see the amount of failed params marked in red
- Racks allow you to do this similarly: press resolve, add a comment if desired, and press save
- Currently this must be done one at a time for all racked parts
Item 3 breakdown (Input Requested or Required): If Input Requested box is checked, then the operator will see that there is an input to be collected on the workboard/work order. They will still be able to move past the measurement and process step without collecting a measurement. For input required, the operator will not be able to proceed processing until a measurement is gathered.
Once your work order goes through its process and collects certs, you will have the "Create Cert" option.
If you like, when you are creating a cert in your work order you can use the Master Cert to see all the part numbers with the Specs they went through. However, they will not share the results of the specs. If you would like to see the results of each spec, you will need to use your regular certs.
Another advantage of master certs is that they are able to speed up workflow in a more general way. If this sounds good to you, it will likely make sense for you to enable Use Master Cert:

Item 4 breakdown (Must Be Passing): If this box is selected and the operator enters in a measurement that is outside the scope of the parameter, they will not be able to proceed in processing until a valid measurement is entered.
Item 5 breakdown (Failure requires resolution): If this box is selected, each failing measurement must be resolved with either a comment, an edit, or being archived.
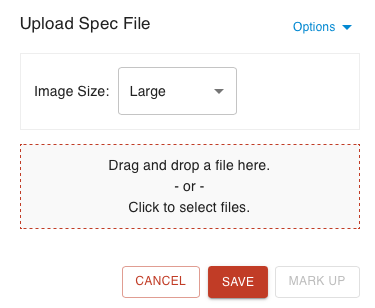
Item 6 breakdown (Request Document): If this box is checked, the operator will be prompted to upload a file upon collecting a measurement for the parameter. This can be used for general file uploads or image-taking.
- Not to be confused with a spec's global files
- This interface pops up when taking a measurement for a spec

Item 7 breakdown (One at a time): If this box is selected, the operator will be prompted to take multiple measurements based on the sampling rate. This is commonly used for thickness measurements where we need to gather a variable number of measurements, and we want to record each raw value.
Item 8 breakdown (Sampling rate per part or batch): Sampling rate per batch refers to how many measurements we must take per batch of parts we are processing. A common example is oven time for a rack of parts. We can gather 1 measurement that will be used for timing for all parts on the rack. Sampling rate per parts references how many measurements must be taken as a percentage of the total number of parts. If a value of 0.4 is entered here, the operator will be prompted to take 40 measurements from a quantity of 100 parts.
Item 9 breakdown (Sample interval): Sampling interval represents the frequency we must collect data to that parameter. Leave this attribute empty for one-time data collection. An example of its usage would be to perform a visual inspection every hour during a 10 hour processing cycle.
For Number Types:
- Minimum value
- Target Value
- Maximum Value
- Unit
For Timer Types:
- Minimum value
- Target Value
- Maximum Value
For Sensors Types:
- Sensor valid time
- Sensor warning threshold
- Minimum value - for Number Sensor Types
- Target Value - for Number Sensor Types
- Tolerance - lets Minimum and Maximum Values auto calculate
- Maximum Value- for Number Sensor Types
Note that for number sensor types the unit from the sensor type will be used for the parameter
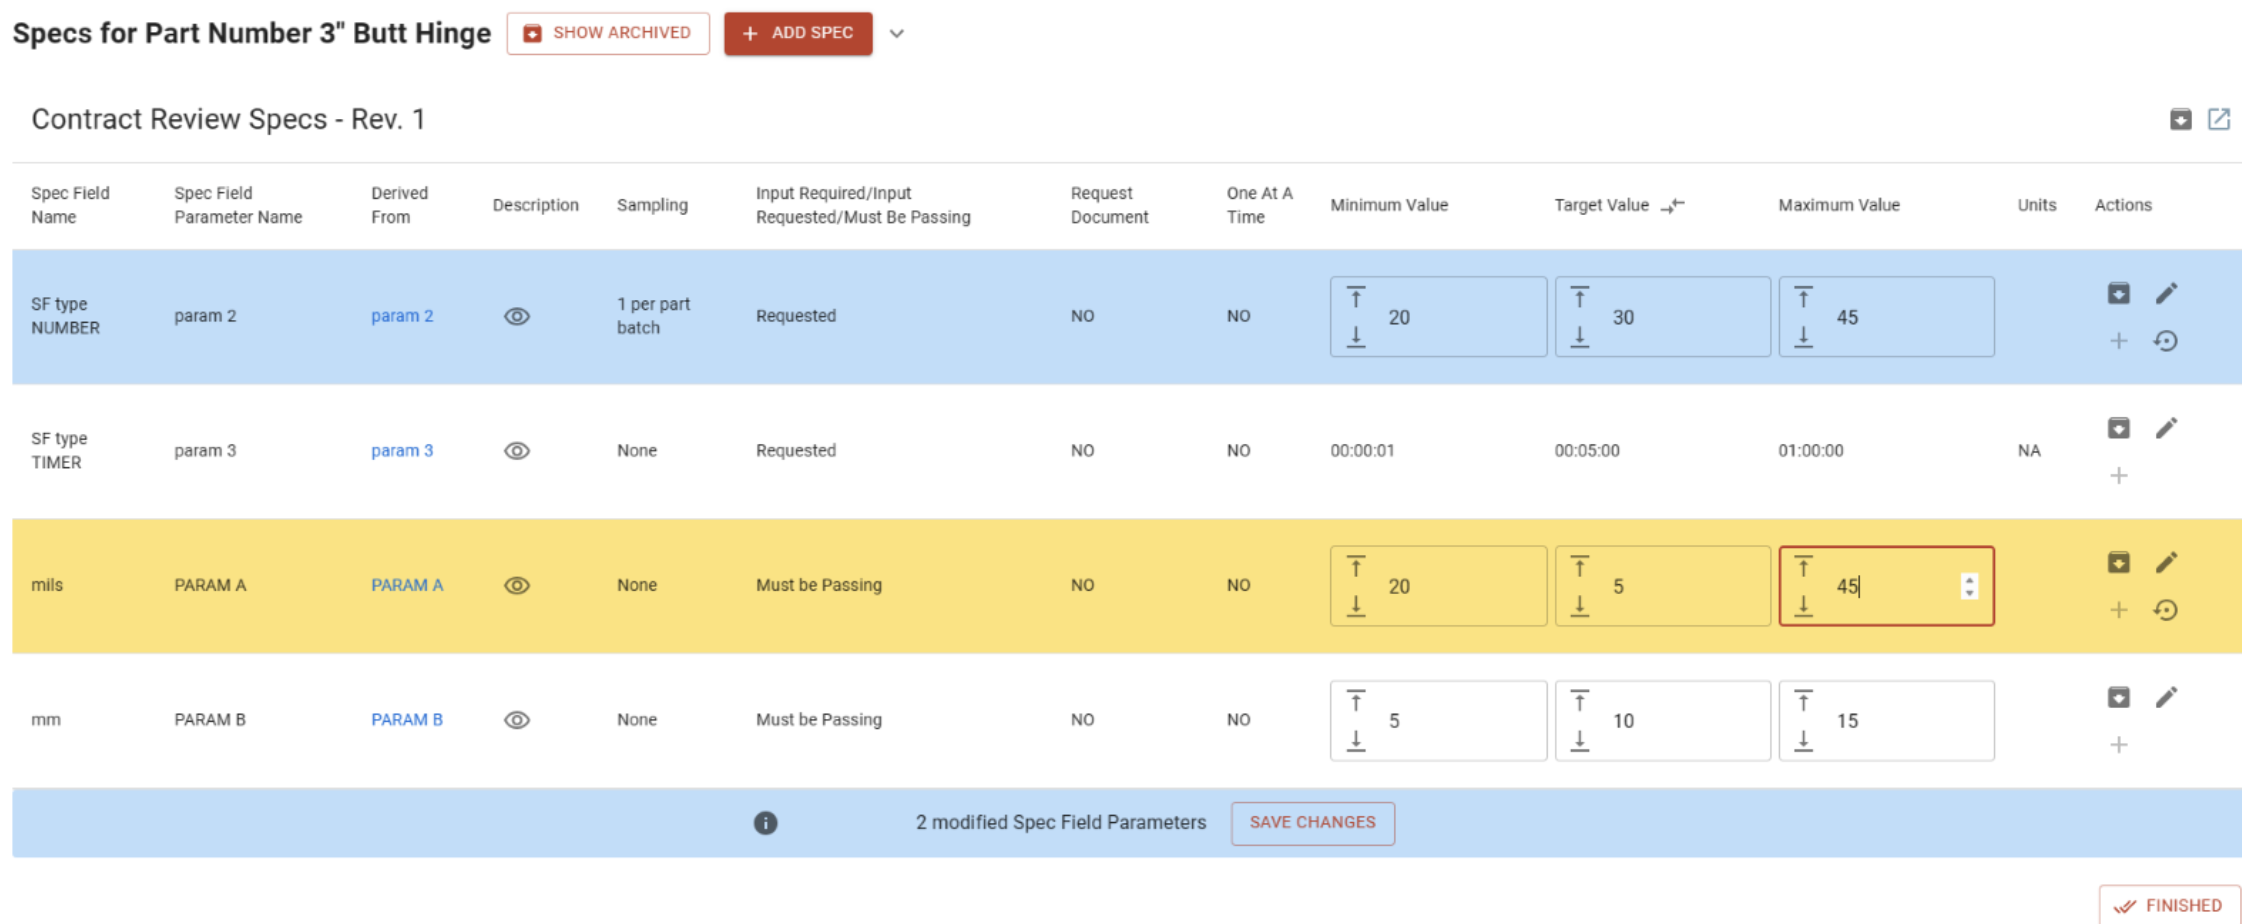
Steelhead enables easy editing of Spec Field Params when setting specs on a quote or sales order:
- Add a spec to a part number or click 'Edit Part Number/Add Specs' from a quote line or sales order Add Parts table
- Use the UI to edit spec field params min, target, max values
- Toggle to use tolerance at the column header

- Lines highlighted blue have changes that are ordered appropriately and can be saved.
- Lines highlighted yellow have changes that can’t be saved because the target is not in the min & max.
- Click Save Changes on the bottom banner and ensure spec field params are saved.

Params per Occurence:
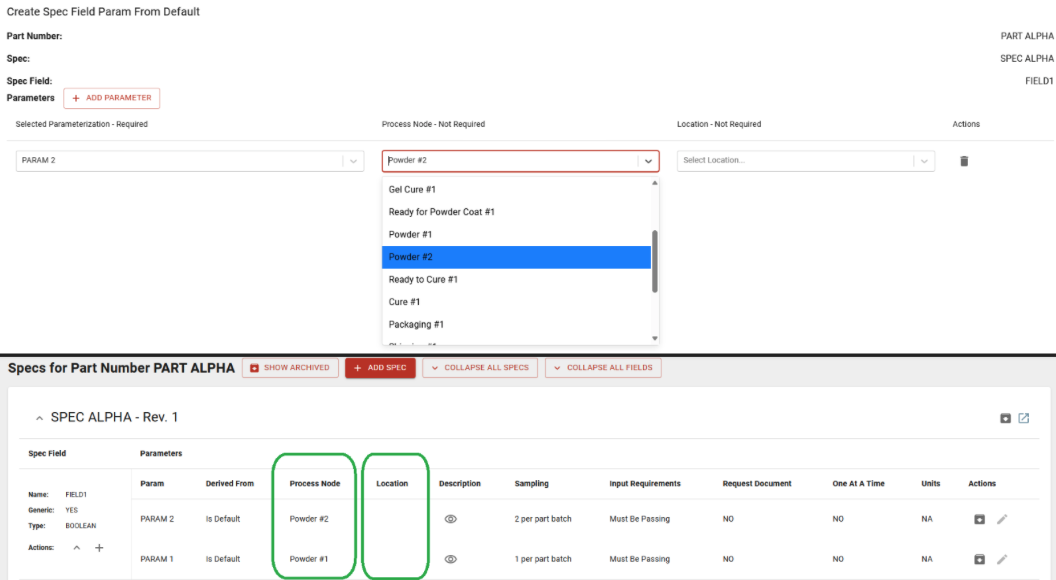
Enabled spec field params to be distinct per process node occurrence, making differing params on shared nodes possible:
- Create a part number with a default process from either itself or spec driven processing
- Add specs and specify which process nodes the params go on
- Create a sales order and add the part number to the work order
- View the specs on the work order
- Edit a part number and manage specs
- Edit a part number and compose a process using specs with spec driven processing


