Workboard Troubleshooting
- Print
Workboard Troubleshooting
- Print
Article summary
Did you find this summary helpful?
Thank you for your feedback!
Send Parts to Location
If you would like to assign parts to a specific destination using Workboards, there are multiple ways to do this:
- Ensure that your Workboards are associated with Process Nodes or Stations. Refer to the Workboard Card Setup for more information.
- Another method is to assign a destination directly through the Work Order. Click on the Work Order from the Workboard. Once inside the Work Order, click the down arrow next to MOVE PARTS, then select Assign Location.
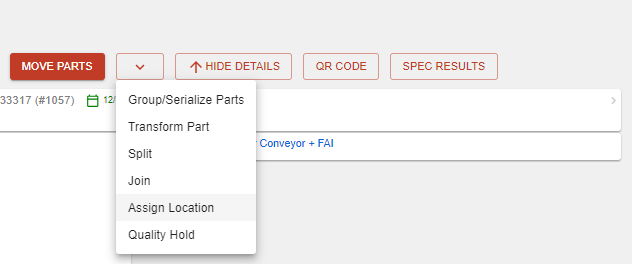
- Within the popup dialog, select the Assign New Location checkbox. A list of all available locations will populate. Scroll through the list, select a location, and click SAVE.
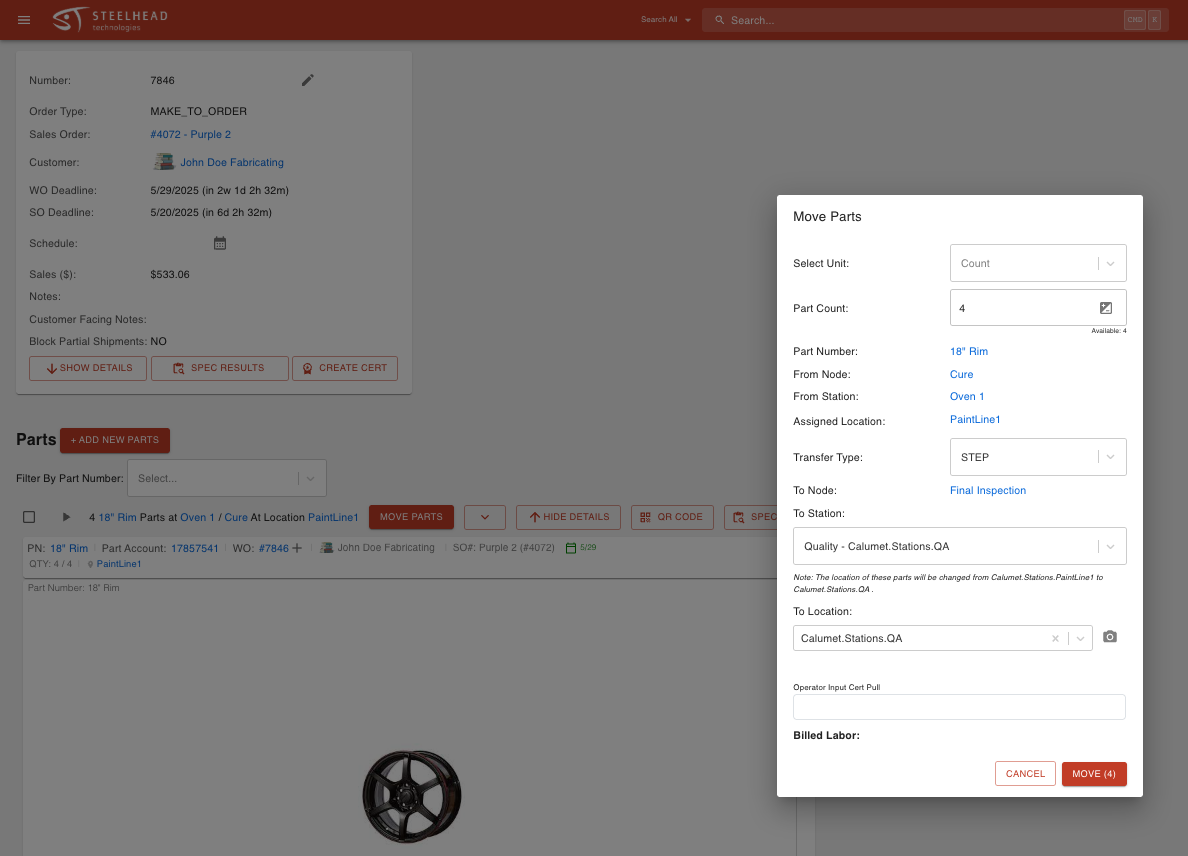
- You can also change the To Location before moving the parts to the next node in the process in the Move Parts dialog. Once a Location is assigned, it will follow the Work Order as it moves through the Process.
Common Reasons Parts Don’t Show on a Workboard
If a Workboard is not receiving parts from a Work Order, review the following:
- Ensure the station assigned to the parts is also assigned to the Workboard Card.
- Confirm that the location on the Workboard Card matches the location listed on the Work Order.
- Verify that the correct Process Node is associated with the Workboard Card.
- Refer to the Setting Up Workboards article for full configuration instructions.
Troubleshooting: Unable to Move Work Order to a Station Workboard Card
If you're unable to move a Work Order to a Station Workboard Card, follow these steps to troubleshoot:
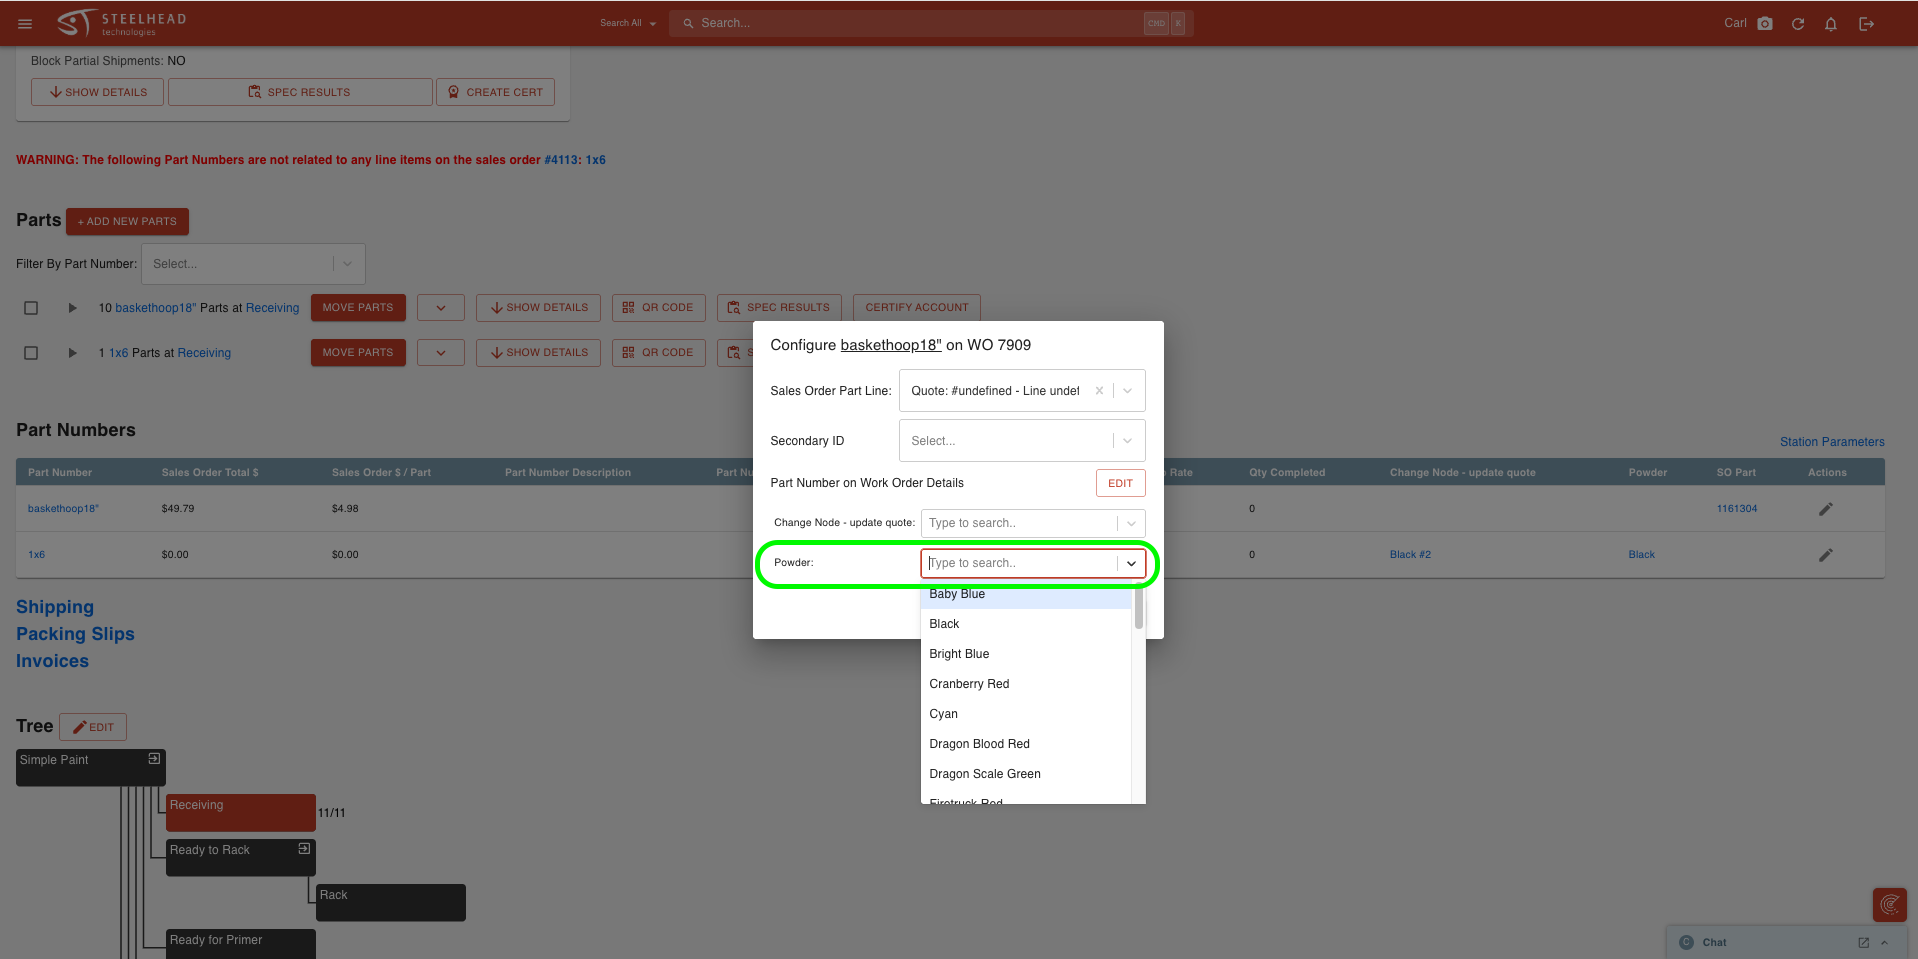
- Check if a Treatment was added to the Part Number during order entry.
If a required Treatment associated with the Station is missing, the system will prevent the parts from being moved to the Workboard Card.
To resolve this: - Select the associated Work Order on the Workboard.
- Scroll down to locate the Part Number listed between the Move Parts dialog and the Process Tree.
- Click the edit pencil icon next to the Part Number.
- Choose the appropriate Treatment from the dropdown menu.
- Click SAVE.
Example:
If PN Baskethoop 18” does not have a powder type selected, choose a treatment color (e.g., "Black Matte") from the dropdown and save. This will assign a treatment associated with a treatment group. If that treatment group is tied to the station, the Work Order will now be eligible to move to the correct Workboard Station Card.
Additional Troubleshooting: Specification Measurements Blocking Movement
- If parts are still unable to move, it may be due to required specification measurements that must be collected before proceeding.
To resolve this:
*Attempt to collect the required spec measurements before moving the parts.
Note: Any greyed-out fields indicate that the measurement has already been collected and does not need to be re-entered.
Was this article helpful?