Work Order Troubleshooting
- Print
Work Order Troubleshooting
- Print
Article summary
Did you find this summary helpful?
Thank you for your feedback!
Move Work Order to new Sales Order
You may have multiple Work Orders on one Sales Order and want to reassign the Work Order to a different Sales Order. To reassign an existing Work Order to a new Sales Order:
Navigate to the Sales Orders Tile from the "Sales" section on the Steelhead homescreen.
Create a new Sales Order or identify the number of an existing Sales Order where you want to move your Work Order.
Navigate to the Sales Order that has the work you want to split.
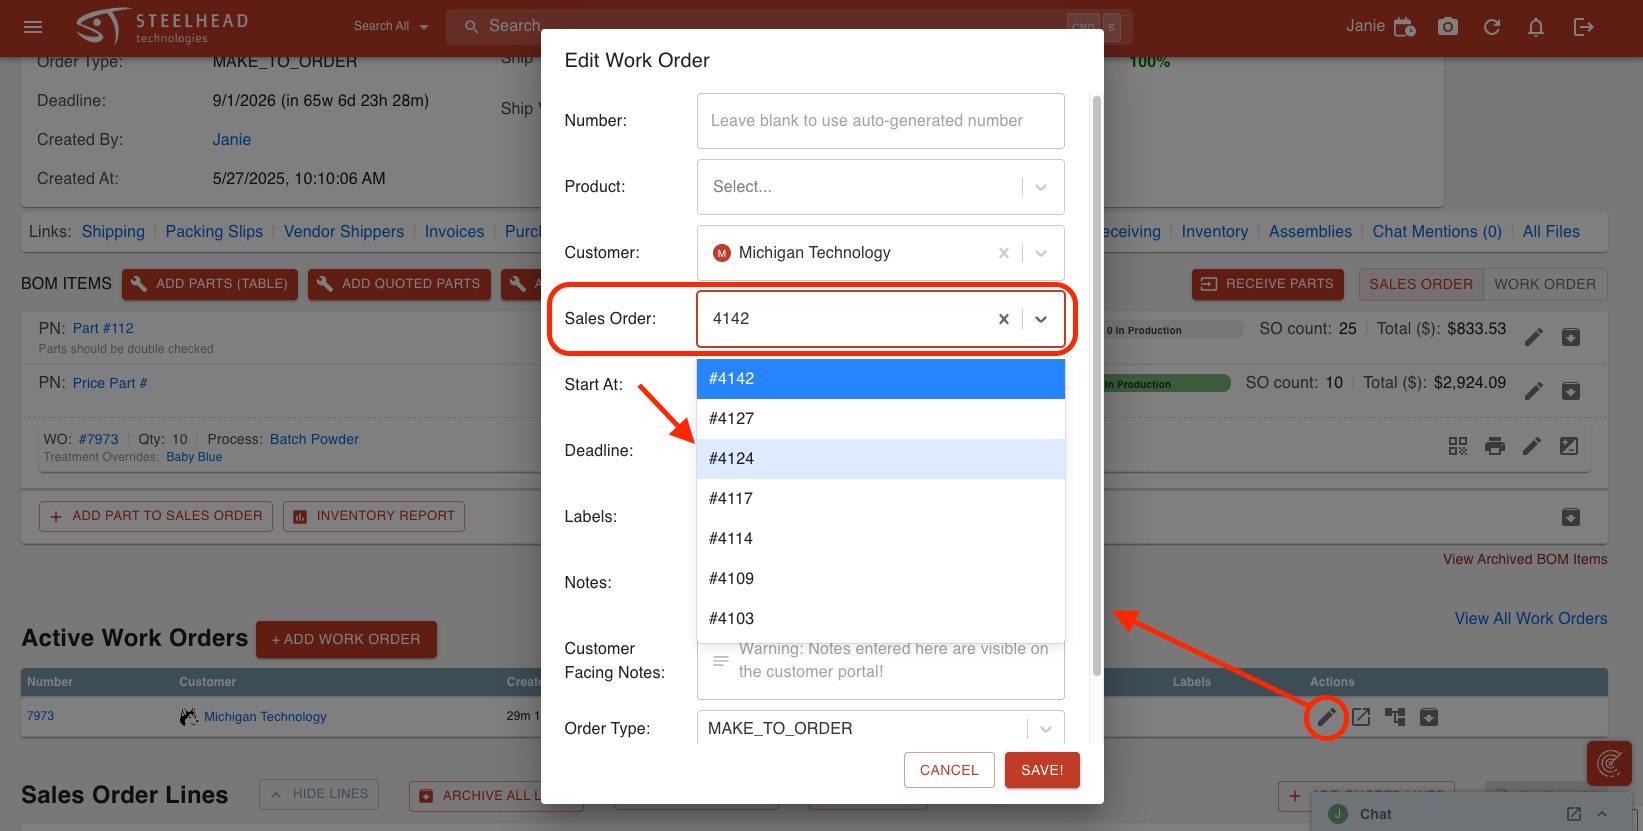
In the "Work Order" section of the Sales Order page, click the Edit pencil icon next to the Work Order that you want to move.
Choose the Sales Order where you want to send the Work Order, and click SAVE.
Editing Transfer Time
To edit the transfer time on a Work Order:
Navigate to the Work Orders Tile from the "Production" section on Steelhead homescreen.
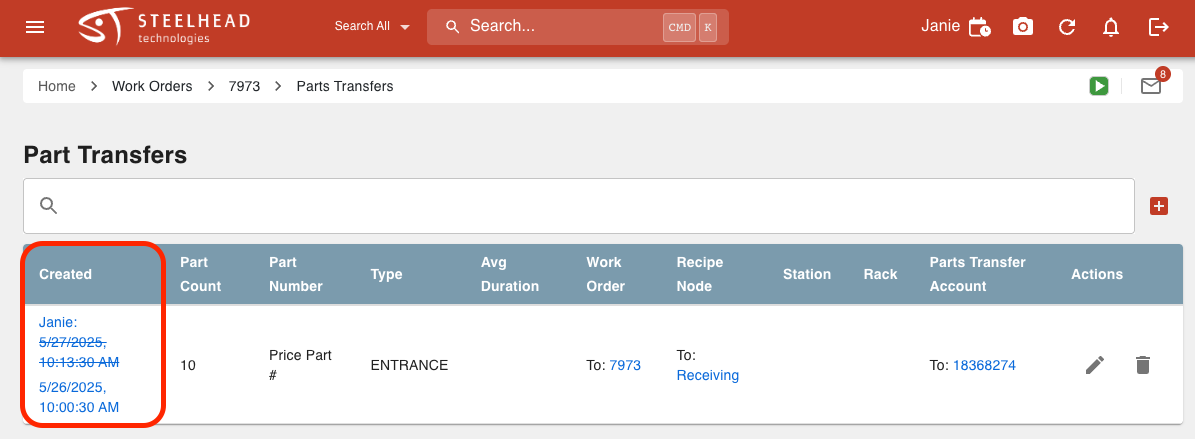
From the desired Work Order Page, scroll down to the blue "View All Part Transfers" hyperlink in the Recent Billed Time section.

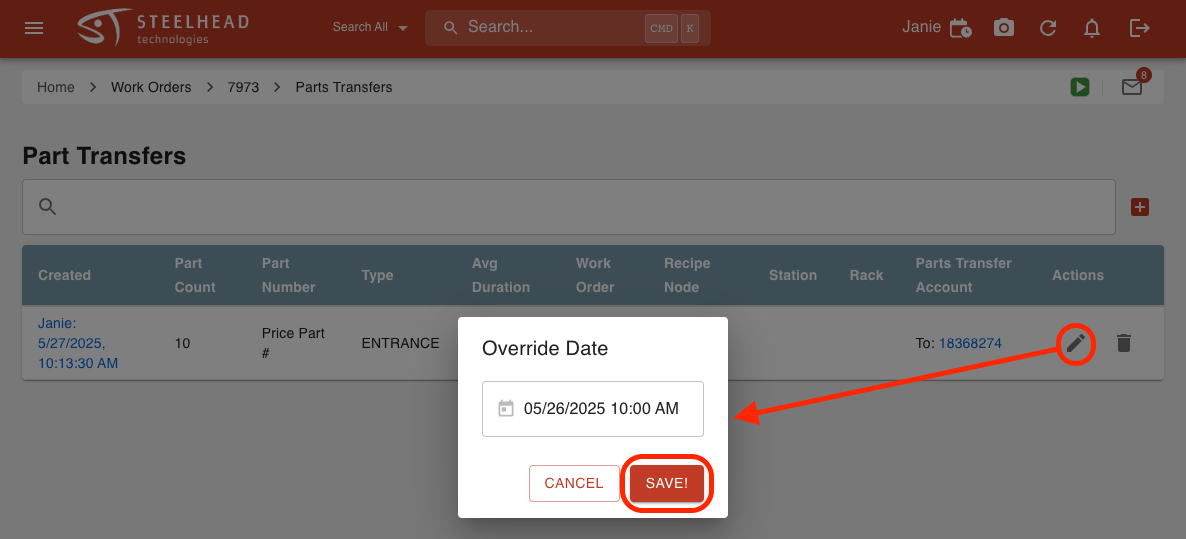
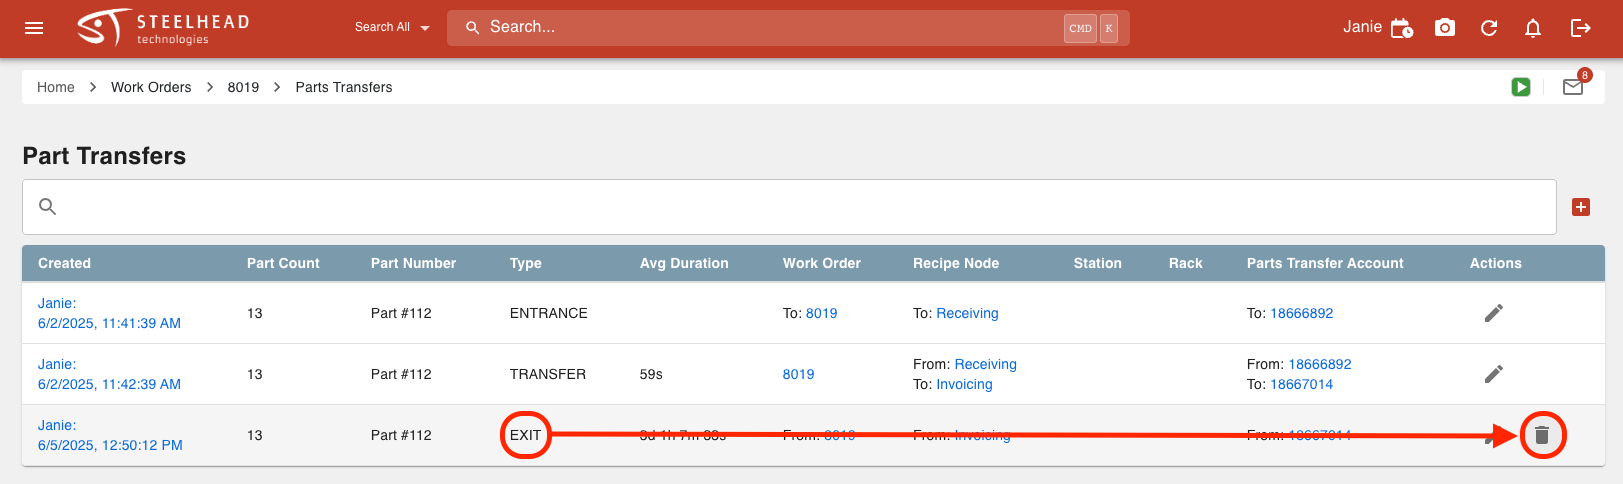
Find the part transfer that you want to edit and click the Edit pencil icon.
Edit the time of the part transfer and click SAVE!
View the updated time stamp.
Removing a Work Order from Archive
To un-archive a Work Order:
Navigate to the Work Orders Tile from the "Production" section on Steelhead homescreen.
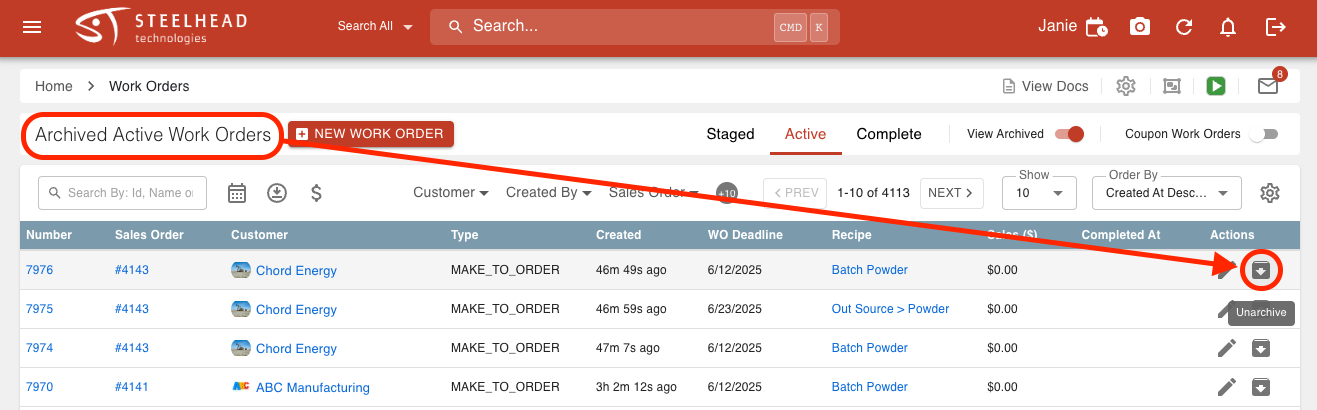
Toggle on the "View Archived" setting on the Work Orders dashboard.
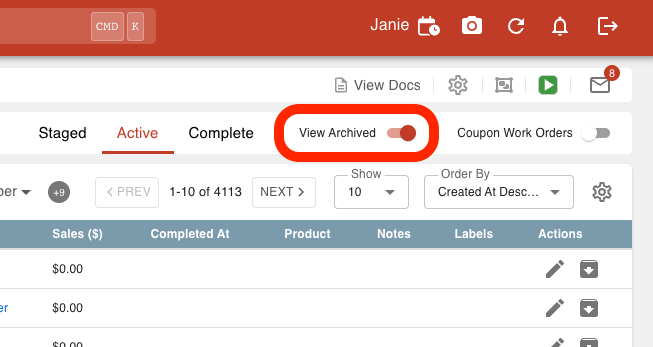
3 . Click the downwards arrow button on the right to un-archive the Work Order.
Tips about Archiving:
- When archiving a Work Order, all the Parts that are still on the Work Order will be automatically exited.
- Also occurs if archiving a Sales Order.
- This means the Work Order no longer says “Shared Pricing” when a Part on an archived Work Order references the same contract line.
Shared Pricing
You can choose to share pricing between different Parts by going to the Sales Order line, clicking the Edit pencil icon on the left, and then going to the right side and clicking the +/- icon to associate with Parts.
Show Quantity of Each Part Number on Work Orders
To add Part Number quantities to Part Number Inventory Batches on Work Orders (so all parts show up on the same line of the Work Order), use the following tips:
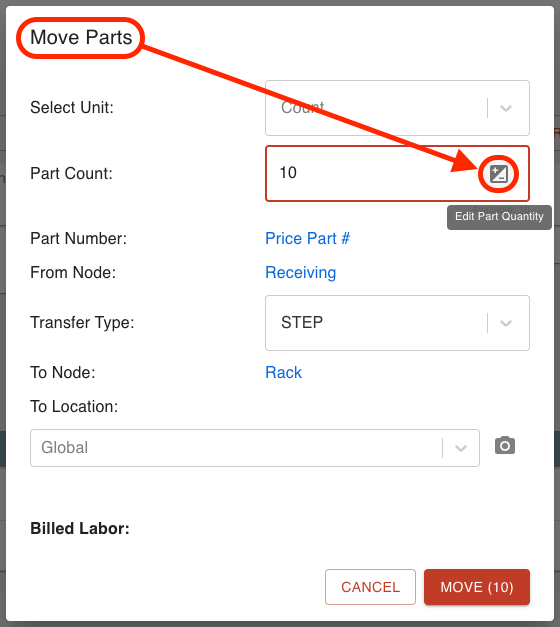
If Parts are received in a Part Number Inventory Batch you have to adjust the quantity from the +/- icon found in the "Move Parts" dialog.
- This can be done in either the Work Order page or from Workboards.
- This can be done in either the Work Order page or from Workboards.
If you just add new Parts to the Work Order, the Parts will move separately.
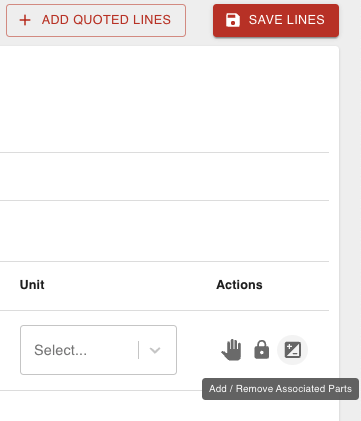
There is also a button on the right side of the Sales Order Lines that says "Add / Remove Associated Parts" that you can click to associate the Line with Parts on the Work Order.
For associating Part Numbers to Invoices, see this video.
Parts Automatically Switching Work Orders
If your Parts are added to different Work Orders when they shouldn't be, here is a possible solution:
When you create a new Sales Order and add Parts, you can see what Work Order the Parts will be added to from the "Add Parts to Sales Order" dialog.

If the Work Order is different for Parts that are going through the same Process and you want them to be on the same Work Order, the opt-ins/outs are probably configured differently.
- This means the Parts have different steps as they go through the Process and can't be run together.
Make sure the opt ins/outs are configured the same for both Part Numbers and the order should automatically adjust to put the Parts on the same Work Order.
- Keep an eye out on this screen so you can catch the discrepancy before the order is created.
See also:
Moving Parts to a New WO
Return Order to Invoicing Bay
If you lose track of a recently created Invoice but can still find it with the search bar, the Work Order may have been archived when it shouldn't have been. If so, follow the steps to "Uncomplete" the Work Order:
- Enter the desired Work Order (if you can't find it, try searching in the "Archived Work Orders") and click the button that says CLICK TO UNCOMPLETE.
- Scroll to the "Recent Billed Time" section on the Work Order Page and click the "View All Part Transfers" hyperlink.

- Revert the last Part Transfer that describes the order Completion.
- Once the Parts appear in the Invoicing Node on the Recipe Tree, they will populate in the Invoicing dashboard.
Treatment Misapplied to a Work Order
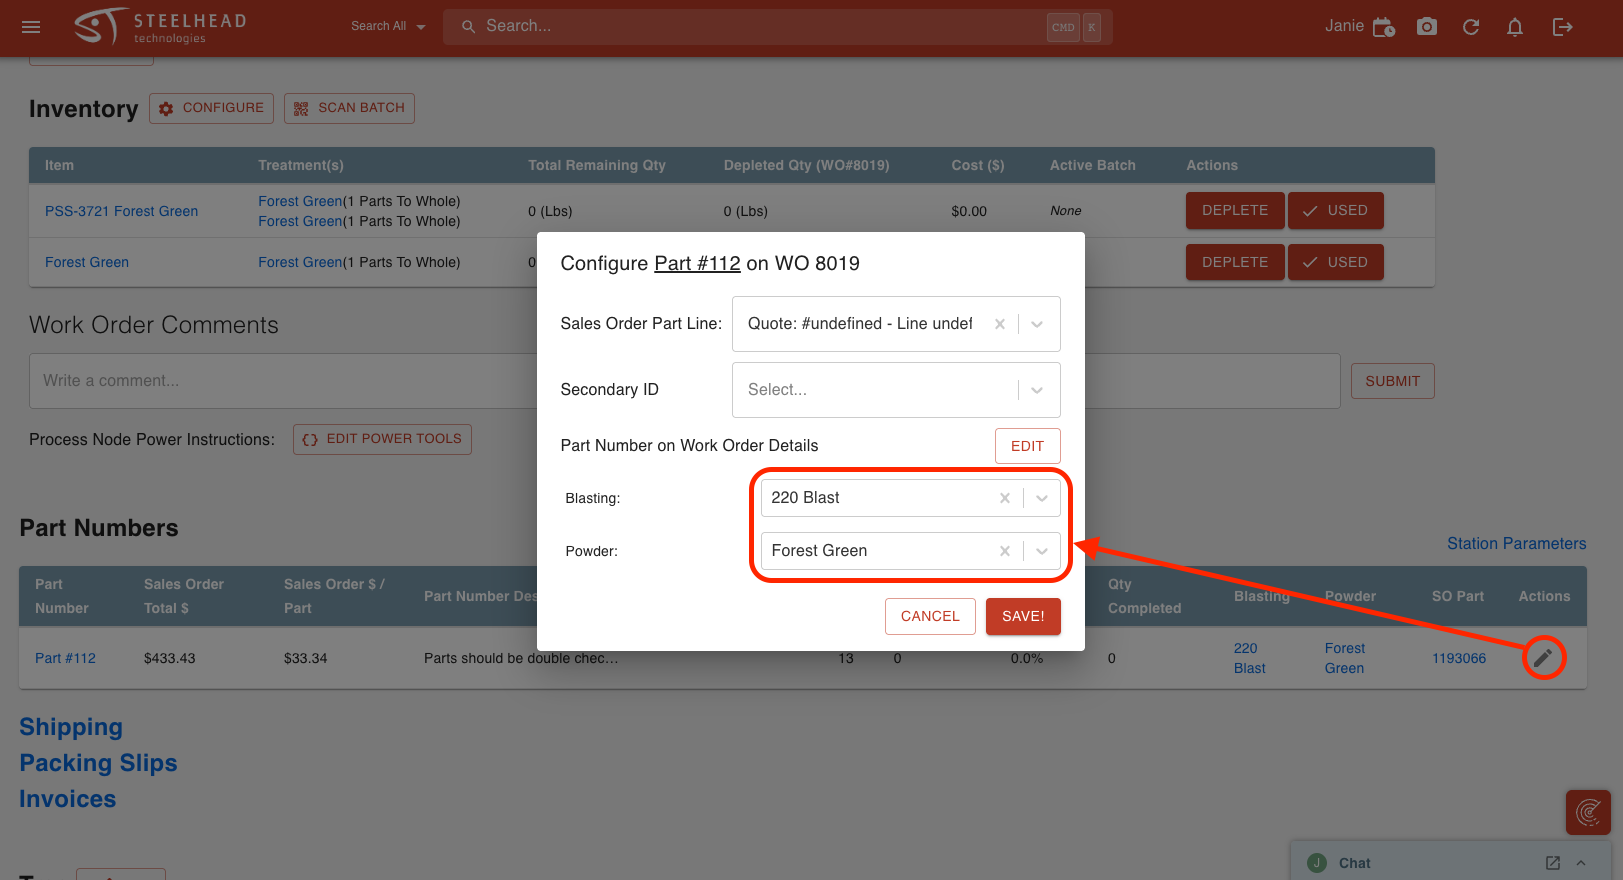
If your Work Order is showing the wrong Treatment, someone might have mistakenly switched the Treatment and it should be corrected.
- To edit the Treatment override, click the Edit pencil icon on the right of the Part Number and change the Treatment.
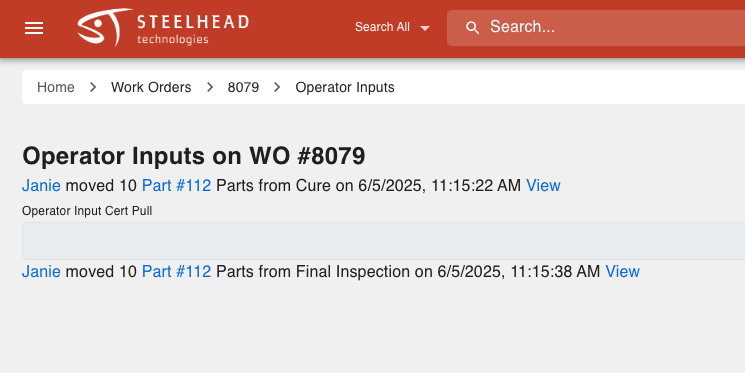
See Operator Inputs on a Work Order
If you would like to see the operator inputs that have been applied to a Work Order, here are some things to try:
You can see this from the Work Order screen under the "View All Operator Inputs" link. This is located under the Process Tree and right above Recent Billed Time.

Here you can see all the Operator inputs for the specific Work Order:
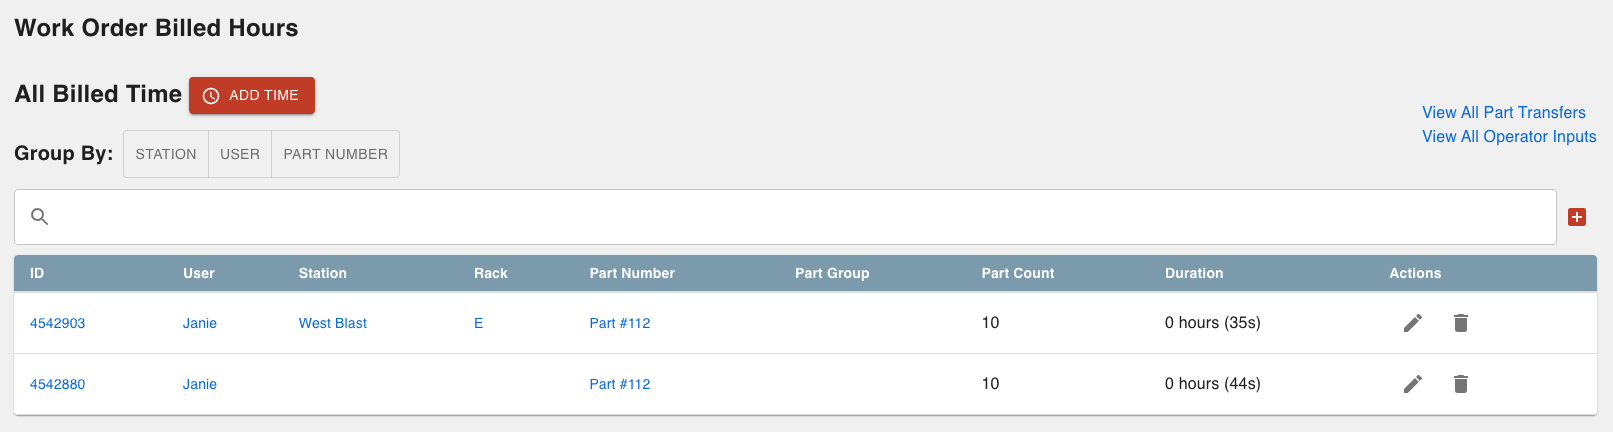
Extra info for Stations used on Work Orders:
To quickly see User and Timer info:
Scroll to the Recent Billed Time section and click the "View All Billed Hours" hyperlink.

Group labor hours by Station, User, or Part Number to find out which of your workers had Timers running and for how long.
Also, you can click on any of the ID numbers under part transfers labor and it will pull up more information that may help you.
Incorrect Sales Order Deadline
If the deadline for one of your Sales Orders is different from its Work Orders, here are some things you can try:
- When you update an Sales Order deadline you will also have to update the Work Order deadline (and the other way around).
- The only time the Work Order will have the same deadline as the Sales Order is if you use the default Sales Order deadline when creating the Sales Order in order entry.
- If incorrect deadlines are occurring right from the start of order entry, your Domain's default lead time may be at fault:
- If you have a default deadline (lead time) in your Domain settings, the Sales Order and Work Order will follow it unless you manually choose a deadline at order entry of the Sales Order.
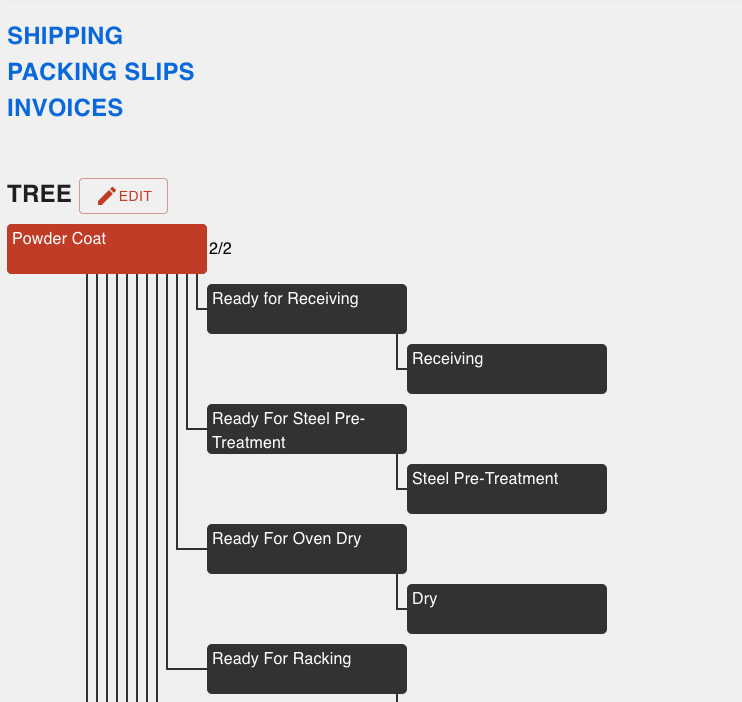
Missing Orders on a Dashboard
If some of your Customers' orders don’t show up on a Dashboard even though they are active in a Process, here are some things you could try:
- The orders might not be showing up because they're not in the Receiving Node yet.
- One place they might be is sitting in the first Node of the Tree "Powder Coat" which has no Dashboard card.
- For this example, the Work Order will not show up in Dashboards because the Parts have not moved past the first step and into production.
- As soon as you step the Parts into the next step, the Work Order will appear in Dashboards.
Unarchiving With Parts Attached (instead of re-entering):
When archiving a Work Order you will get this warning shown below:
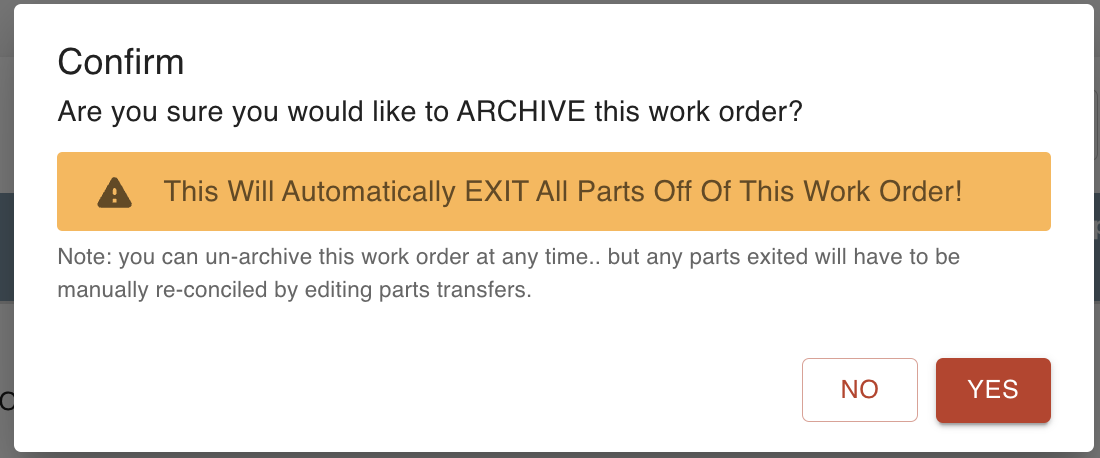
This is letting you know that the Parts will be exited from production when you archive the Work Order.
- When you un-archive the Work Order the Parts won't automatically be pulled back in.
- Rather than re-entering the Parts every time you un-archive a Work Order:
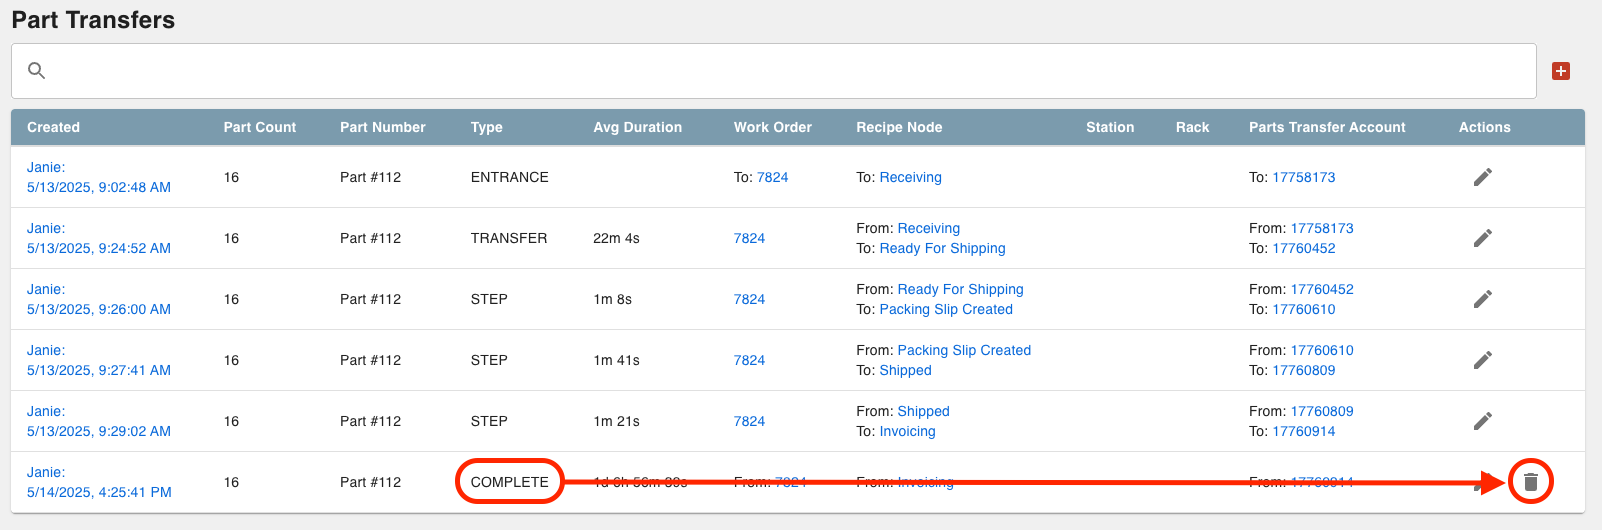
Navigate to the "View All Part Transfers" link found in the Recent Billed Time section on a Work Order page.
Delete the transfer that exits the Parts.
This will pull the Parts back into the Work Order.
Important Note:
This workflow will not retain the receiving Batch ID information (or other information created at receiving).
Part Numbers Not Related to Any Line Items Error

This error is letting you know this Work Order part is not connected to a Sales Order line. If this is interrupting your workflow, here are some things to try:
Enter into the Work Order's corresponding Sales Order.
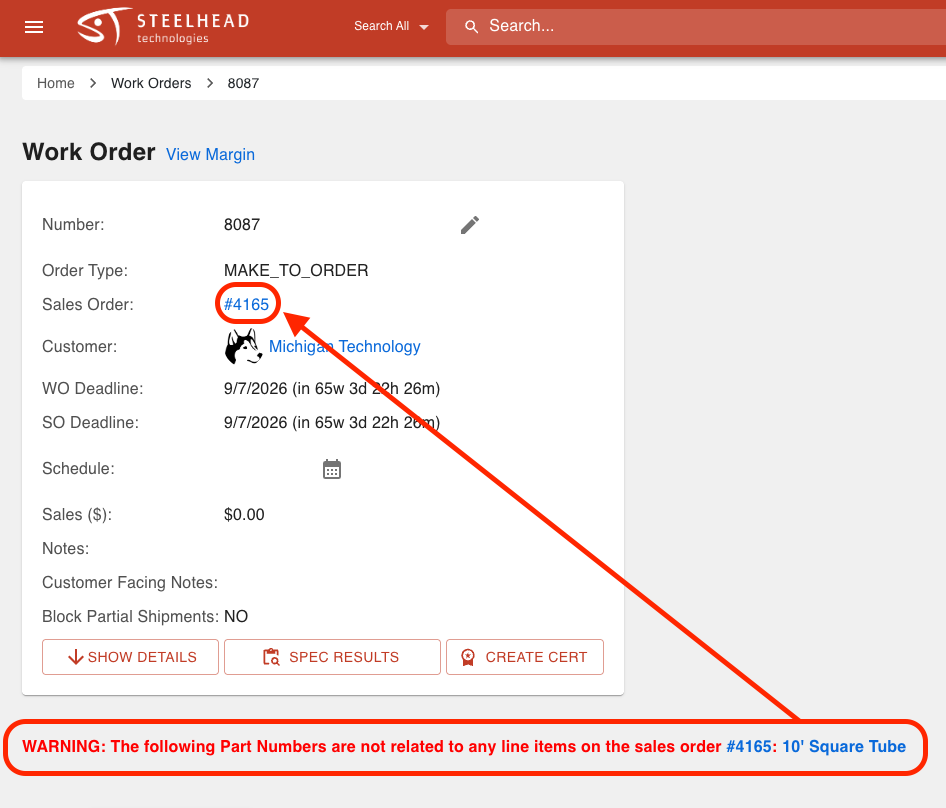
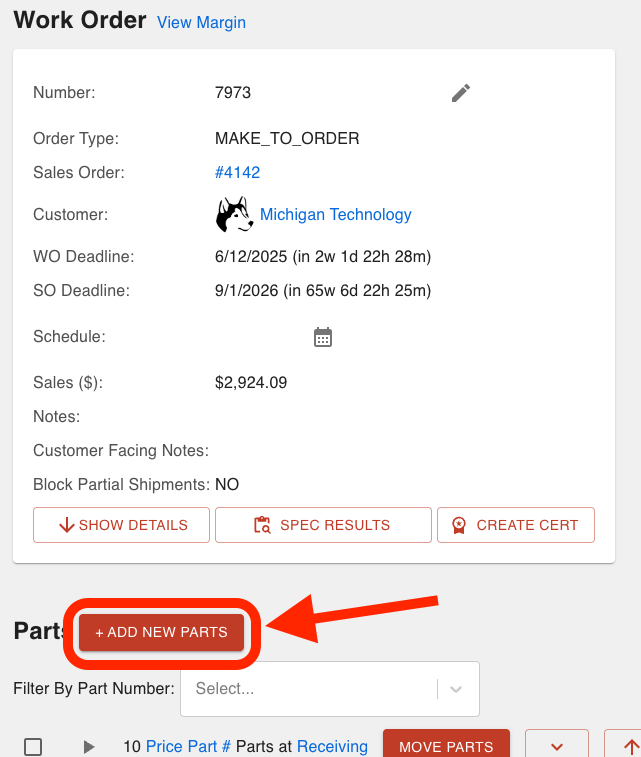
Click the WORK ORDER button on the Sales Order page.

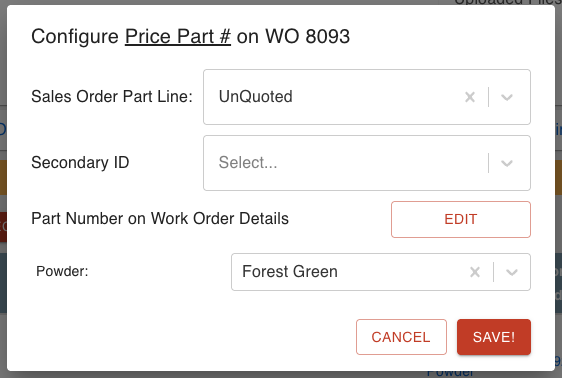
Click the Edit pencil icon on the far right of the Part Number.
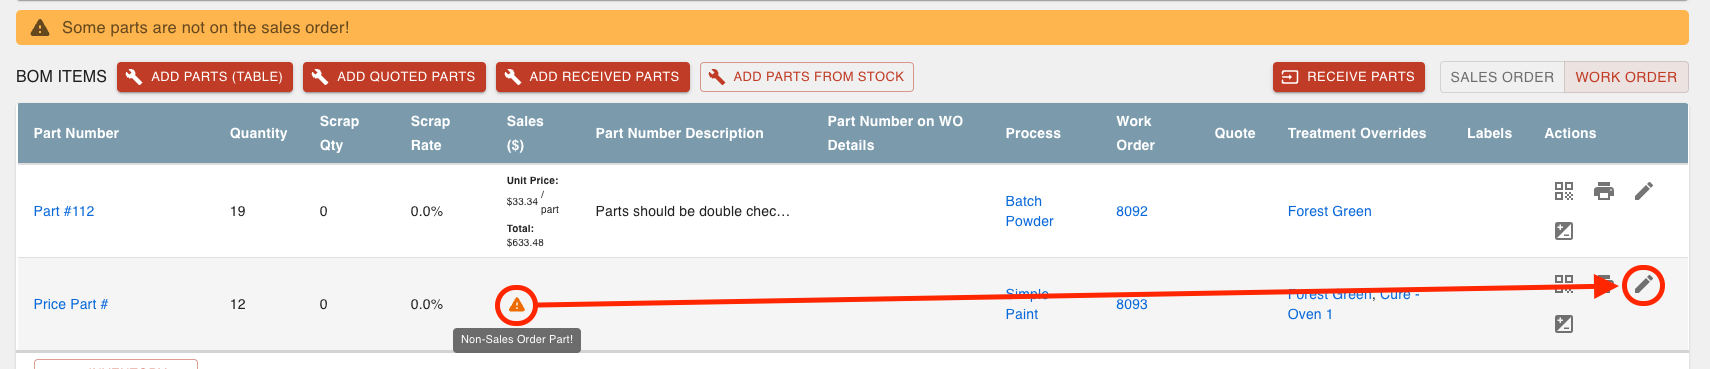
This is where you will create the Sales Order line; type in a new name for the Sales Order Line and click 'Create "New Line"'.
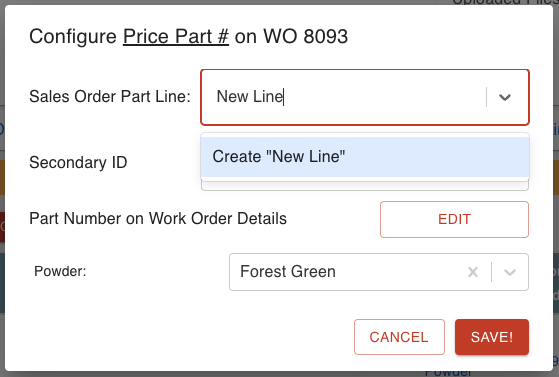
Enter the Part quantity.
Click + ADD LINE ITEM.
Fill in the description, quantity, and price and click SAVE.
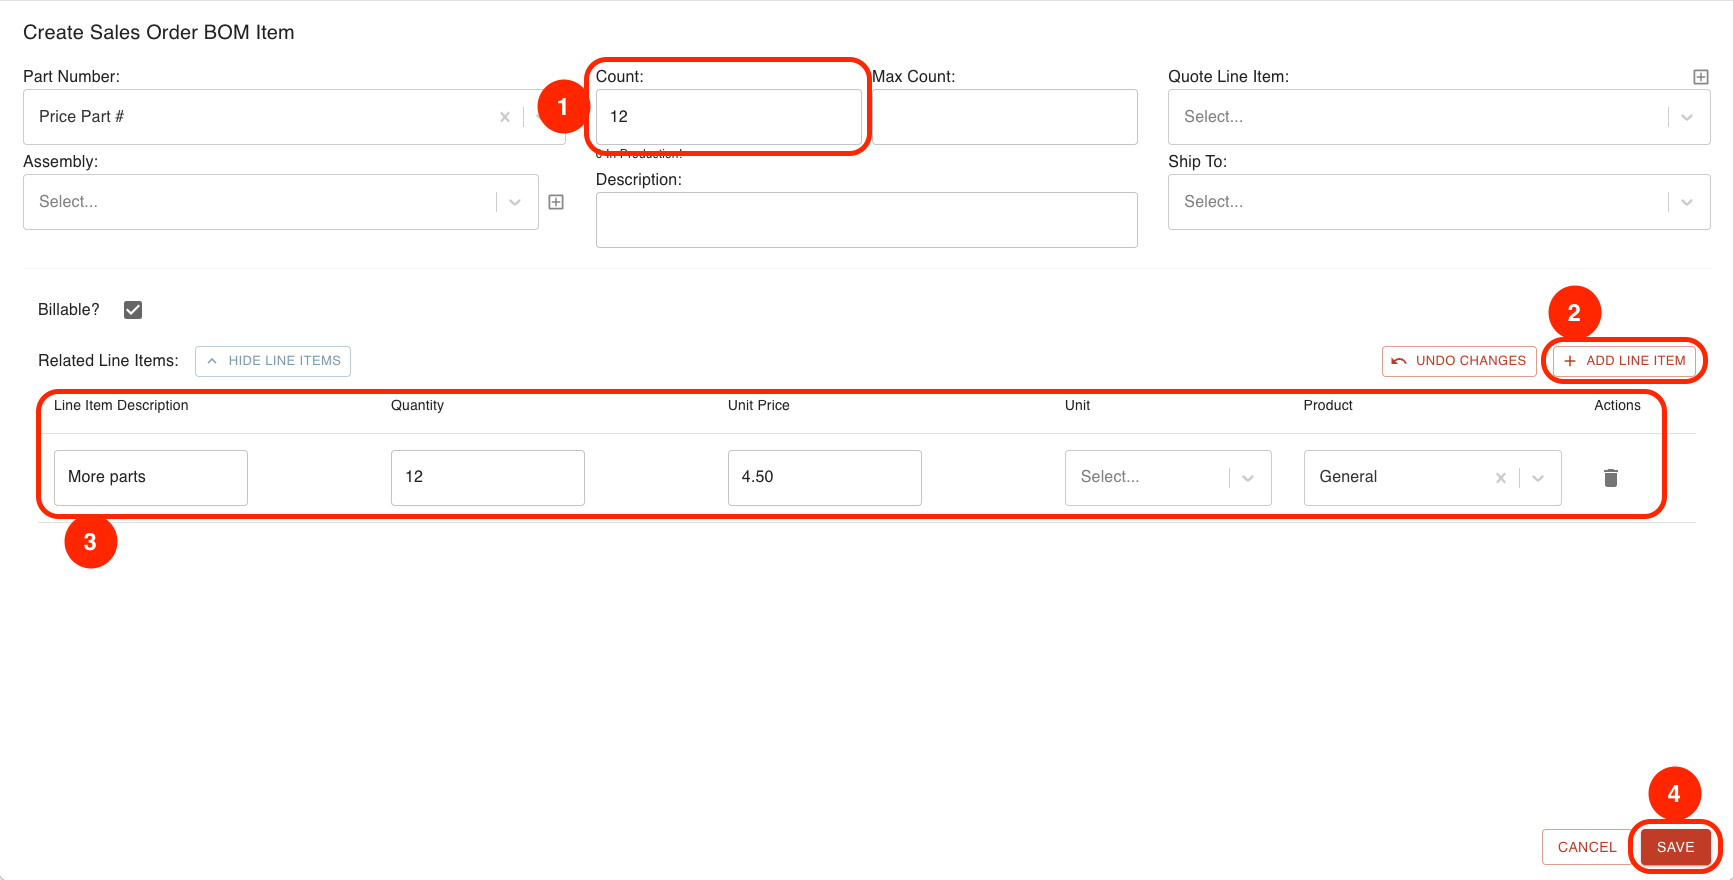
Click SAVE!
View your Work Order now priced and added to the Sales Order.

Was this article helpful?