Timesheet Segments
- Print
Timesheet Segments
- Print
Article summary
Did you find this summary helpful?
Thank you for your feedback!
This article goes into detail about Timesheet Segments. For just a general overview, visit the Guide to Timesheets article.
There are multiple ways that an Hourly User's time segments can be recorded/viewed/edited:
User Account Page
To easily get to your User Account page, you can simply click your name in the top right of the red Steelhead banner. Here are many features relating to Timesheet Segments:
- Clock in and out buttons
- Missed Clock In (/Clock Out) button
- Option to submit that a clock in, clock out, or both was missed.
- This will notify management to make adjustments to Timesheet Segments.
- Management will see these entries as notifications in Timesheet Report.
- Table that shows payroll period hours worked
- Select payroll period wanted to view.
- Table that shows past entries for missed clock ins and outs
- Options to edit and delete entries.
Time Clock Mode
Time Clock Mode allows a device to support clocking in and clocking out very quickly for hourly employees. To put a device into this mode, find the Domain Setting and toggle it on. To disable this mode, clear the device cookies and refresh.
There are a variety of clocking actions that can be performed in this mode:
- Clock In
- Clock Out
- Submit Missed Clock Entries
- Logout Without Clocking In/Out
- View Payroll Periods
- View Missed Clock Entries
Enable PIN Login First
The domain setting, PIN Login, must be set up in order for the Time Clock Mode Domain Setting to be toggled on. Users will clock in and out using their PIN login.
Typical Setup
A company may have one or multiple of devices set in Time Clock Mode around their job shop, in places easily accessible for employees to clock in and out.
Timesheet Page
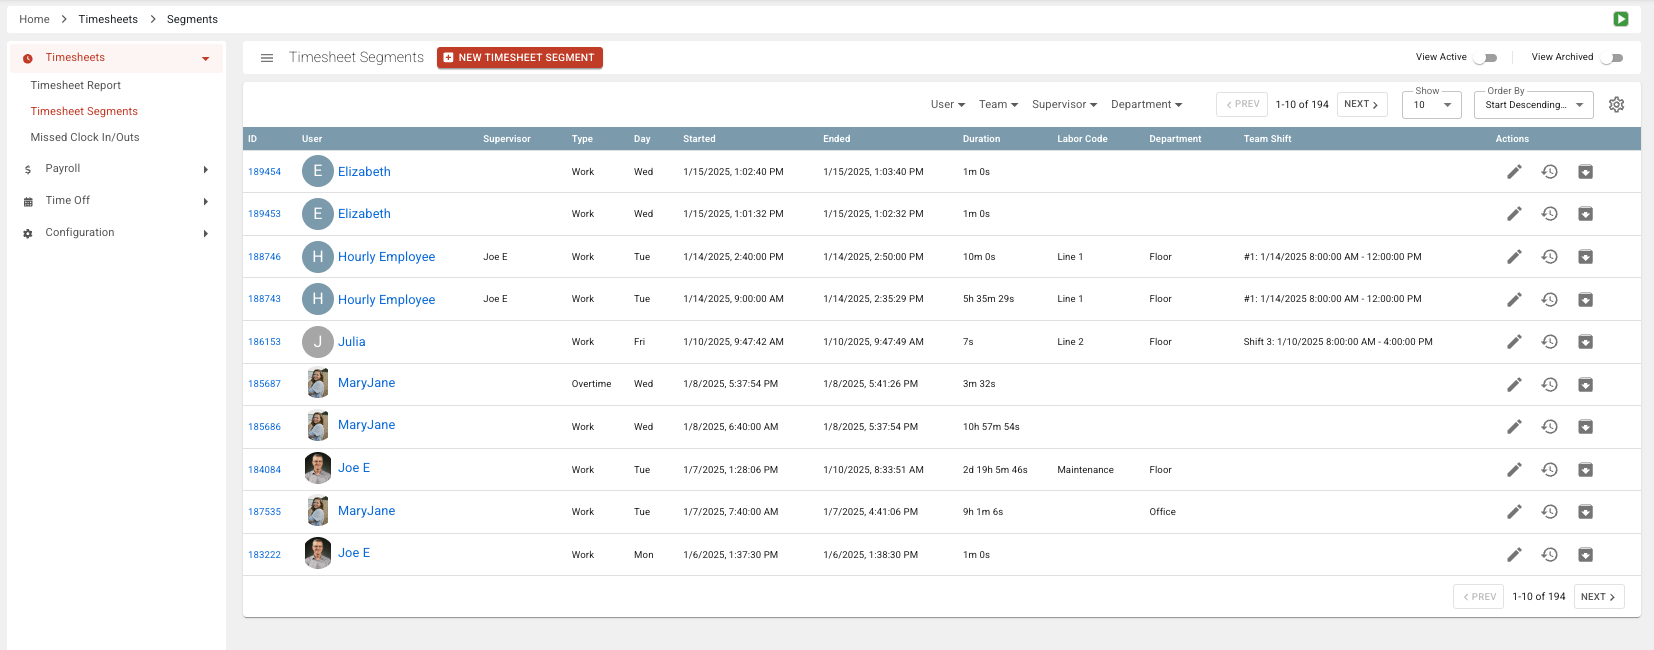
As Users clock in and out to record their hours worked, the main Timesheet page will list the Time Segments.
The Timesheet Segment table contains columns for ID, Username, Date Started, Date Ended, Segment Duration, and Actions.
In the Timesheet page, here is what can be done:
- Create new segments
- Click +NEW TIMESHEET SEGMENT.
- Fill out necessary fields.
- Specify user start/end times
- Click the Edit icon under Actions column.
- Archive segments
- Click the Archive button under Actions column.
- View/unarchive archived segments
- Click "View Archived Timesheet Segments" in top right.
- Click UNARCHIVE button to unarchive time segment.
- Determine if a segment is overtime or not
- Check/uncheck the Overtime checkbox when creating or editing a Time Segment.
- Checking the box will make the segment appear as overtime in Timesheet Report.
- Determine if a segment needs review
- Check/uncheck the Review Required checkbox when creating or editing a Time Segment.
- Checking the box will put a warning sign on the User and the Time Segment in Timesheet Report.
- Choose timesheet segment shift
- Segments may have the option to select Previous Shift, Next Shift, Current Shift, or Create New Shift.
- Assigning shifts will make sure hours are assigned to the correct day/week if they crossover to the next.
- View active segments
- Click "View Active Timesheet Segments" in the top right to view currently running Time Segments.
- Clock out currently clocked in users
- For any currently running user Time Segments, click the clock out icon under the Actions column to clock the User out.
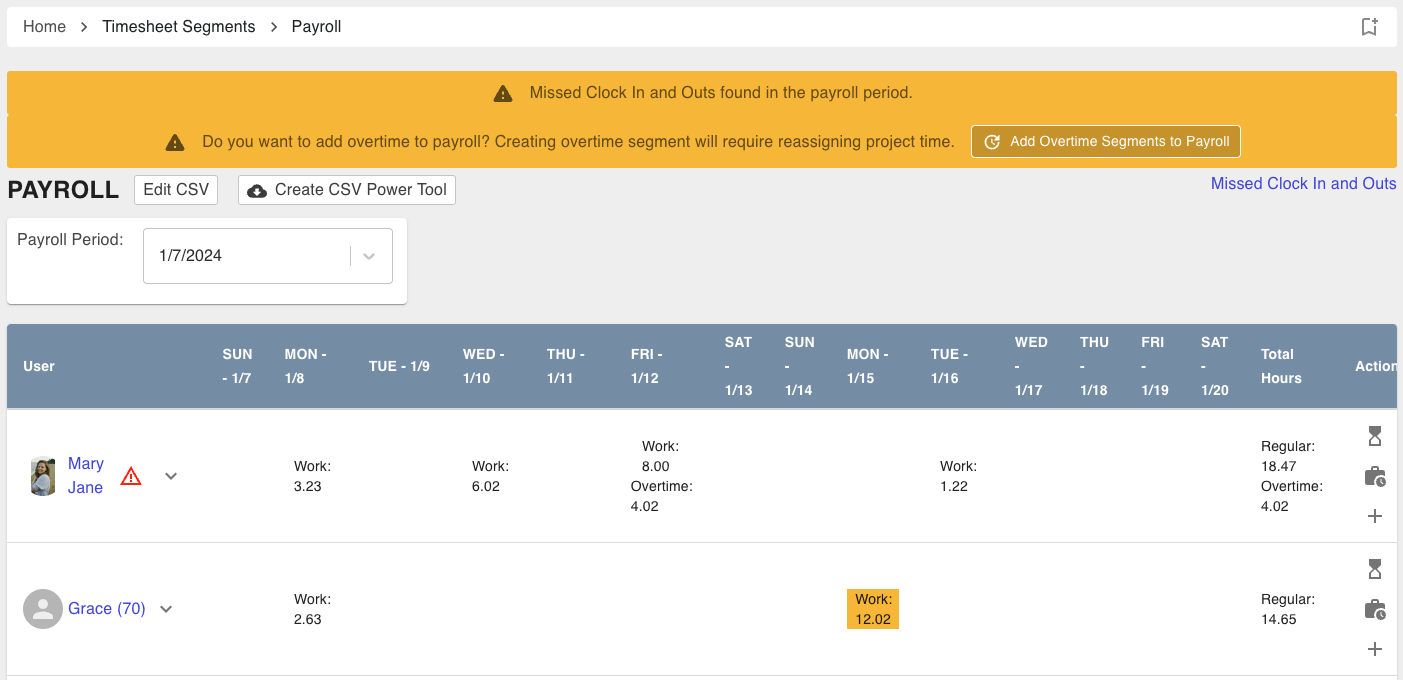
Timesheet Report
Found in the left hand menu of the main Timesheets page, "Timesheet Report" brings you to a page that displays Time Segments for each User in a selected time period. From here, you can perform many things:
Assign Overtime
- Click the hour glass icon under the Actions column
or - Click the "Add Overtime Segments to Payroll" on top yellow banner.
- Overtime will be based off the overtime amount defined in Domain Settings.
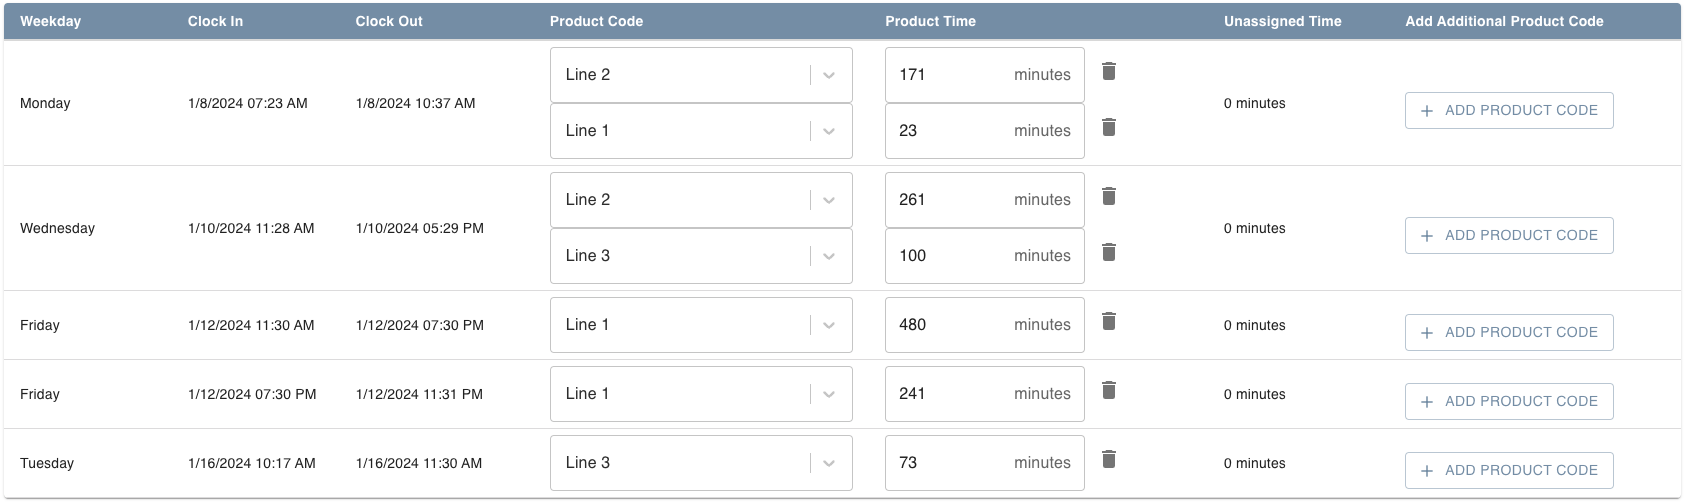
Assign Product Breakdowns
- Accessed through clicking the suitcase-clock icon under the Actions column.
- Assign Product Codes to Time Segments (including Time Off Segments) that have not already been assigned, or edit those already assigned.
- Breakdowns will be automatically filled in if User breakdown defaults are set.
- Split time and assign multiple Product Codes by clicking +ADD PRODUCT CODE .
- Delete Product Codes by clicking the trash can to the right of the Product time column (this will not delete the Time Segment itself).
Add Timesheet Segments
- Accessed through the plus button under the Action column of a User's column.
- Fill out fields to create a new Timesheet Segment for the User.
Edit and Create CSV Power Tool
- Accessed through the buttons in the top left corner.
- This is best to be done by TypeScript-trained Users.
- This is where Custom Inputs come into play.
Missed Clock Entries
- Yellow banner will appear on Timesheet Report page when missed clock entries are present.
- Accessed through the hyperlink in the top right corner.
- Entries from Users who missed clocking their hours will appear listed here.
- Table displays: Date, Missed Type, Clock In/Out Times, Duration, Comment, Actions
- The Action column icons:
- Plus - create a Time Segment from missed clock entry
- Pencil - edit the User's entry
- Archive - archive the entry (this can be undone through top right hyperlink)
- Trash - delete entry (this cannot be undone)
Missed Clock Entries
Time Segments will not appear on Timesheet Report until the missed clock entry is added by using the plus icon in the Actions column.
Submitting Missed Clock Entries
Missed clock entries can be submitted by Users through the MISSED CLOCK IN button on the User Account Page.
Review Required Timesheet Segments
- A warning sign will appear if a Timesheet Segment is over or under the times set in domain settings.
- A warning sign will appear if a Timesheet Segment was checked as "Review Required" when it was created or edited.
History of Time segments
- There is now a historical look up of all changes made to Time Segments.
- Ability to archive/unarchive Time Segment history.
Timesheet Segments Per User
- Click the down arrow next to a User's name to view all segments, including Time Off Segments.
- The Action column of each segment gives a few different options:
- Edit - change the start and end times of the segment
- Add a break - splits the Time Segment into two, allowing for setting break start/end times, and will not count that break time when saved
- Archive - remove the user's Time Segment (can be undone)
Payroll Period/Dates
You can customize Payroll Periods and dates used in Timesheet Report through Domain Settings.
Was this article helpful?