Station Pages
- Print
Station Pages
- Print
Article summary
Did you find this summary helpful?
Thank you for your feedback!
Station Pages
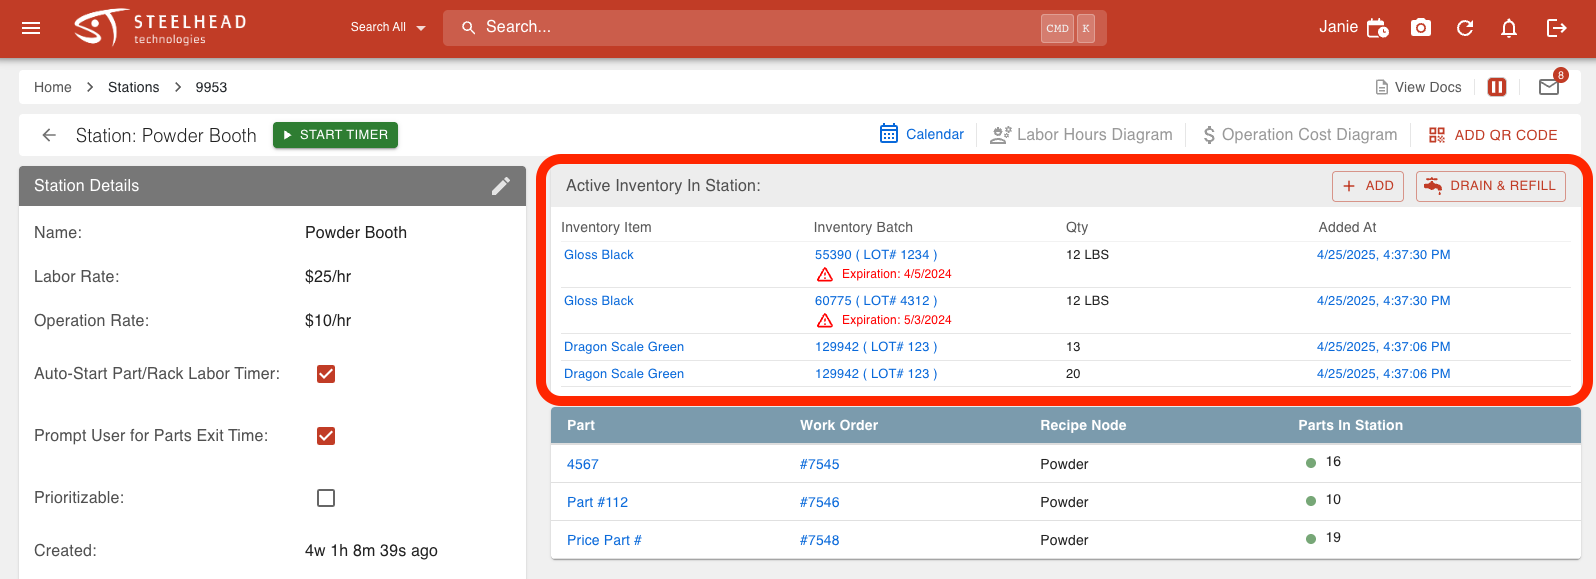
When you click on a specific Station name, you enter into that Station's page which shows you further settings and information about the Station.
Active Inventory
You can view all the active Inventory in the Station and Deplete, Add, and/or Drain and Refill Inventory to the Station from this page.
To add Inventory to a Station:
1. Click +ADD.
2. Select the Inventory Type and Item (Optional: Select Batch to deplete from specific Batch).
3. Click DEPLETE ITEM or DEPLETE BATCH.
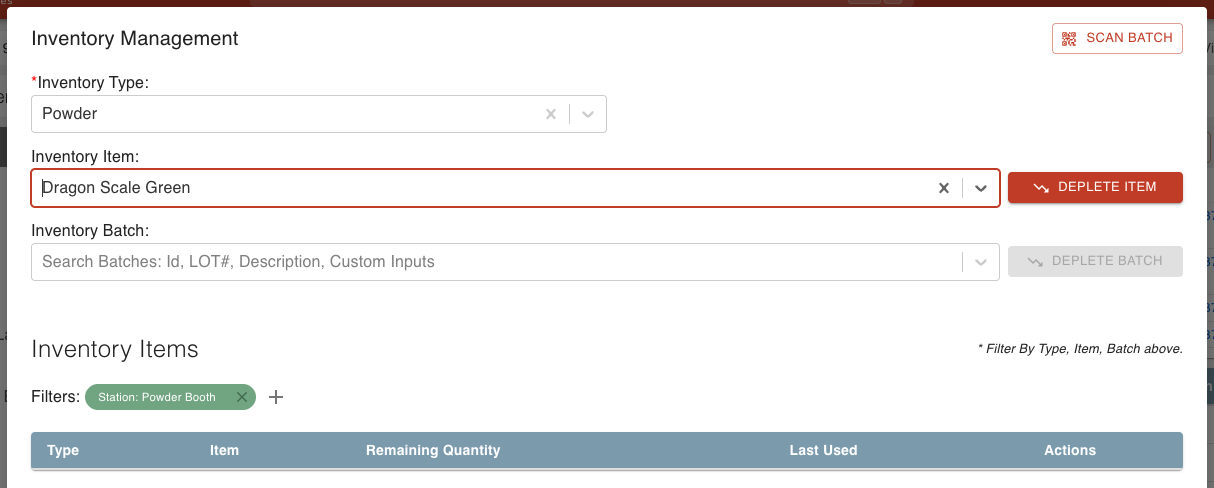
4. Deplete the Inventory Item and make sure the field Add More To Station: is checked.
This depletes the Inventory Item to the Station to be used.
5. Click SAVE.
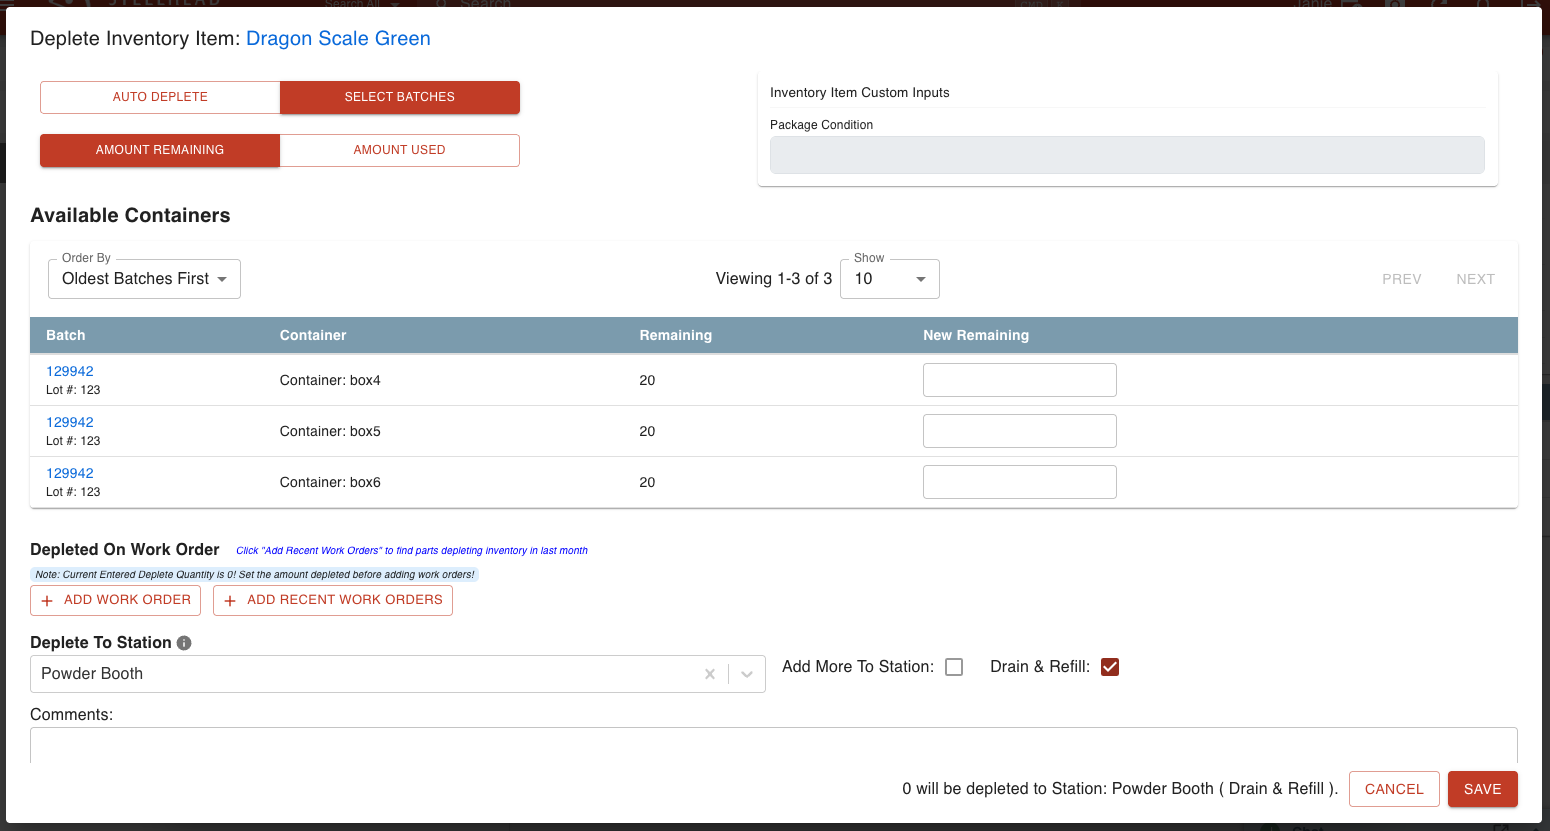
Note: See the Inventory Management article for further instructions on how to deplete inventory from the Deplete Inventory Item dialog.

You can also drain and refill the active Inventory in your Station with new Inventory. This would be helpful if, for example, you wanted to exchange the "Blue Paint" Inventory Item with "Black Paint".
To Drain & Refill Inventory in a Station:
1. Click DRAIN & REFILL.
2. Select the Inventory Type and Item (Optional: Select Batch to deplete from specific Batch).
3. Click DEPLETE ITEM or DEPLETE BATCH.
4. Deplete the Inventory to the Station from the Deplete Inventory Item dialog and make sure the checkbox field Drain & Refill: is checked.
This will drain the Inventory currently in the Station and refill it with the Inventory you have selected.
5. Click SAVE.
To view Recent Inventory Depletions, scroll down to the bottom of a Station's page. This will shows a record of Inventory depletion, providing information on the date and time, Inventory Item, Inventory Batch, and quantity depleted.

Active Parts and Recent Part Transfers
You can view active Part Numbers in the Station, plus their corresponding Work Order, Recipe Node, and the quantity of parts.
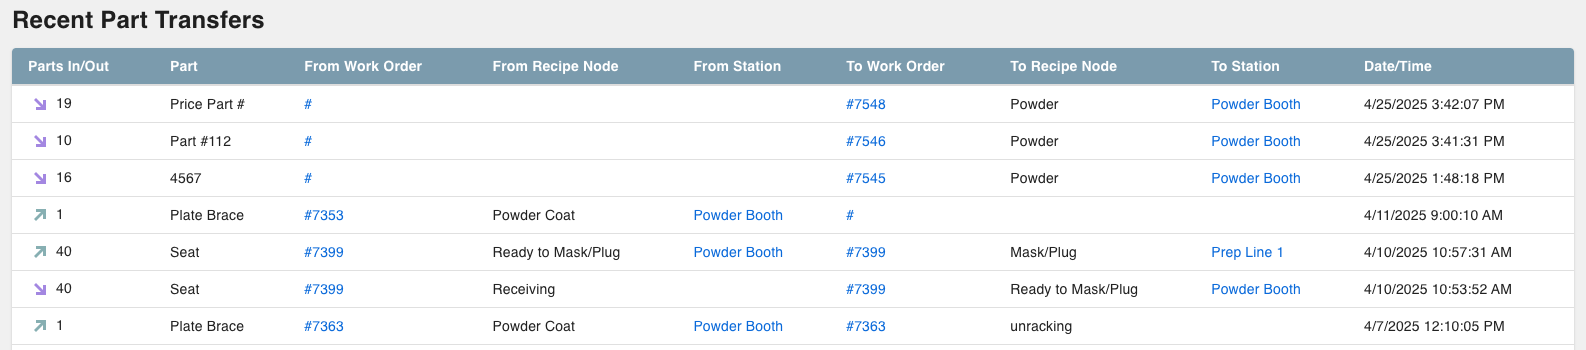
If you scroll down near the bottom of a Station's page, you will find the Recent Parts Transfers section. This is a table view of Parts moving in and out of the Station plus information such as:
Part Number
"From" and "To" Work Order
"From" and "To" Recipe Node
"From" and "To" Station
Date and time
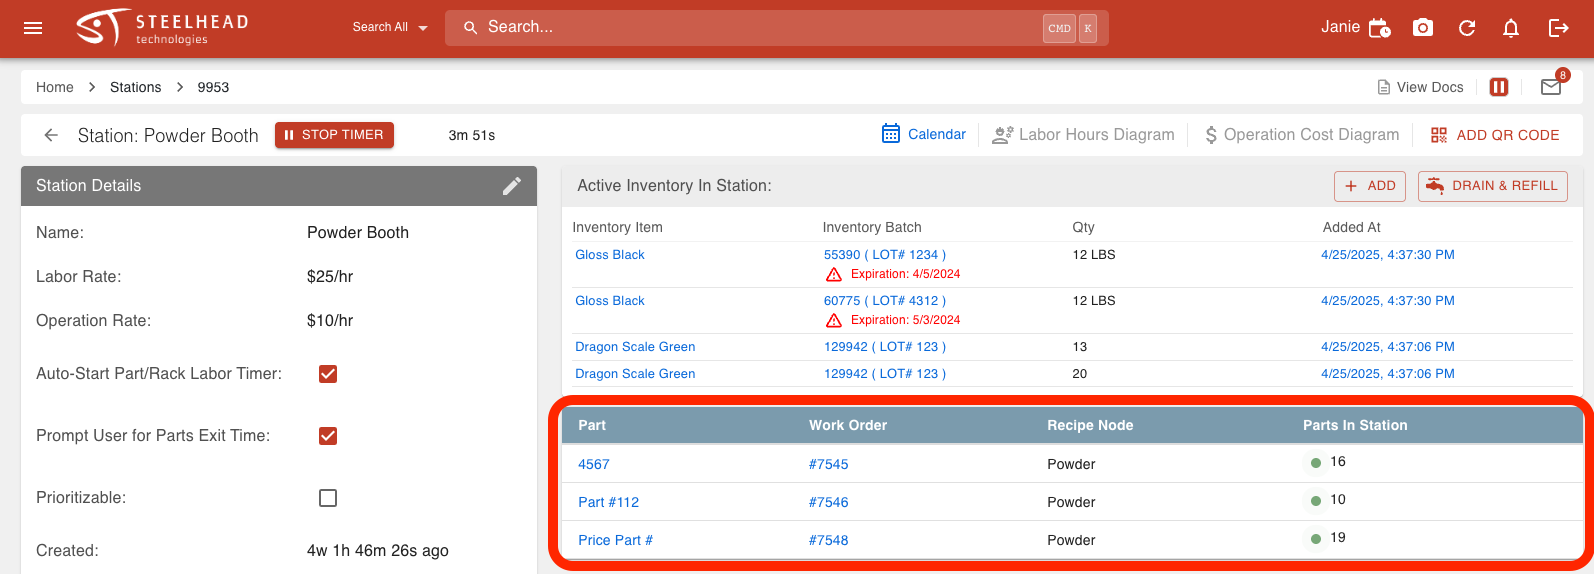
Station Timers
Station Timers are used to track labor and job costing. Operators should start timers when they begin their shift at a Station. The Timers will then track all the part transfers that occur while the Timer is running to document how long different parts/batches take.
To use Station Timers:
Enter into desired Station page.
Start the timer by:
Clicking the START TIMER button found either at the top of the Station page or in the "Active Station Timers" section.
Clicking the green "play" button found in the any page header and selecting the desired Station from the drop-down, plus any further information, and click SAVE.

Use the "Active Station Timers" section to view the current worker, the start time of the timer, and the duration of the timer.

Click STOP TIMER or red "pause" icon when you are done working in the Station.
View the "Recently Ended Station Timers" section to see the history of Timers ended in this Station including the User, start and end time stamp, and the duration of the Timer, plus actions to edit or delete the entry.

Treatments in Stations
A Treatment is an abstract event that is performed that adds value to a Part. A Treatment Group is a group of similar treatments. Treatment Groups are useful for scenarios such as paint, where there are many similar Treatments with small differences (like paint colors). For example, "Red Paint" and "Blue Paint" might be Treatments that belong to the Treatment Group "Paint". Treatments Groups are useful for identifying all Treatments that may be applied at a Station.
Treatments are typically performed at a Station. You should add all the Treatments that a Station can perform to accurately set up Scheduling, Capacity Planning, and Prioritization in Steelhead. Adding a Treatment to a Station means that the Station can perform the Treatment. For example, you would apply the Station "Oven #1" to the Treatment "Cure" if that oven can handle cure treatments. You can also apply Stations to Treatment Groups if applicable. For instance, you could apply the "Paint Booth" Station to the "Paint" Treatment Group instead of applying every specific paint color to the Station.
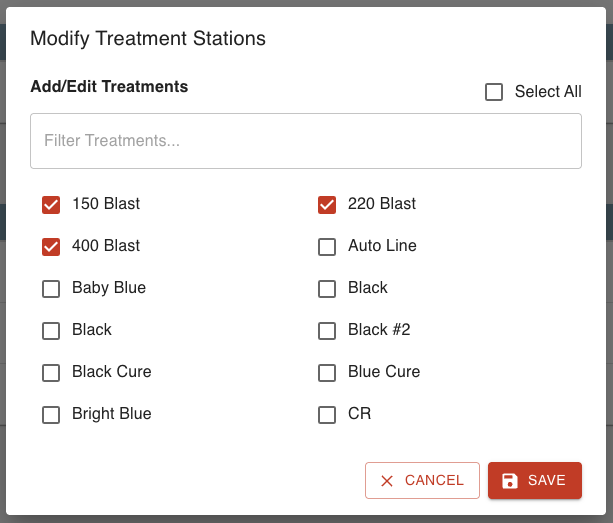
To add Treatments to a Station:
Scroll down to the Treatments section in a Station page and click +ADD/EDIT TREATMENTS FOR STATION.

Select all the Treatments that the Station can perform.
Click SAVE.
To add Treatment Groups to a Station:
Scroll down to the Treatment Groups section in a Station page and click +ADD TREATMENT GROUP.

Select the desired Treatment Group from the dropdown.
Click SAVE.

See the article about Treatments for more information regarding Station and Treatment connections.
Inventory
An Inventory section appears in a Station's page when you add a Treatment/Treatment Group to the Station that has Inventory Item(s) associated with it. For example, if you added the "Blue Cure" Treatment to the "Powder Booth" Station, the "Blue Cure" Inventory Item will populate in the Inventory section.
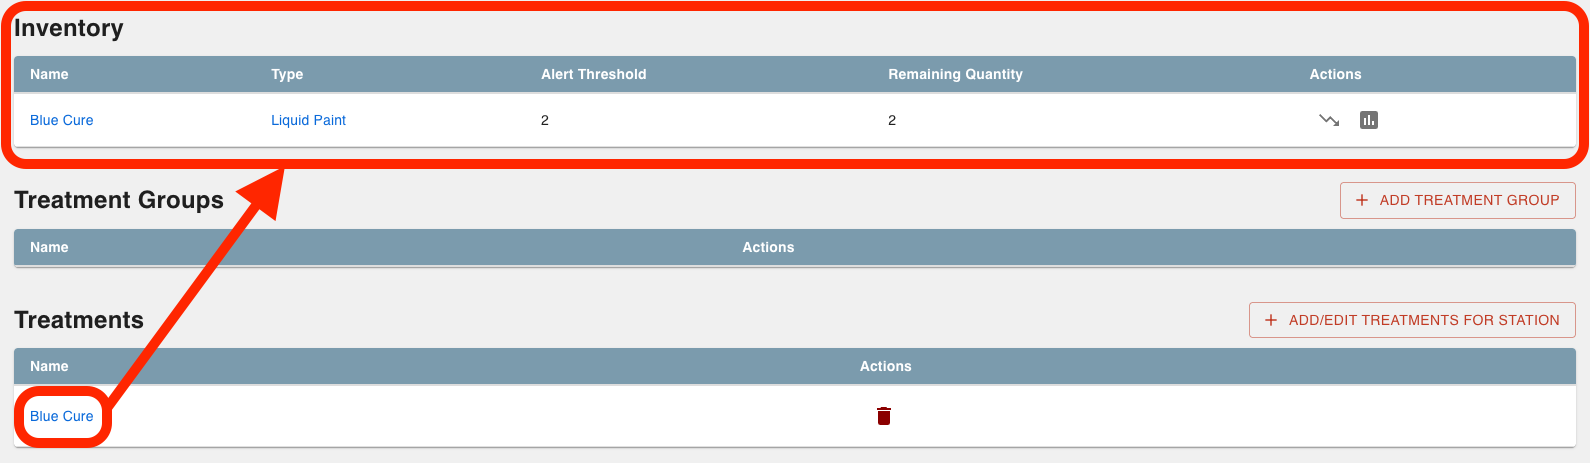
You can view the Inventory Items, their Inventory Type, alert threshold, remaining quantity, and actions including depleting the Inventory Type and viewing the Inventory Report.
Station Parameters
Parameters on a Station (not to be confused with Spec Field Parameters) allow you to provide Operators with the settings of the Station for specific Part Numbers.
For example, you can add the Parameter "Temperature" to the Station "West Blast". You can specify the temperature for any Part that goes through that Station, like setting the Parameter to 70 degrees for when "Part #112" goes through the "West Blast" Station.
To set up Station Parameters:
Enter into a specific Station page and scroll down to the Parameters section.
Click +ADD PARAMETER and enter in a name.
Click SAVE!.

Enter into Part Number that goes through the Station and scroll down to the Station Parameter section.
Note: The Part Number must be going through a Process that uses the Station for the Station Parameter to appear in the Part Number.
Add a Station Parameter and click SAVE CHANGES.

Station Rates
You can set up Station Operation Rates and Station Labor Rates that are used with the Station Timers to track labor and job costing. When Timers are running, the rates are applied to accurately cost the job.
Station Operation Rates:
Operation Rates are fixed cost such as ovens or overhead lighting. This rate is split between parts, meaning if 1,000 parts were in an oven for one hour with a $100/hour operation rate, the cost to process the parts was $0.10 each.
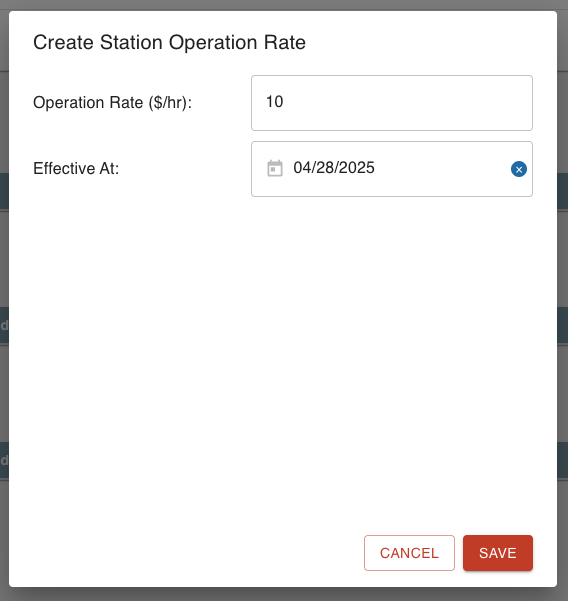
To set up Station Operation Rates:
Enter into desired Station's page and scroll to the Station Operation Rates section.
Click +ADD OPERATING RATE FOR STATION.

Enter the desired dollar per hour operation rate.
Select the date when this rate will be effective.
Click SAVE.
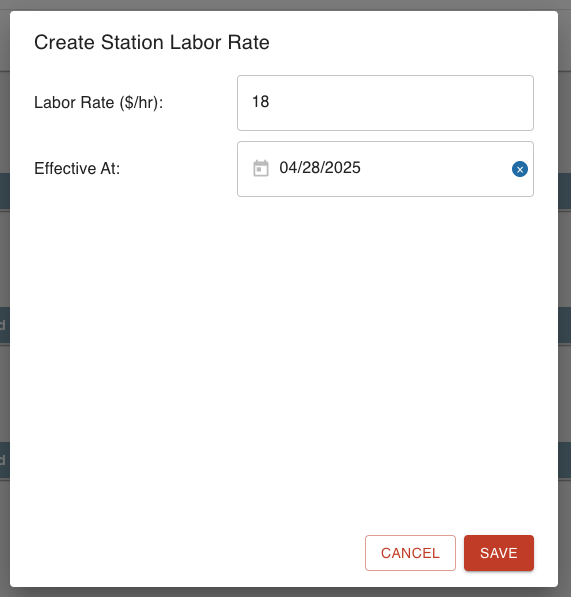
Station Labor Rates:
Labor Rates are charged by a 1:1 part ratio. For example, this means that if three parts get painted over the same one-hour interval at the same labor rate of $10/hour, this Station labor cost is $30 ($10 per part). Labor Rates can be set at both the Station and User level. When both User and Station have a Labor Rate, the User Labor Rate is used.
To set up Station Labor Rates:
Enter into desired Station's page and scroll to the Station Labor Rates section.
Click +ADD LABOR RATE FOR STATION.

Enter the desired dollar per hour operation rate.
Select the date when this rate will be effective.
Click SAVE.
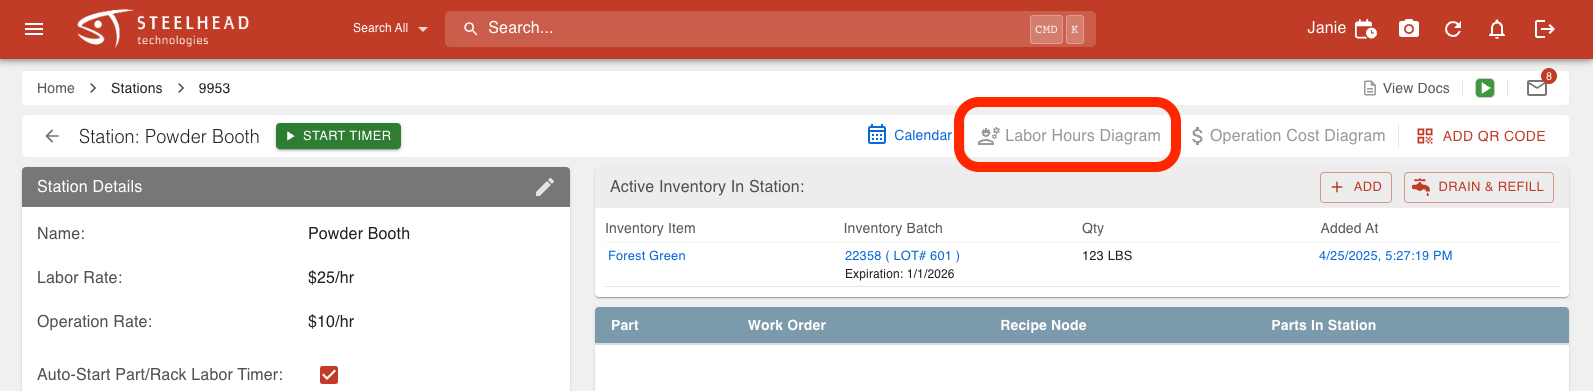
Labor Hours Diagram
The Labor Hours Diagram is a visual aid that displays all the labor activities at a Station. The key information on this page is the recent time segments, duration of jobs, user information, and part information. This graph is connected with Station Timers, Operation and Labor Rates, part transfers, and User Timesheets.
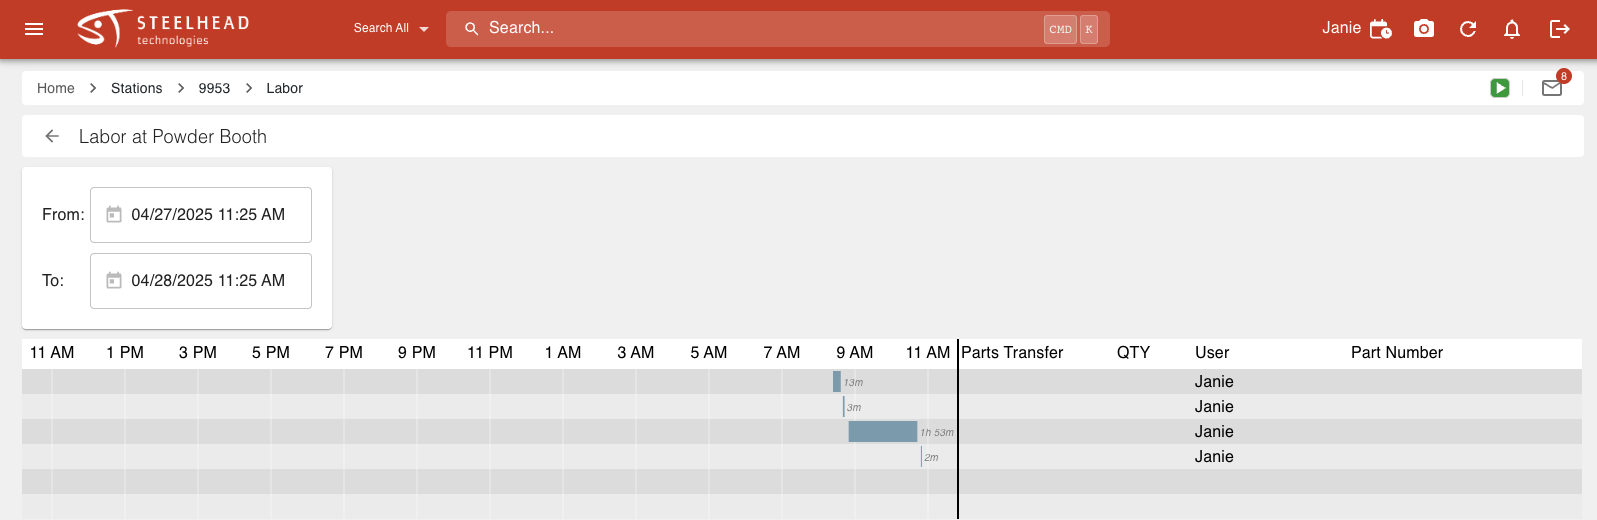
To view the Labor Hours Diagram, enter into the desired Station and click Labor Hours Diagram found at the top of the Page.
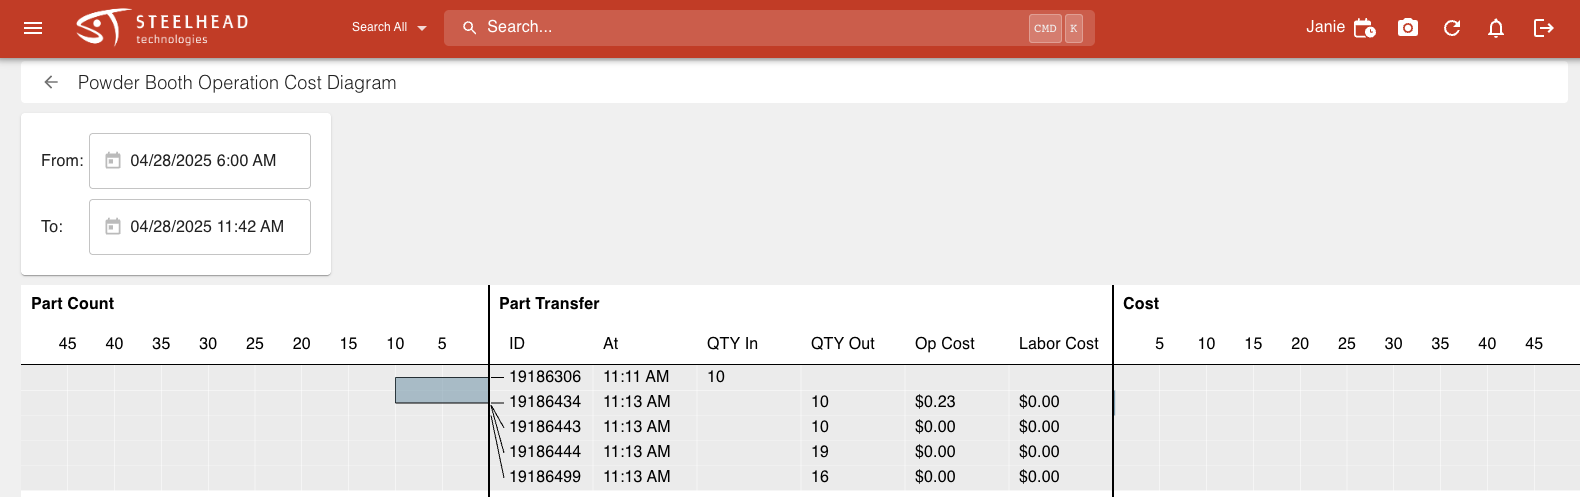
Operation Cost Diagram
The Operation Cost Diagram is a timeline-based graph split into Part Count, Part Transfer, and Cost. Each row of the graph represents a part transfer and time is displayed along the horizontal axis.
Part Count
Shows the number of parts in the Station over time.
Displays a line graph tracking part quantities.
Uses blue shading to indicate part presence.
Part Transfer Section
Displays detailed information about each transfer:
Transfer ID
Time of transfer
Quantity In (parts entering the Station)
Quantity Out (parts leaving the Station)
Cost Section
Shows two types of costs:
Operation Cost (Station running costs)
Labor Cost (worker costs)
Displays costs in dollars
Equipments
The Equipments section within a Station's page helps track which physical equipment is used at each Station. This section is often used for maintenance purposes and tracks Equipment usage, Maintenance schedules, and potential issues.
To add Equipment to a Station:
Enter into the desired Station's page and scroll down to the Equipments section.
Click ADD EQUIPMENT.
From the dropdown, select the desired Equipment.
Click SAVE.
Note: You many only add Equipment to Stations that have already been created in Steelhead. To create Equipment, navigate to the Equipment page and click +NEW EQUIPMENT.
See the article about Equipment to learn more.
Was this article helpful?