Sept. 2024 Specs and Certs Update Overview
- Print
Sept. 2024 Specs and Certs Update Overview
- Print
Article summary
Did you find this summary helpful?
Thank you for your feedback!
Spec Measurements are now associated with a Part Transfer Account, rather than a Work Order/Part Number combination, giving you the ability to be more specific and the option to edit Specs.
A Part Transfer Account (PTA or Part Account):
An account (ID) that represents the unique state of a Parts' movement. Parts can be added to an existing Account if its state is identical to that of the already existing PTA.
Here are updated instructions for creating Certs. You will now be able to modify which Spec Measurements to include on the Cert, and create Certs for multiple Part Accounts.
(See video overview here.)
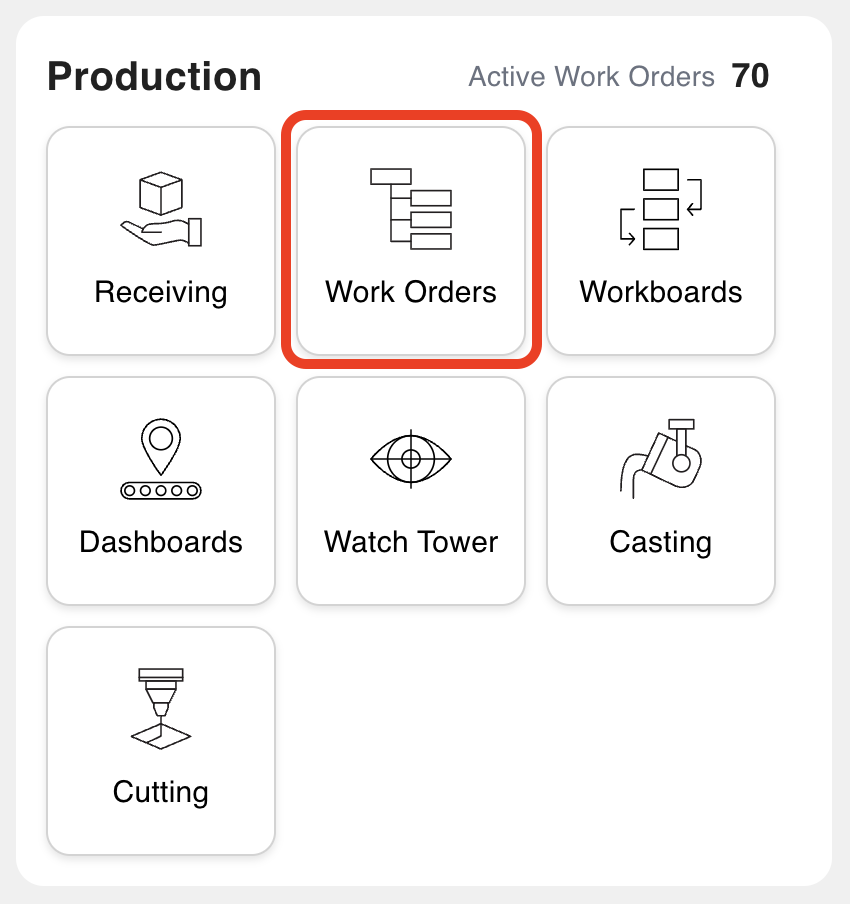
From your Steelhead homepage, click the Work Orders tile.
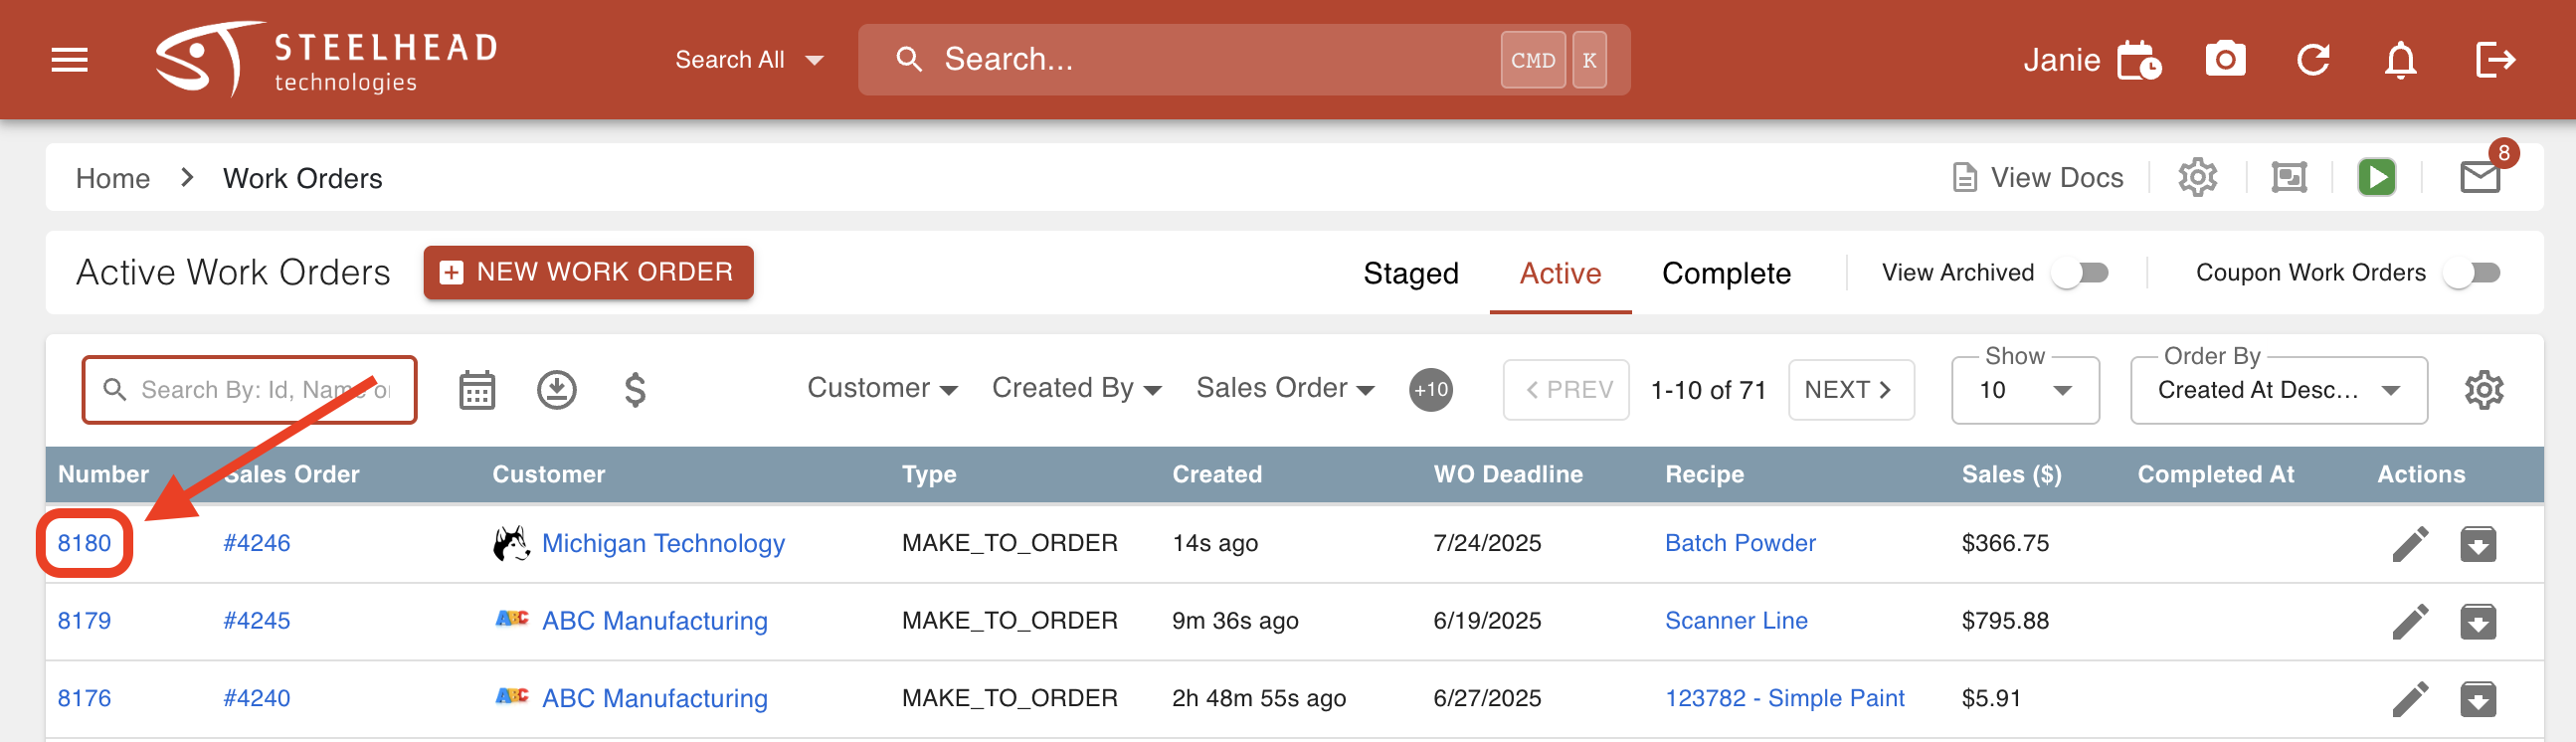
Open a Work Order.
There are three ways to create a Cert:
- You can click CREATE CERT in the top section of the Work Order page (this is a blanket Cert that will include all Part Accounts on this Work Order),

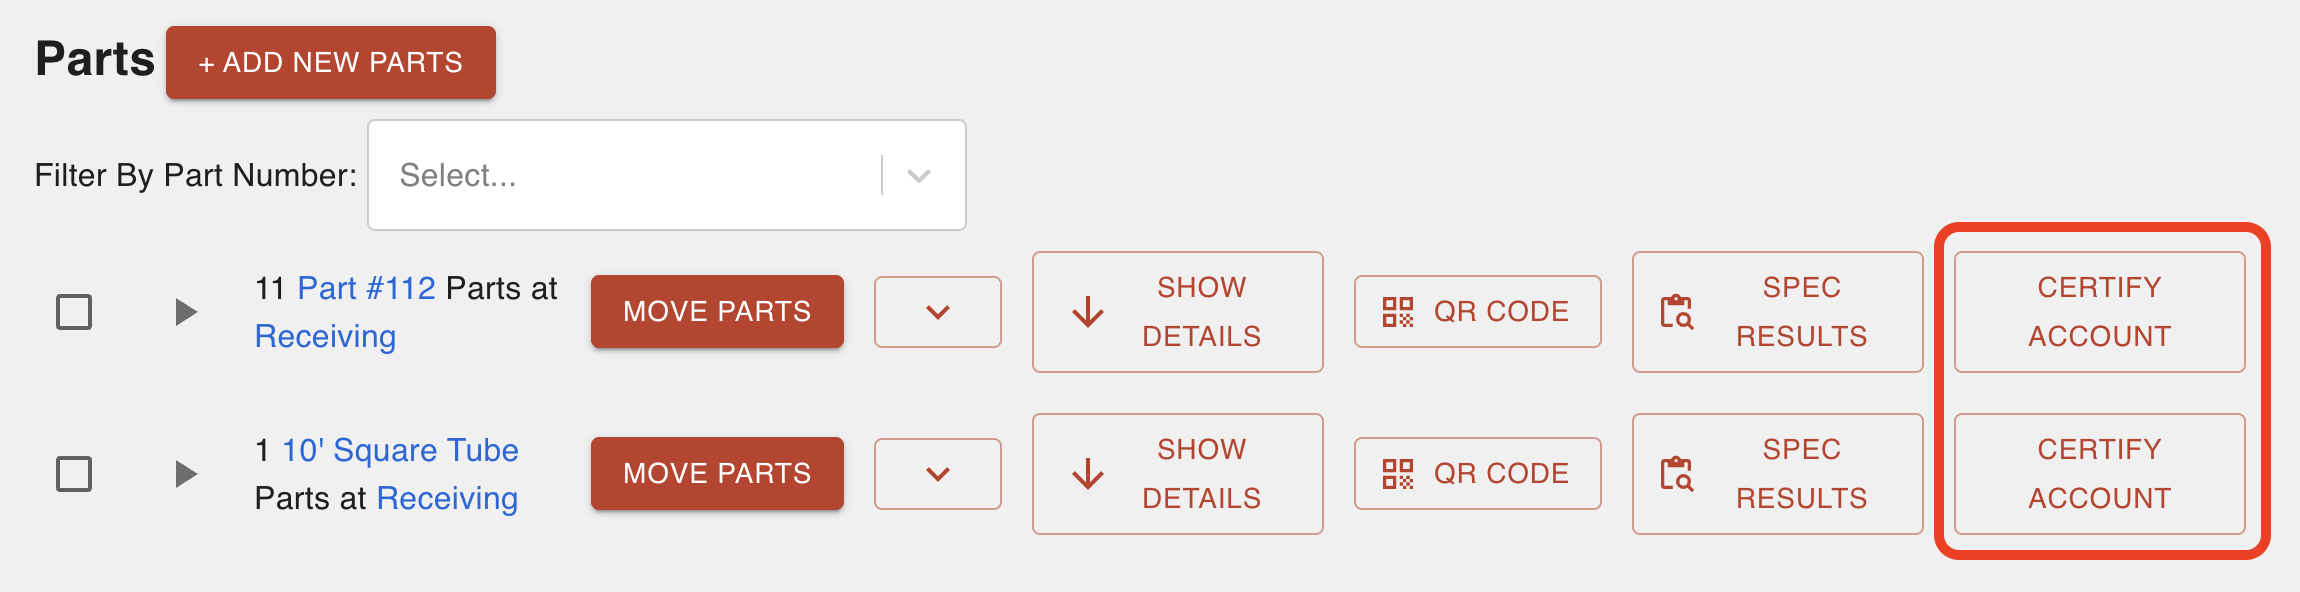
- Or, scroll down to the Parts section and click CERTIFY ACCOUNT on the Part Number you want to create a Cert for.
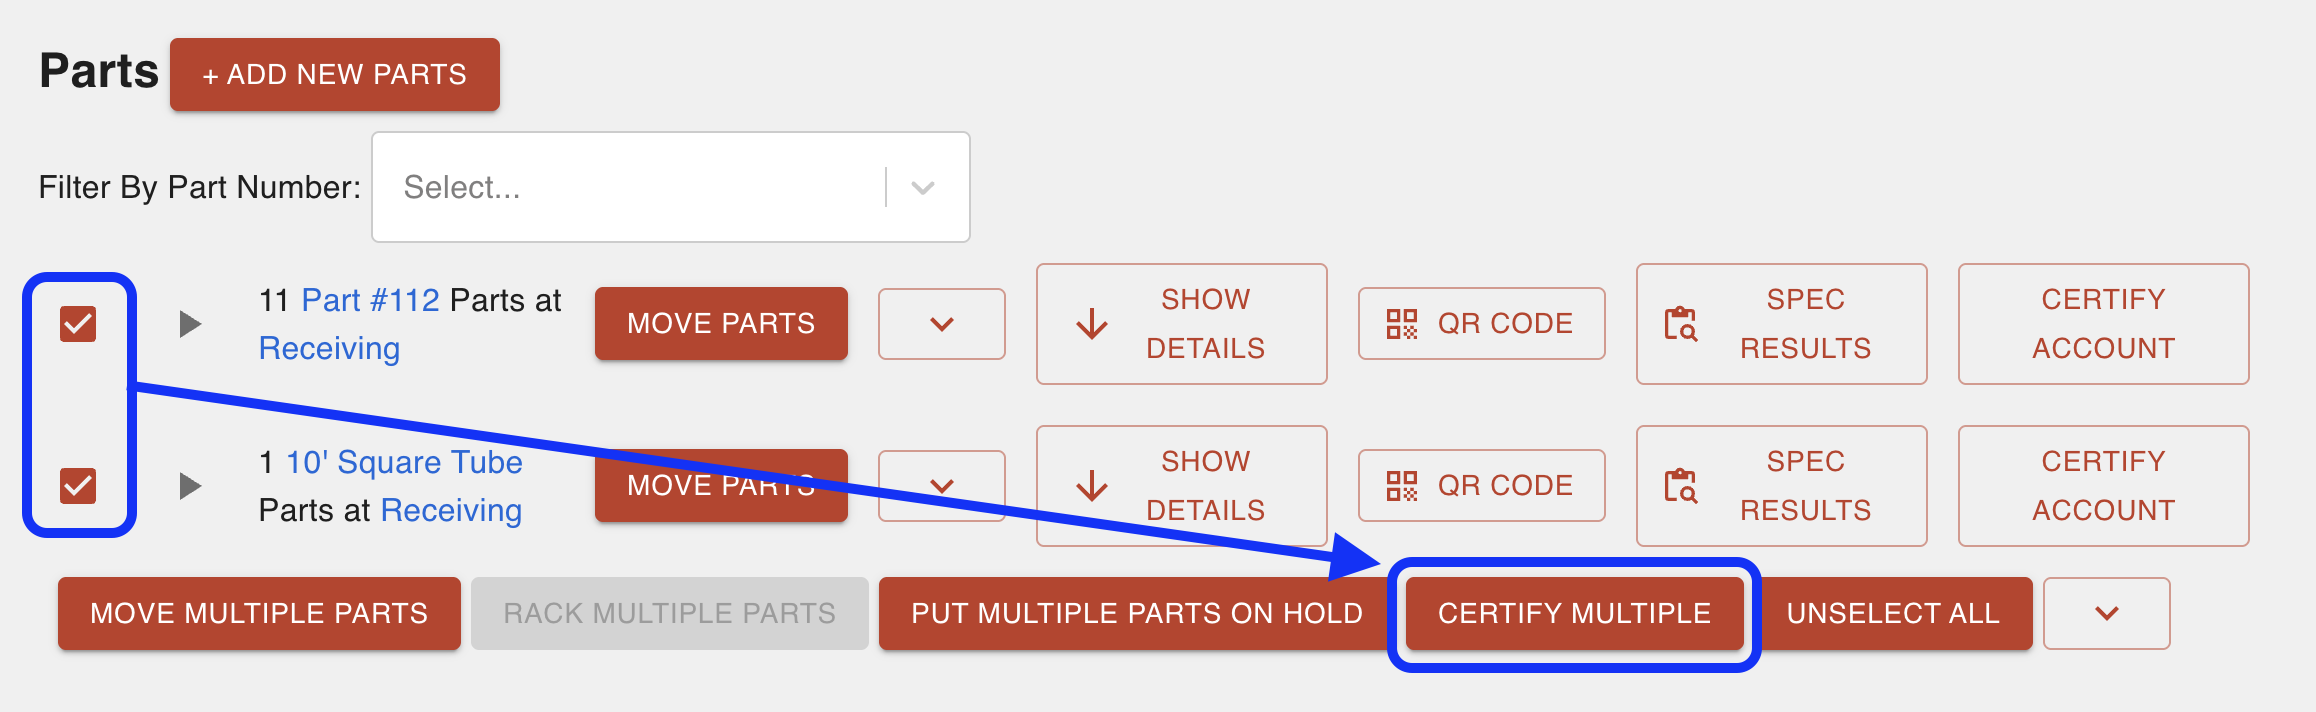
- Or, you can click the checkboxes next to the Parts you want to certify and click CERTIFY MULTIPLE.
- You can click CREATE CERT in the top section of the Work Order page (this is a blanket Cert that will include all Part Accounts on this Work Order),
Fill in the Create Certification dialog. As you input information on the left, a preview will pop up on the right.
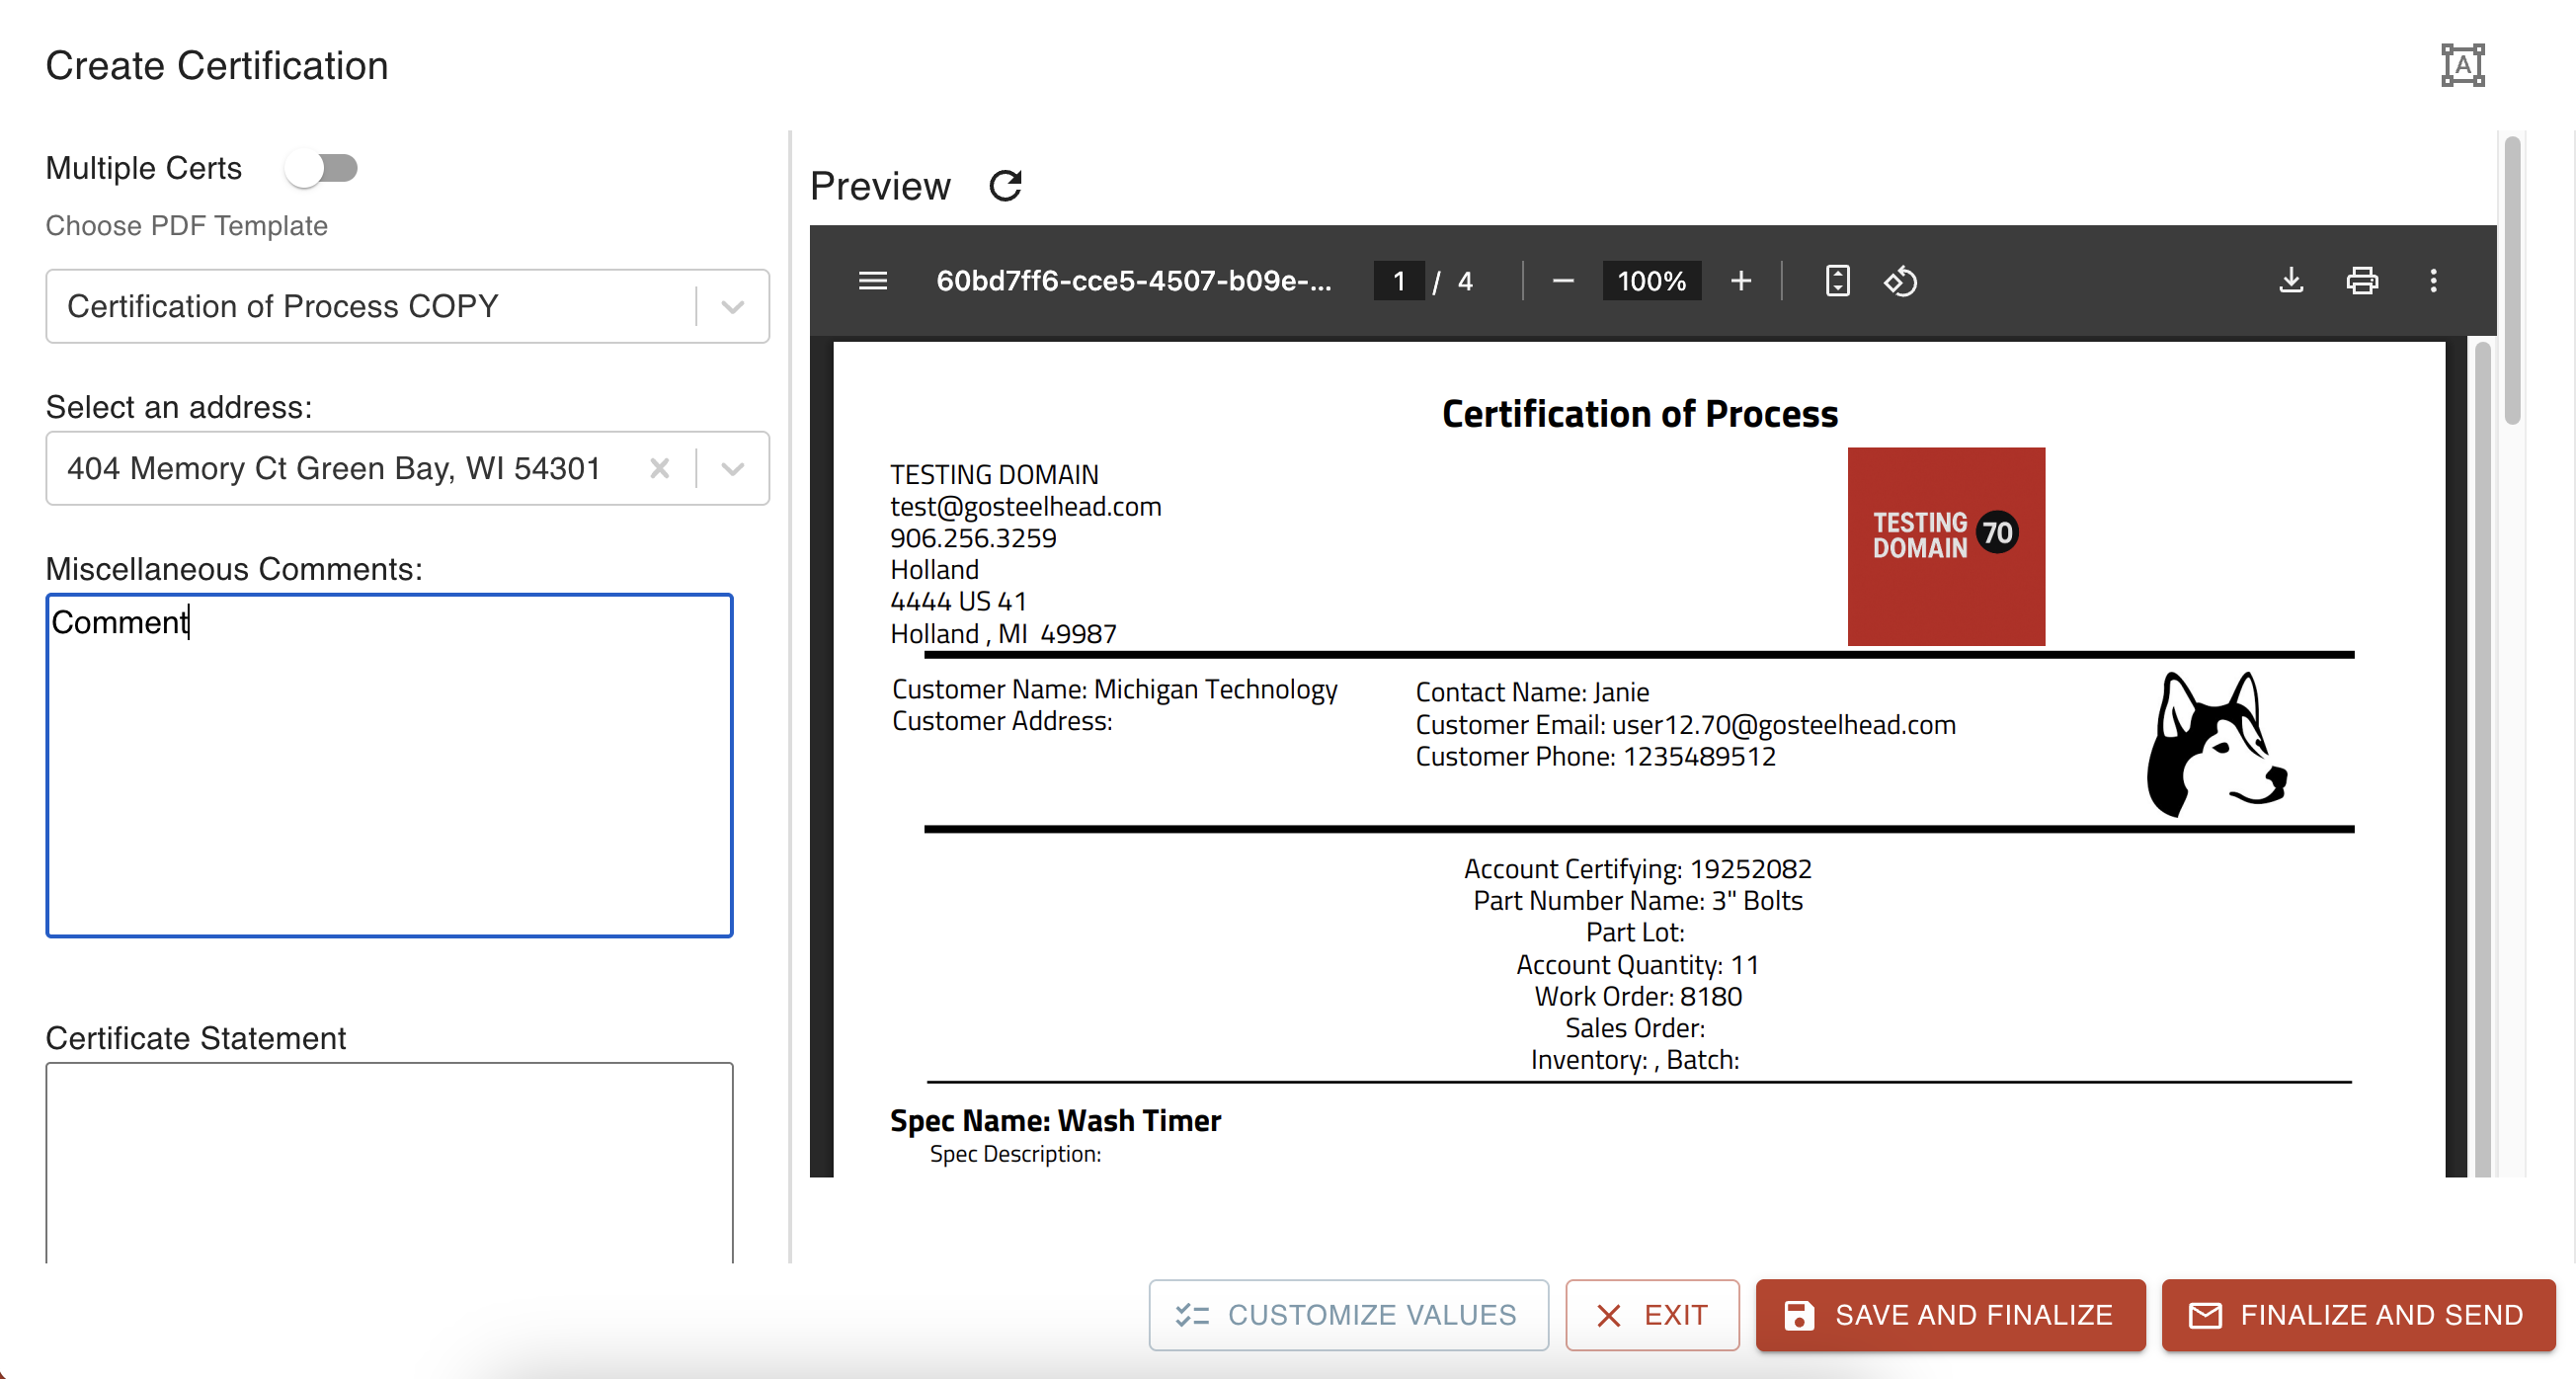
Select a template and an address.
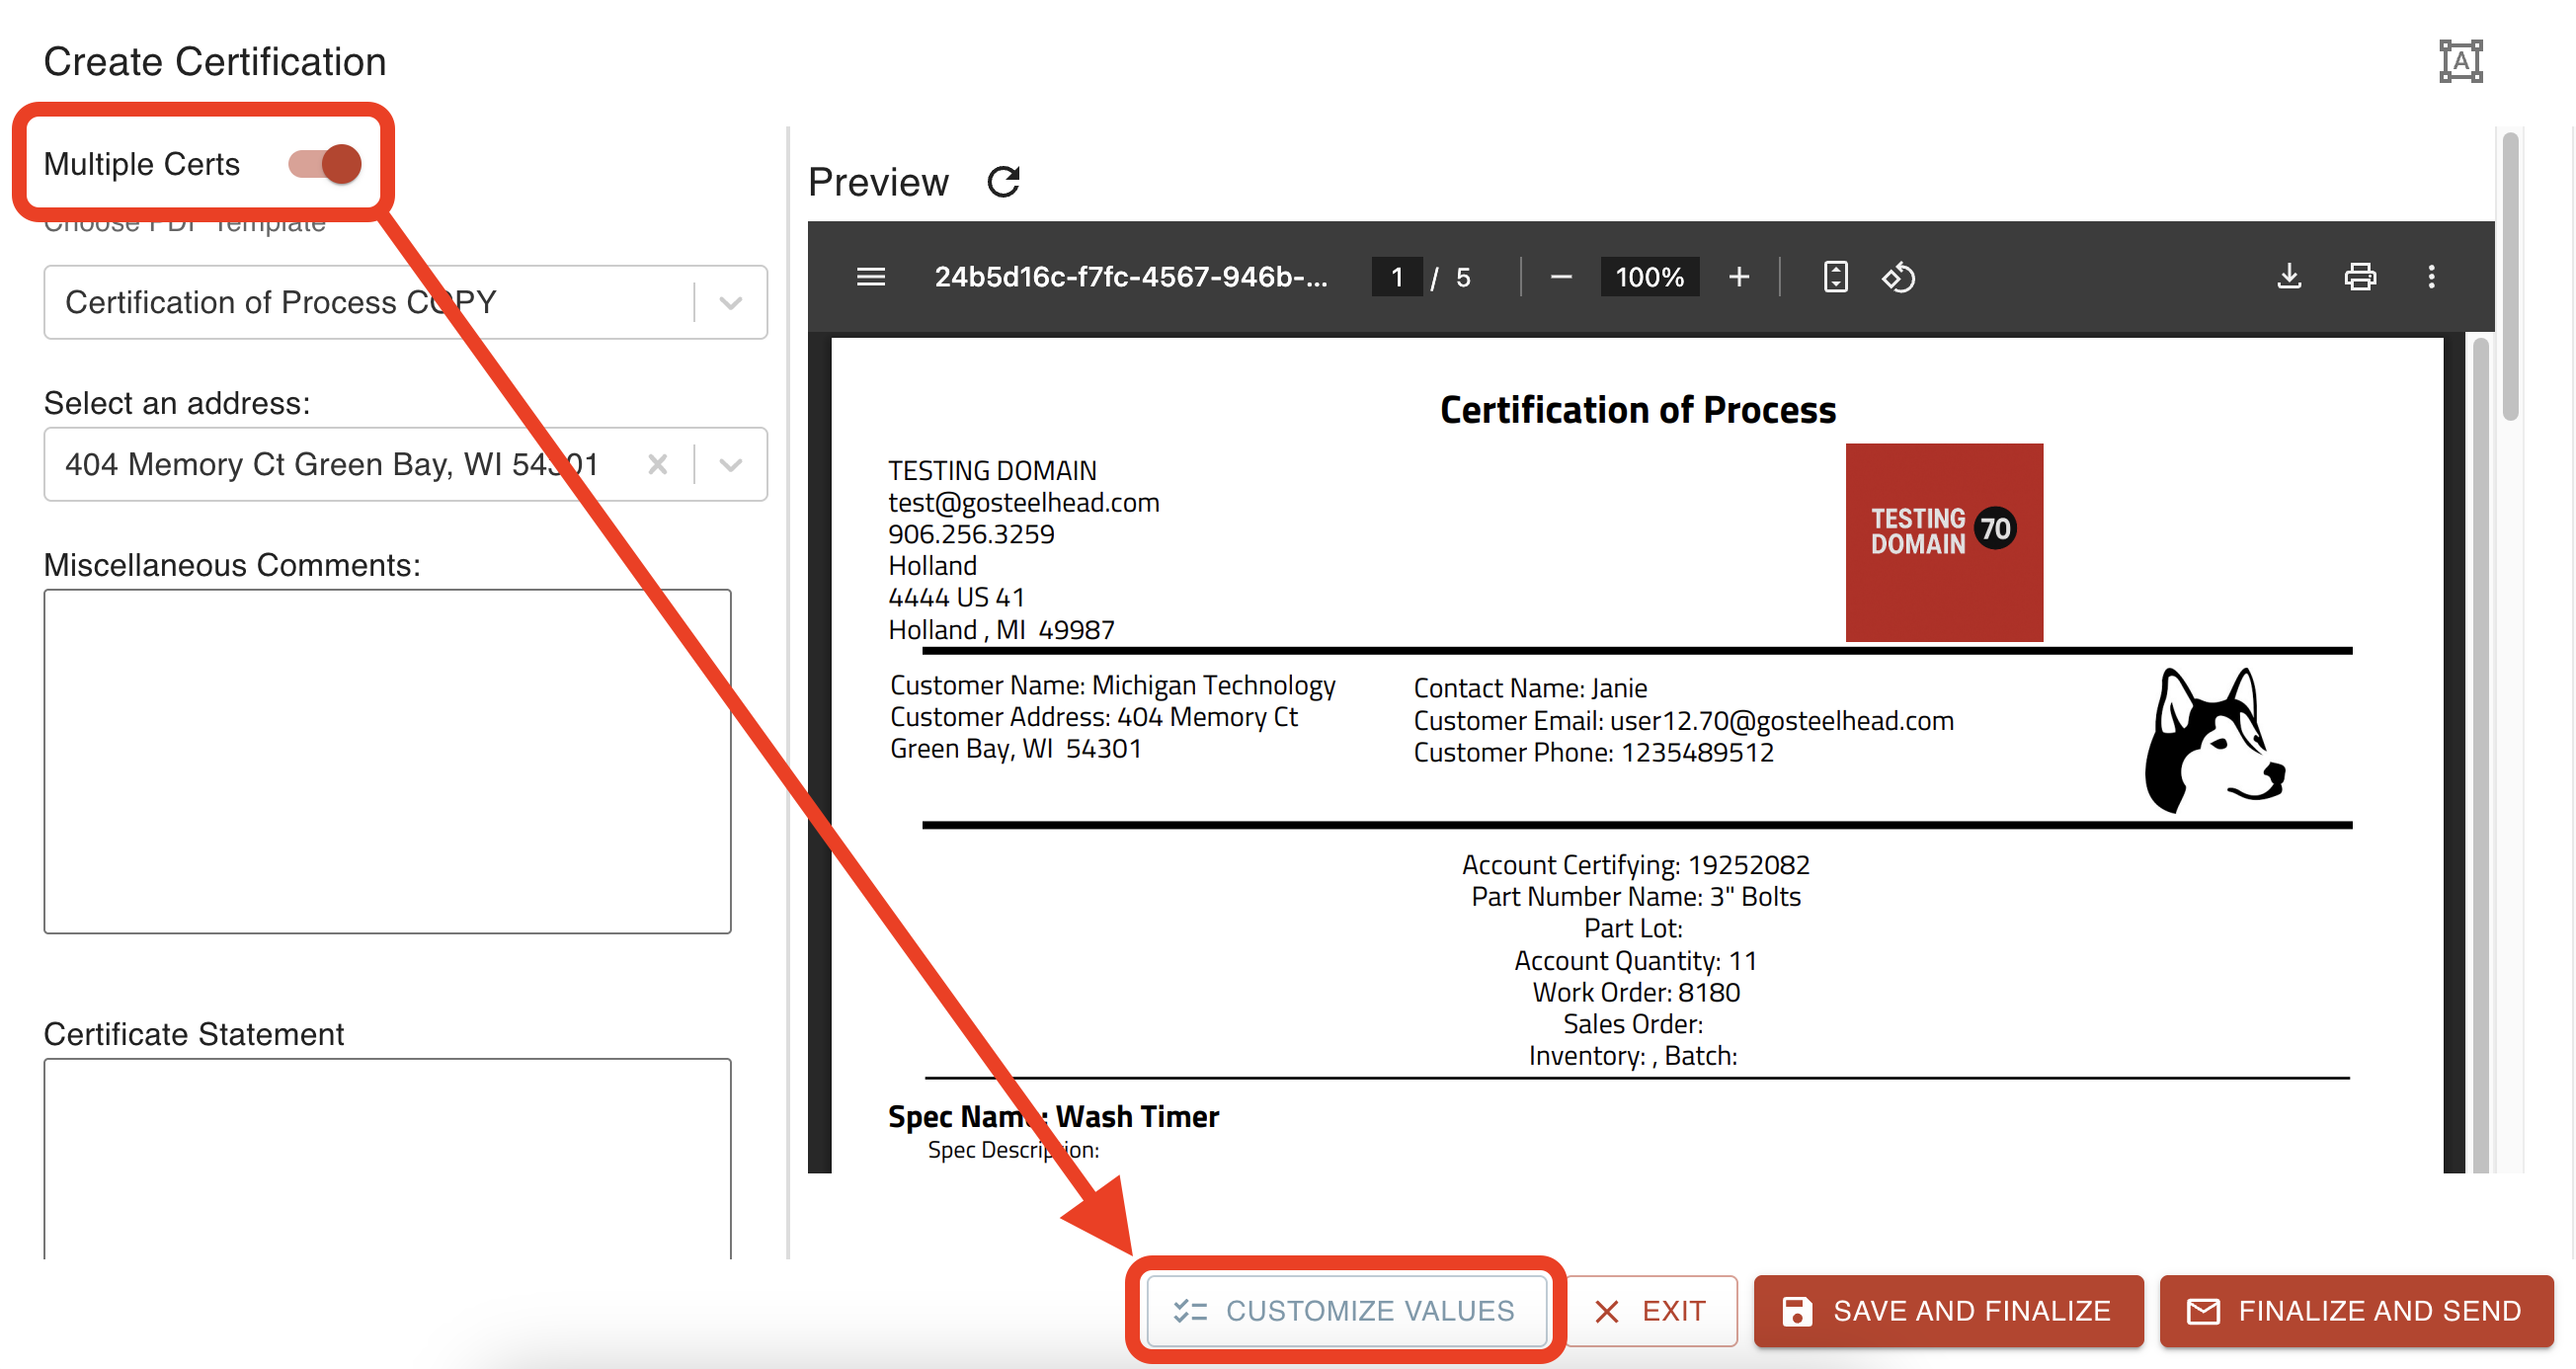
Toggle on the MULTIPLE CERTS switch to separate Parts onto different Certs and click CUSTOMIZE VALUES.
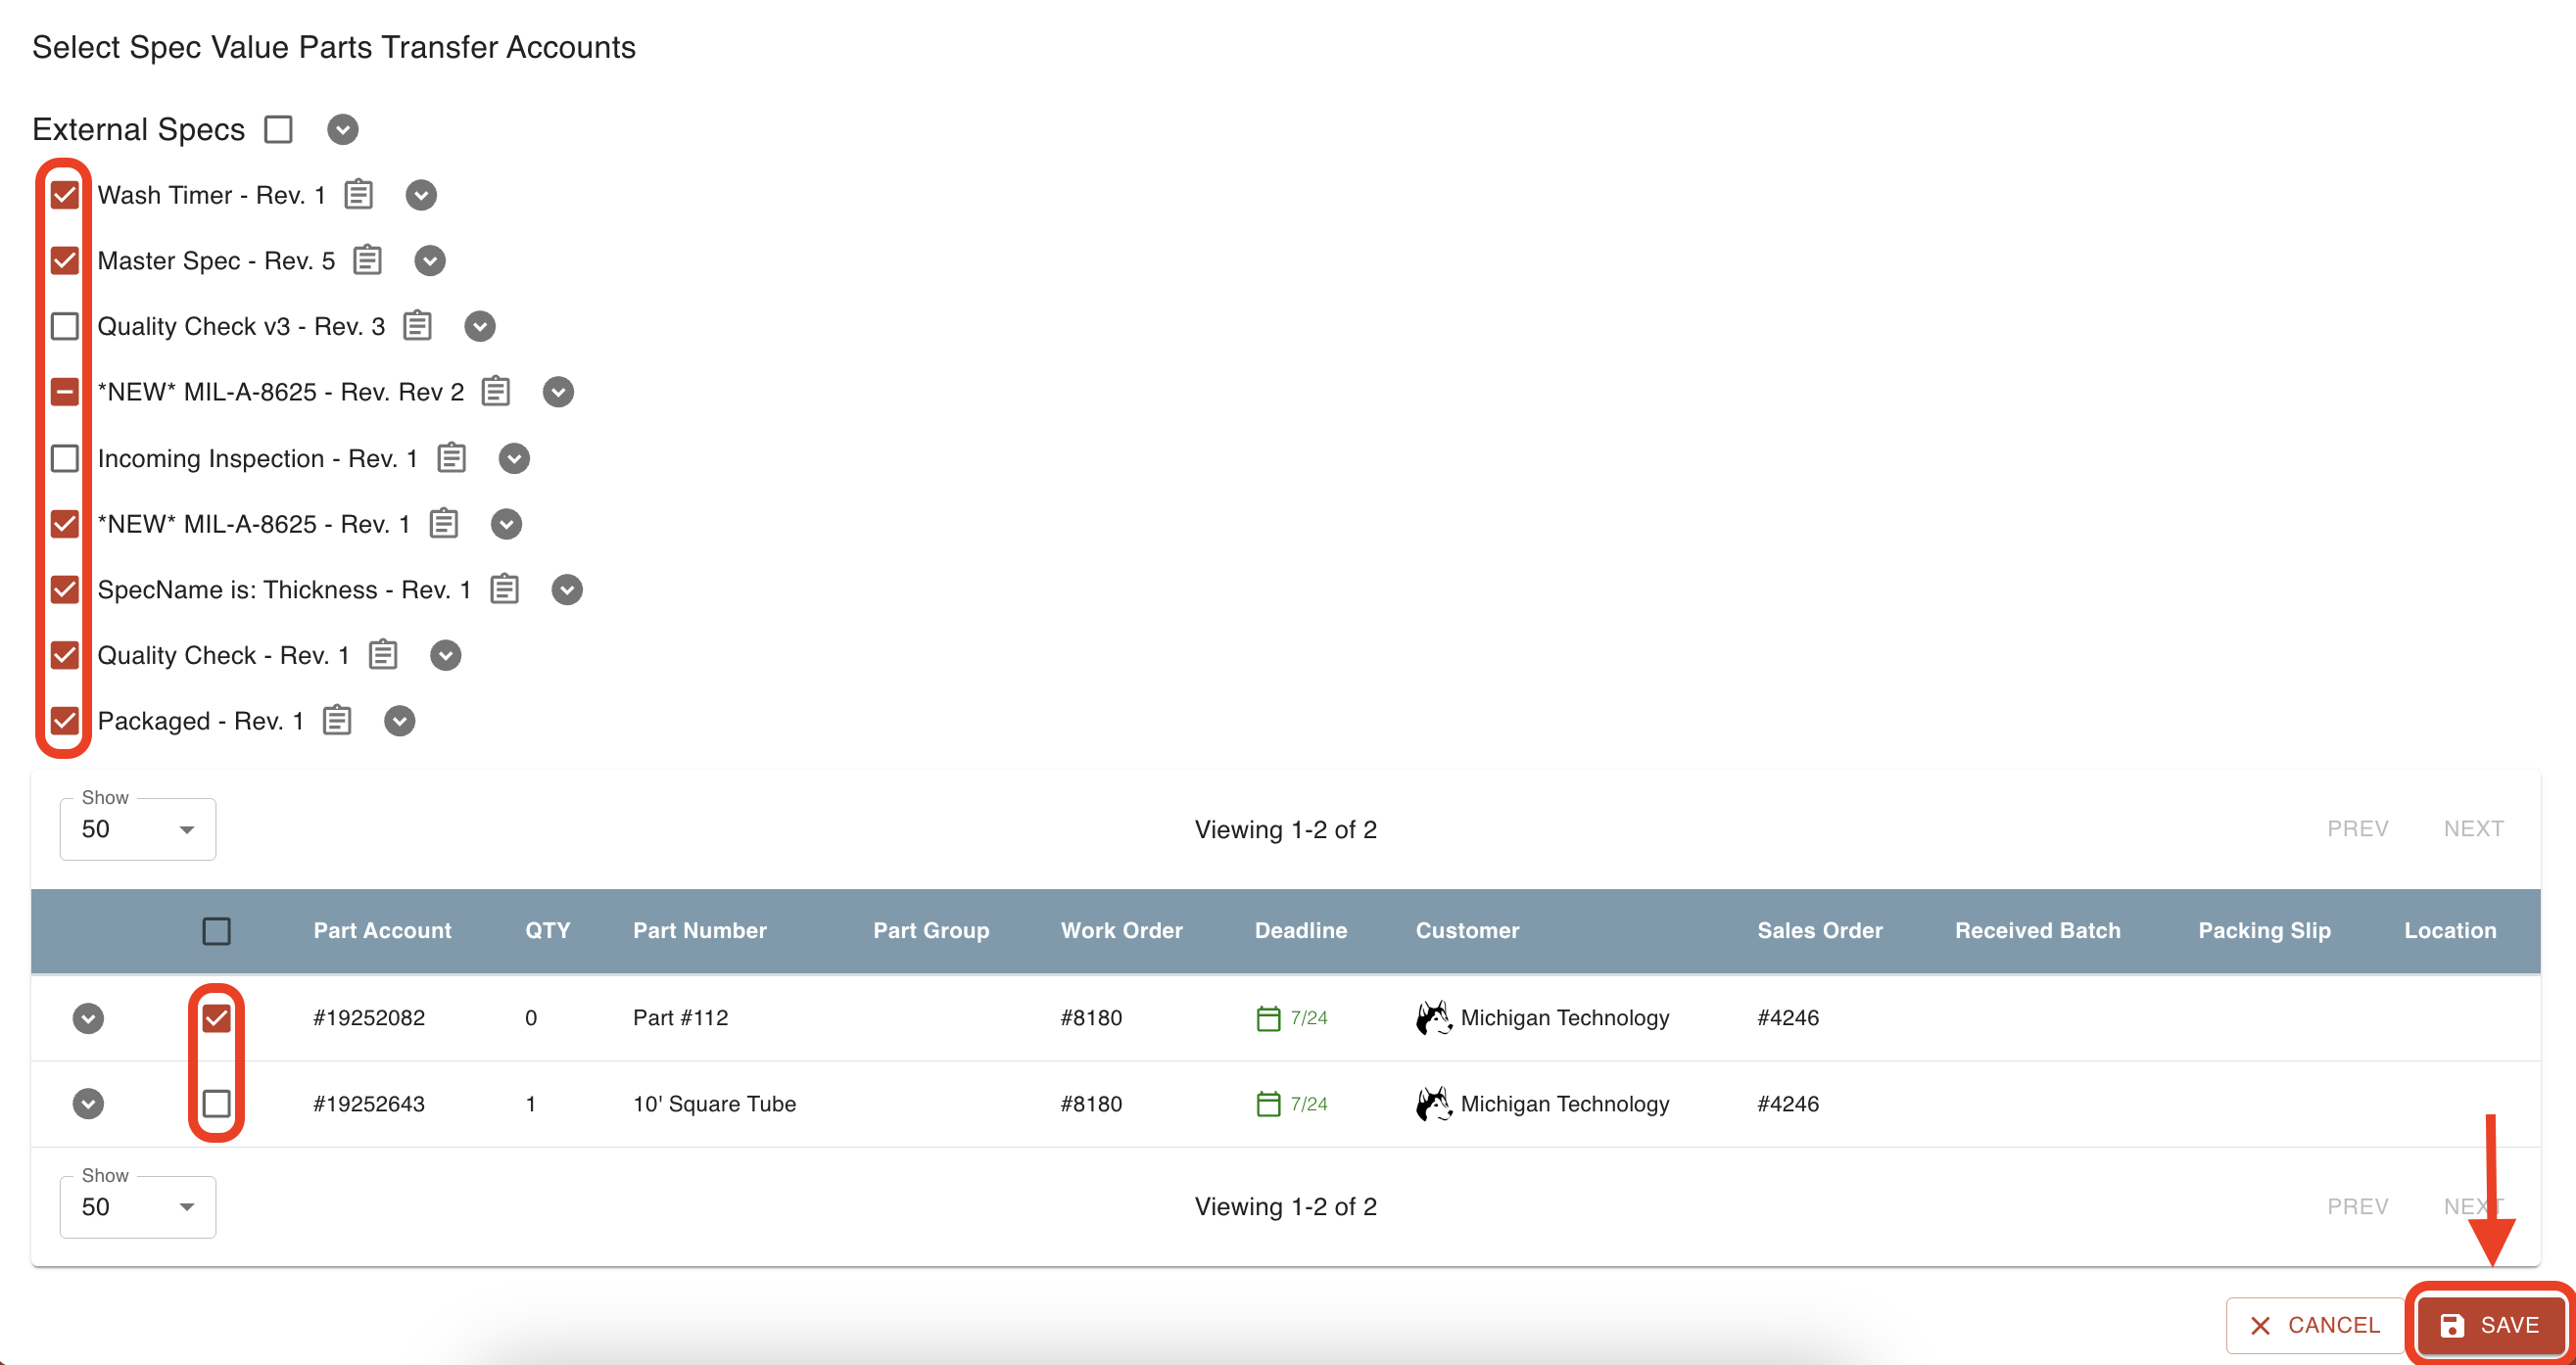
Here you can decide which values to include on your Cert. Use the checkboxes to add or remove values, then click SAVE.
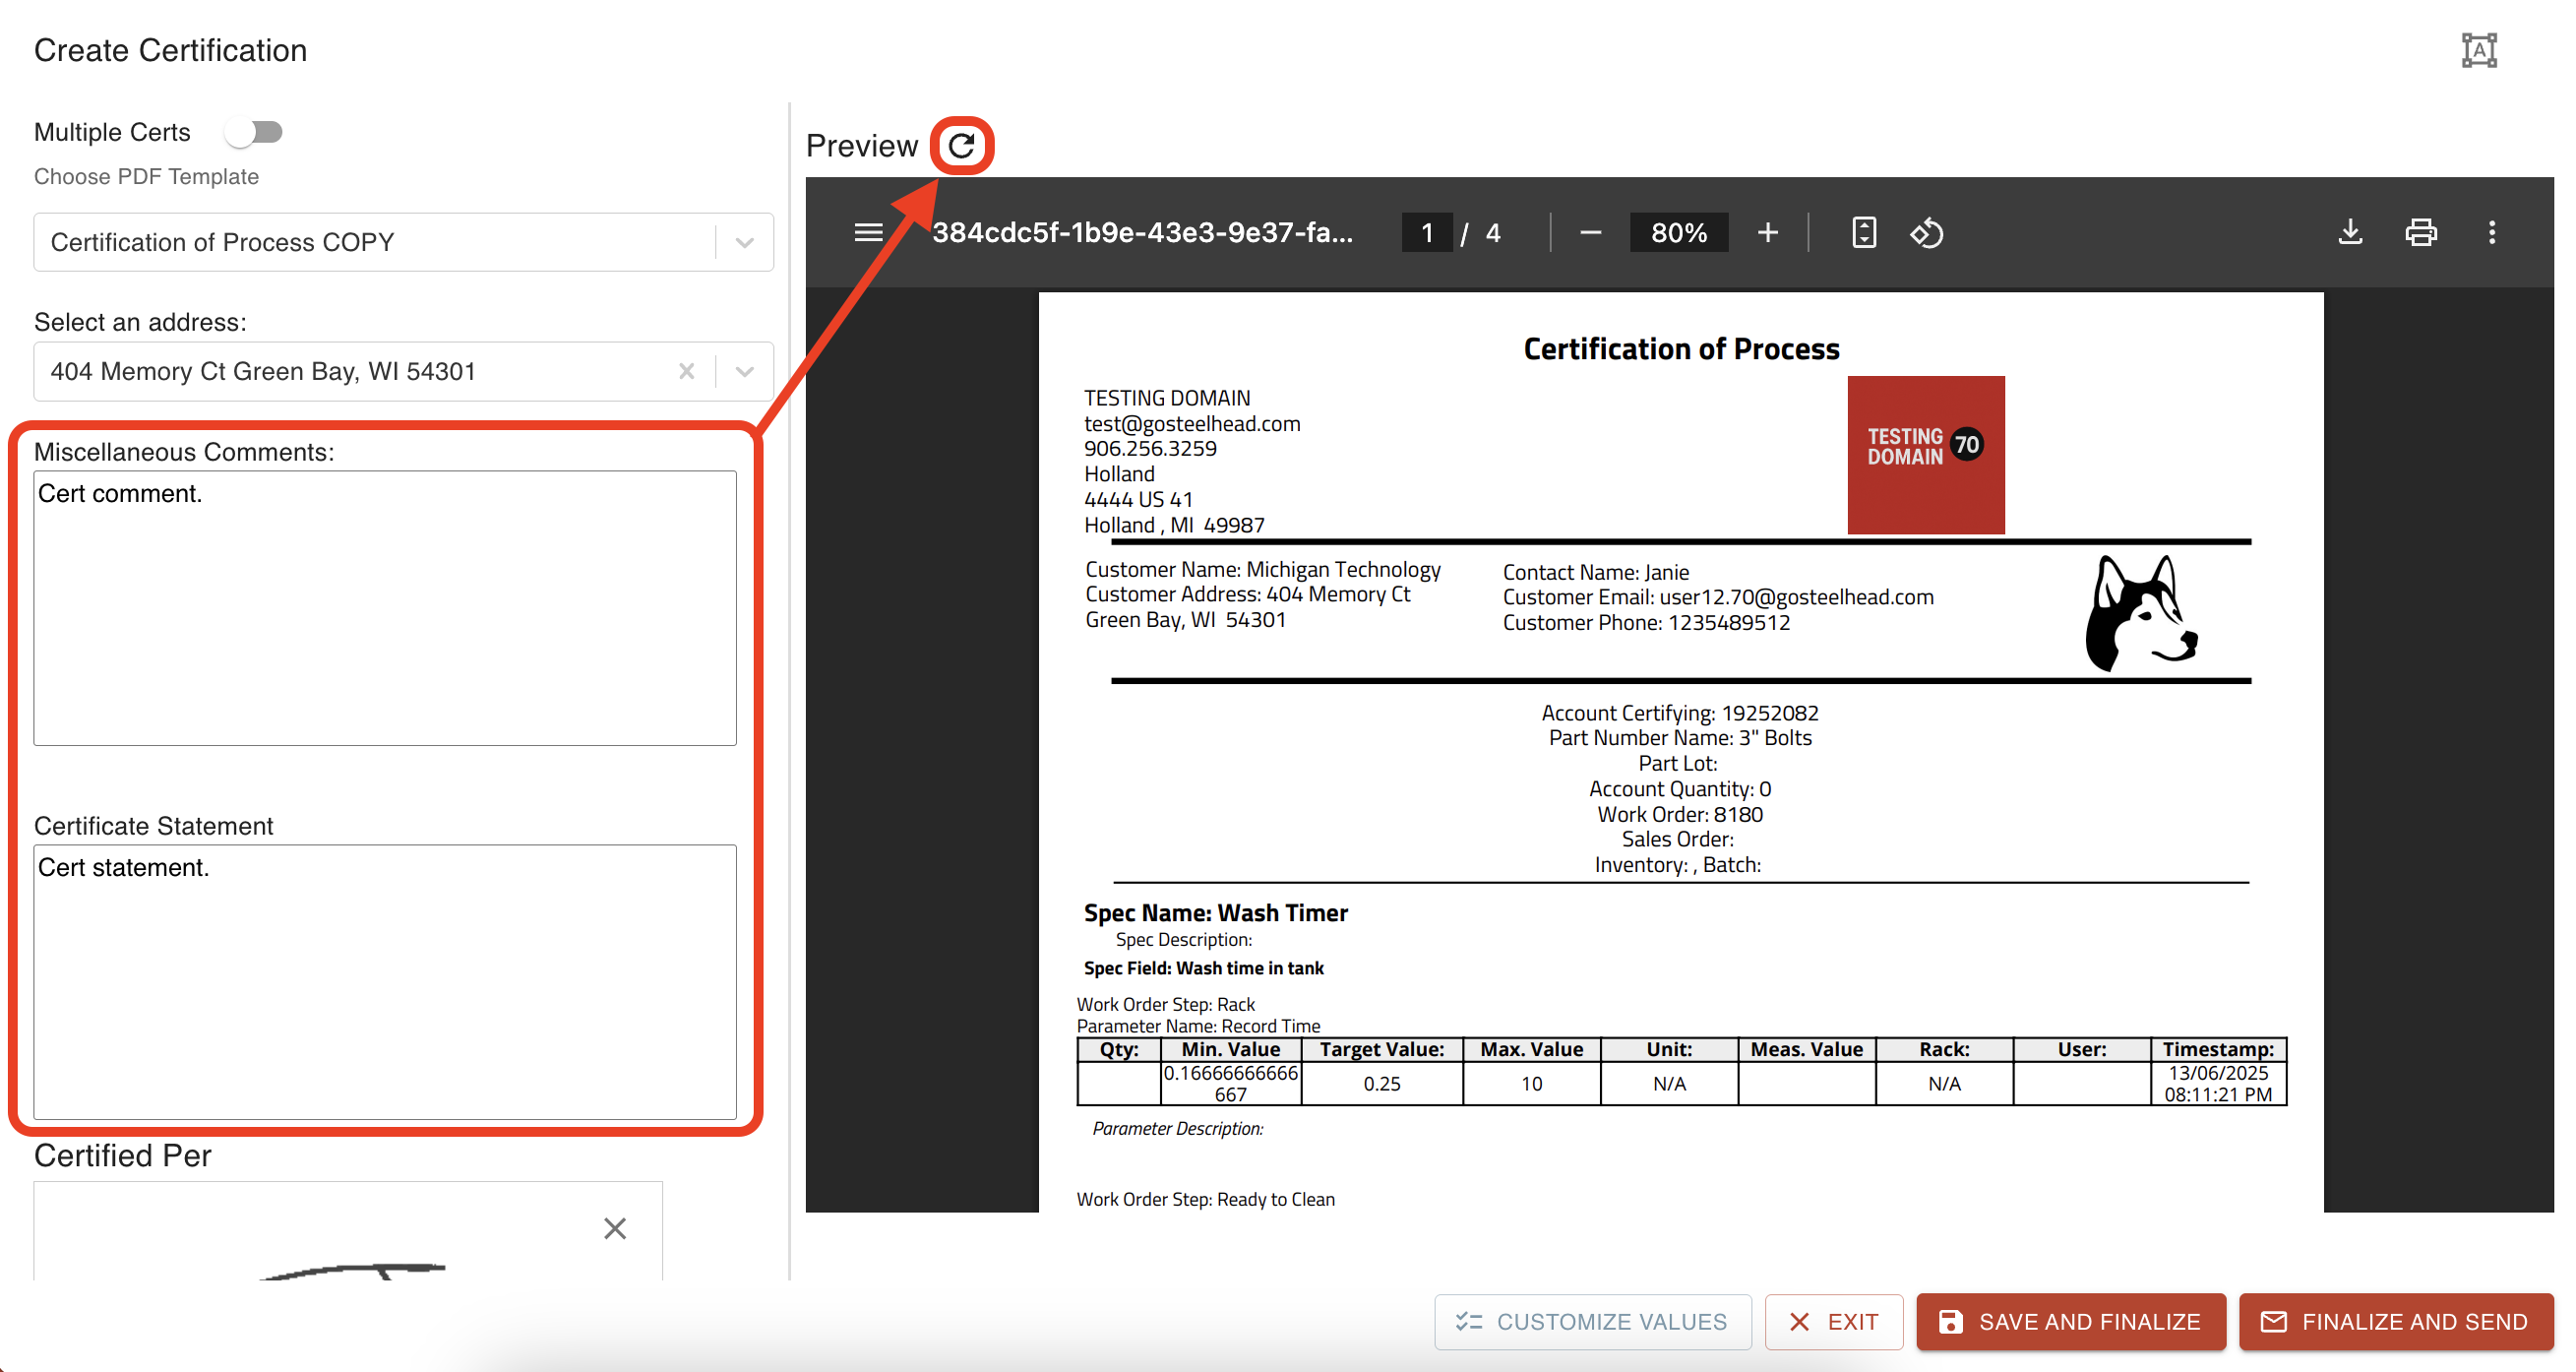
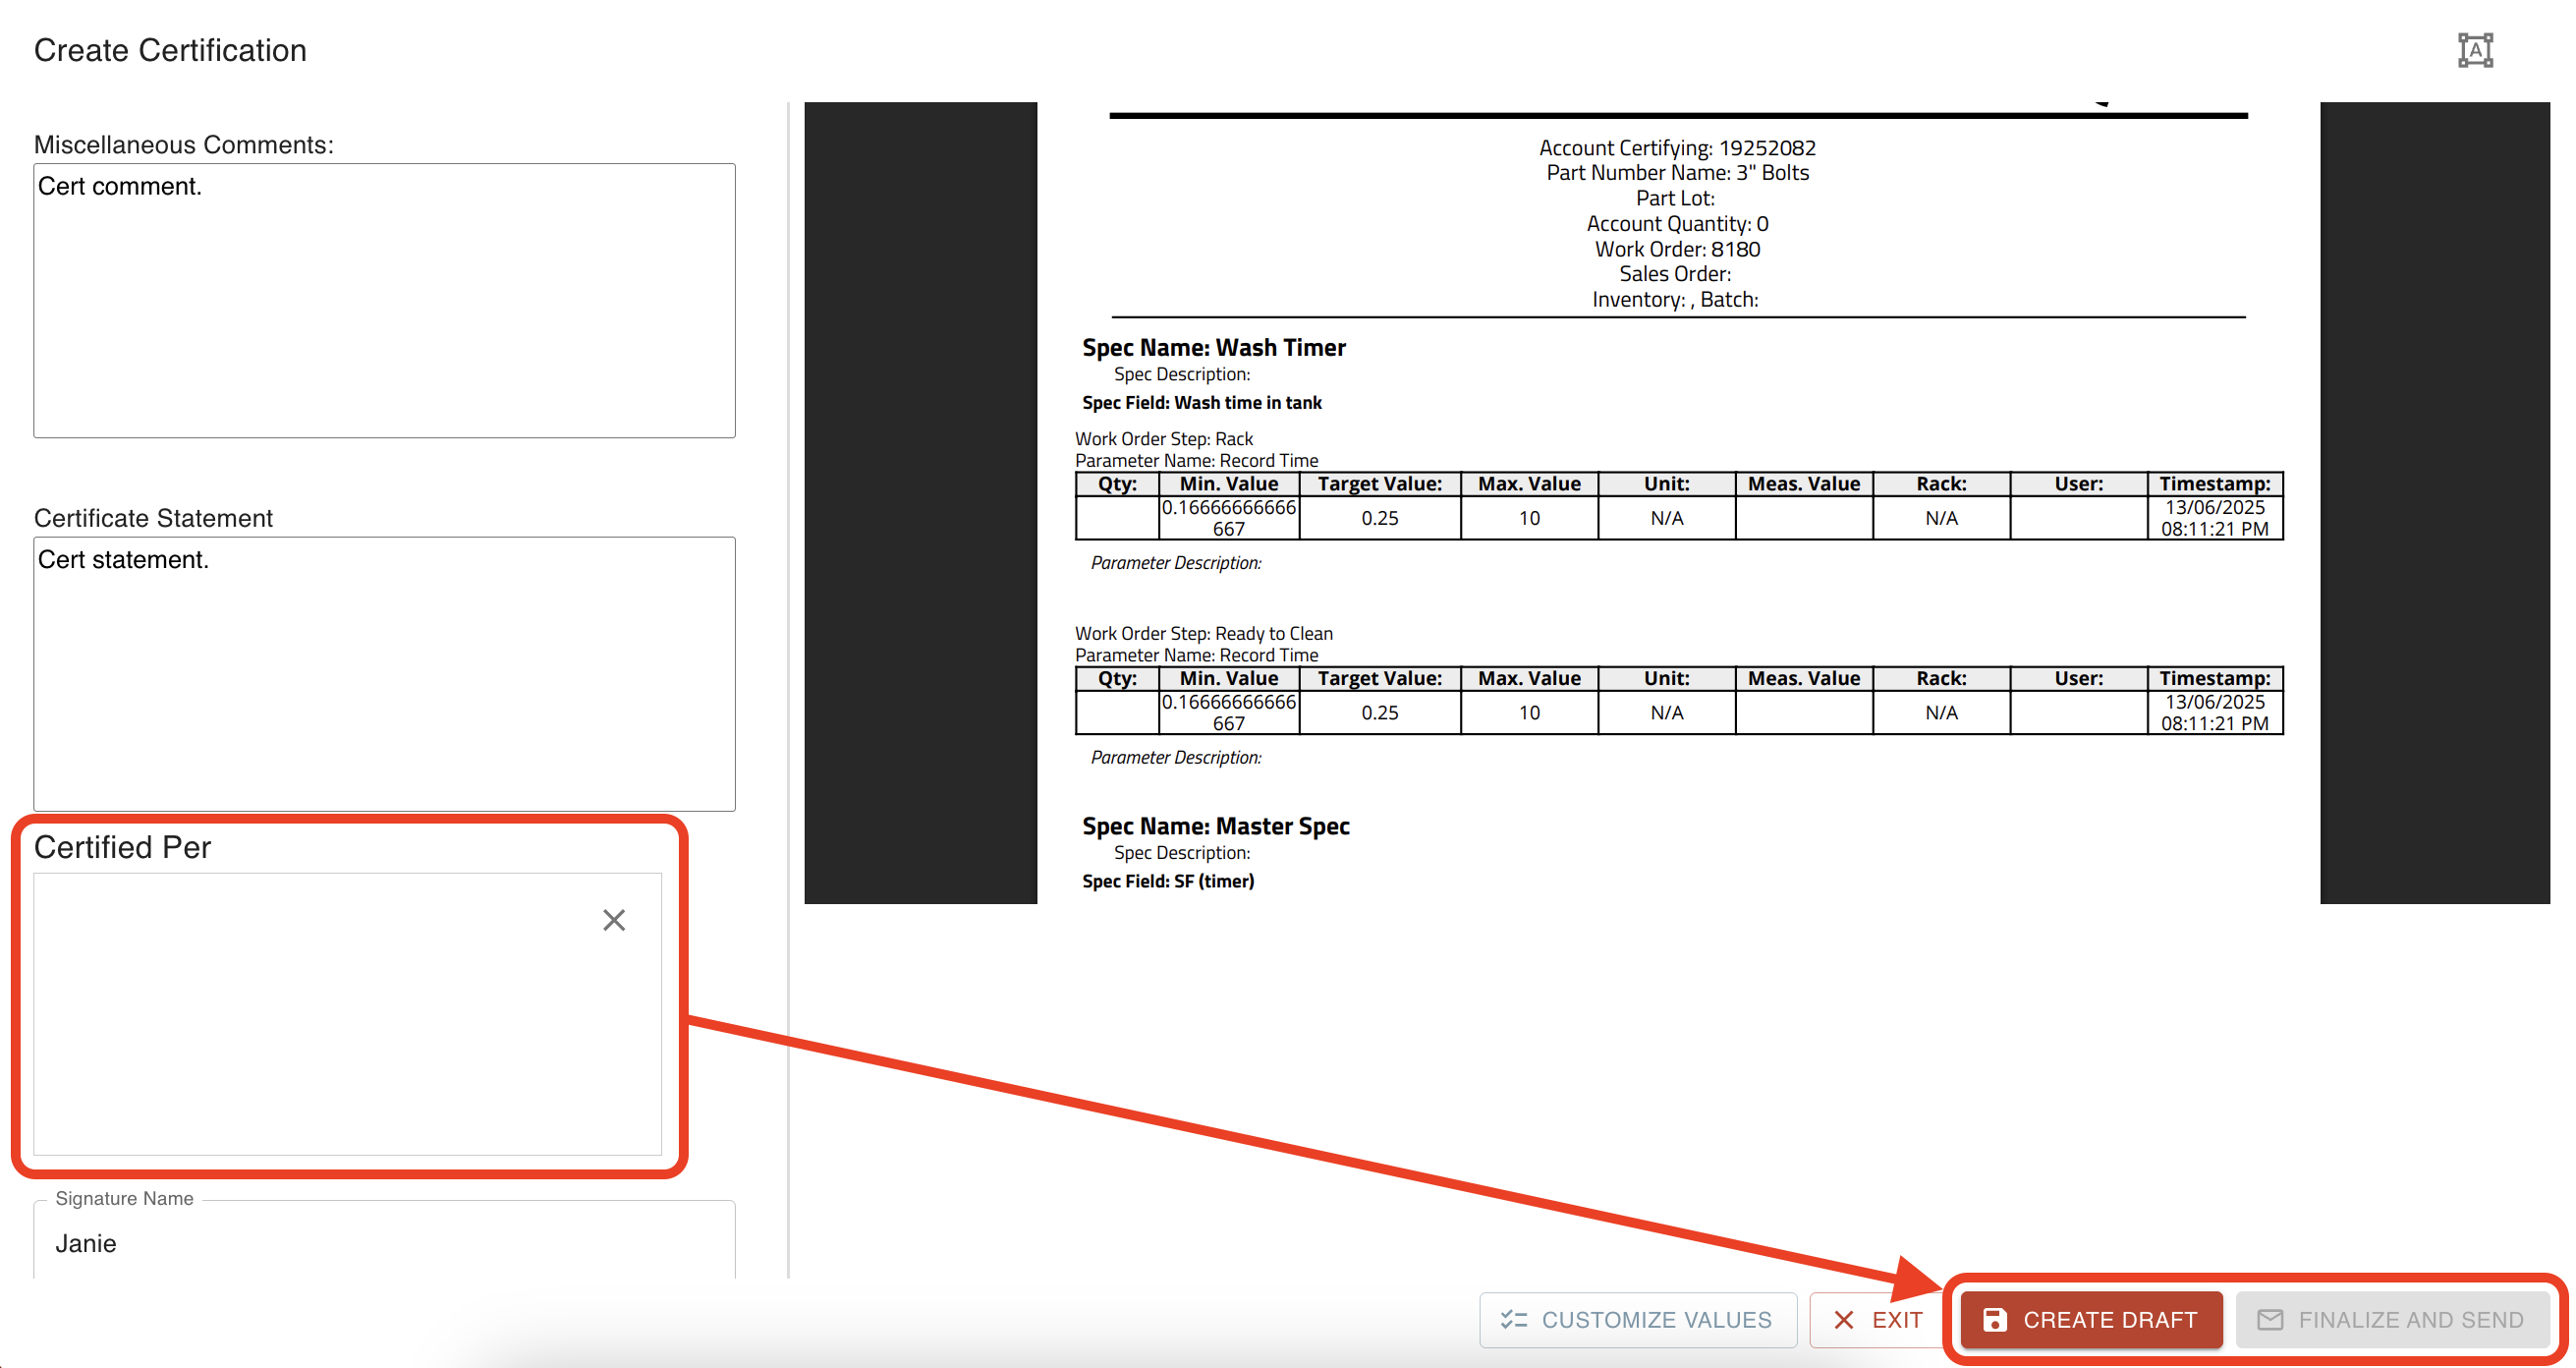
Add a Certificate Statement and any Comments you'd like to include, then click the arrow to refresh the preview.
Without a signature, you cannot Create and Finalize. You have the option to Create a Draft to come back for a signature later.
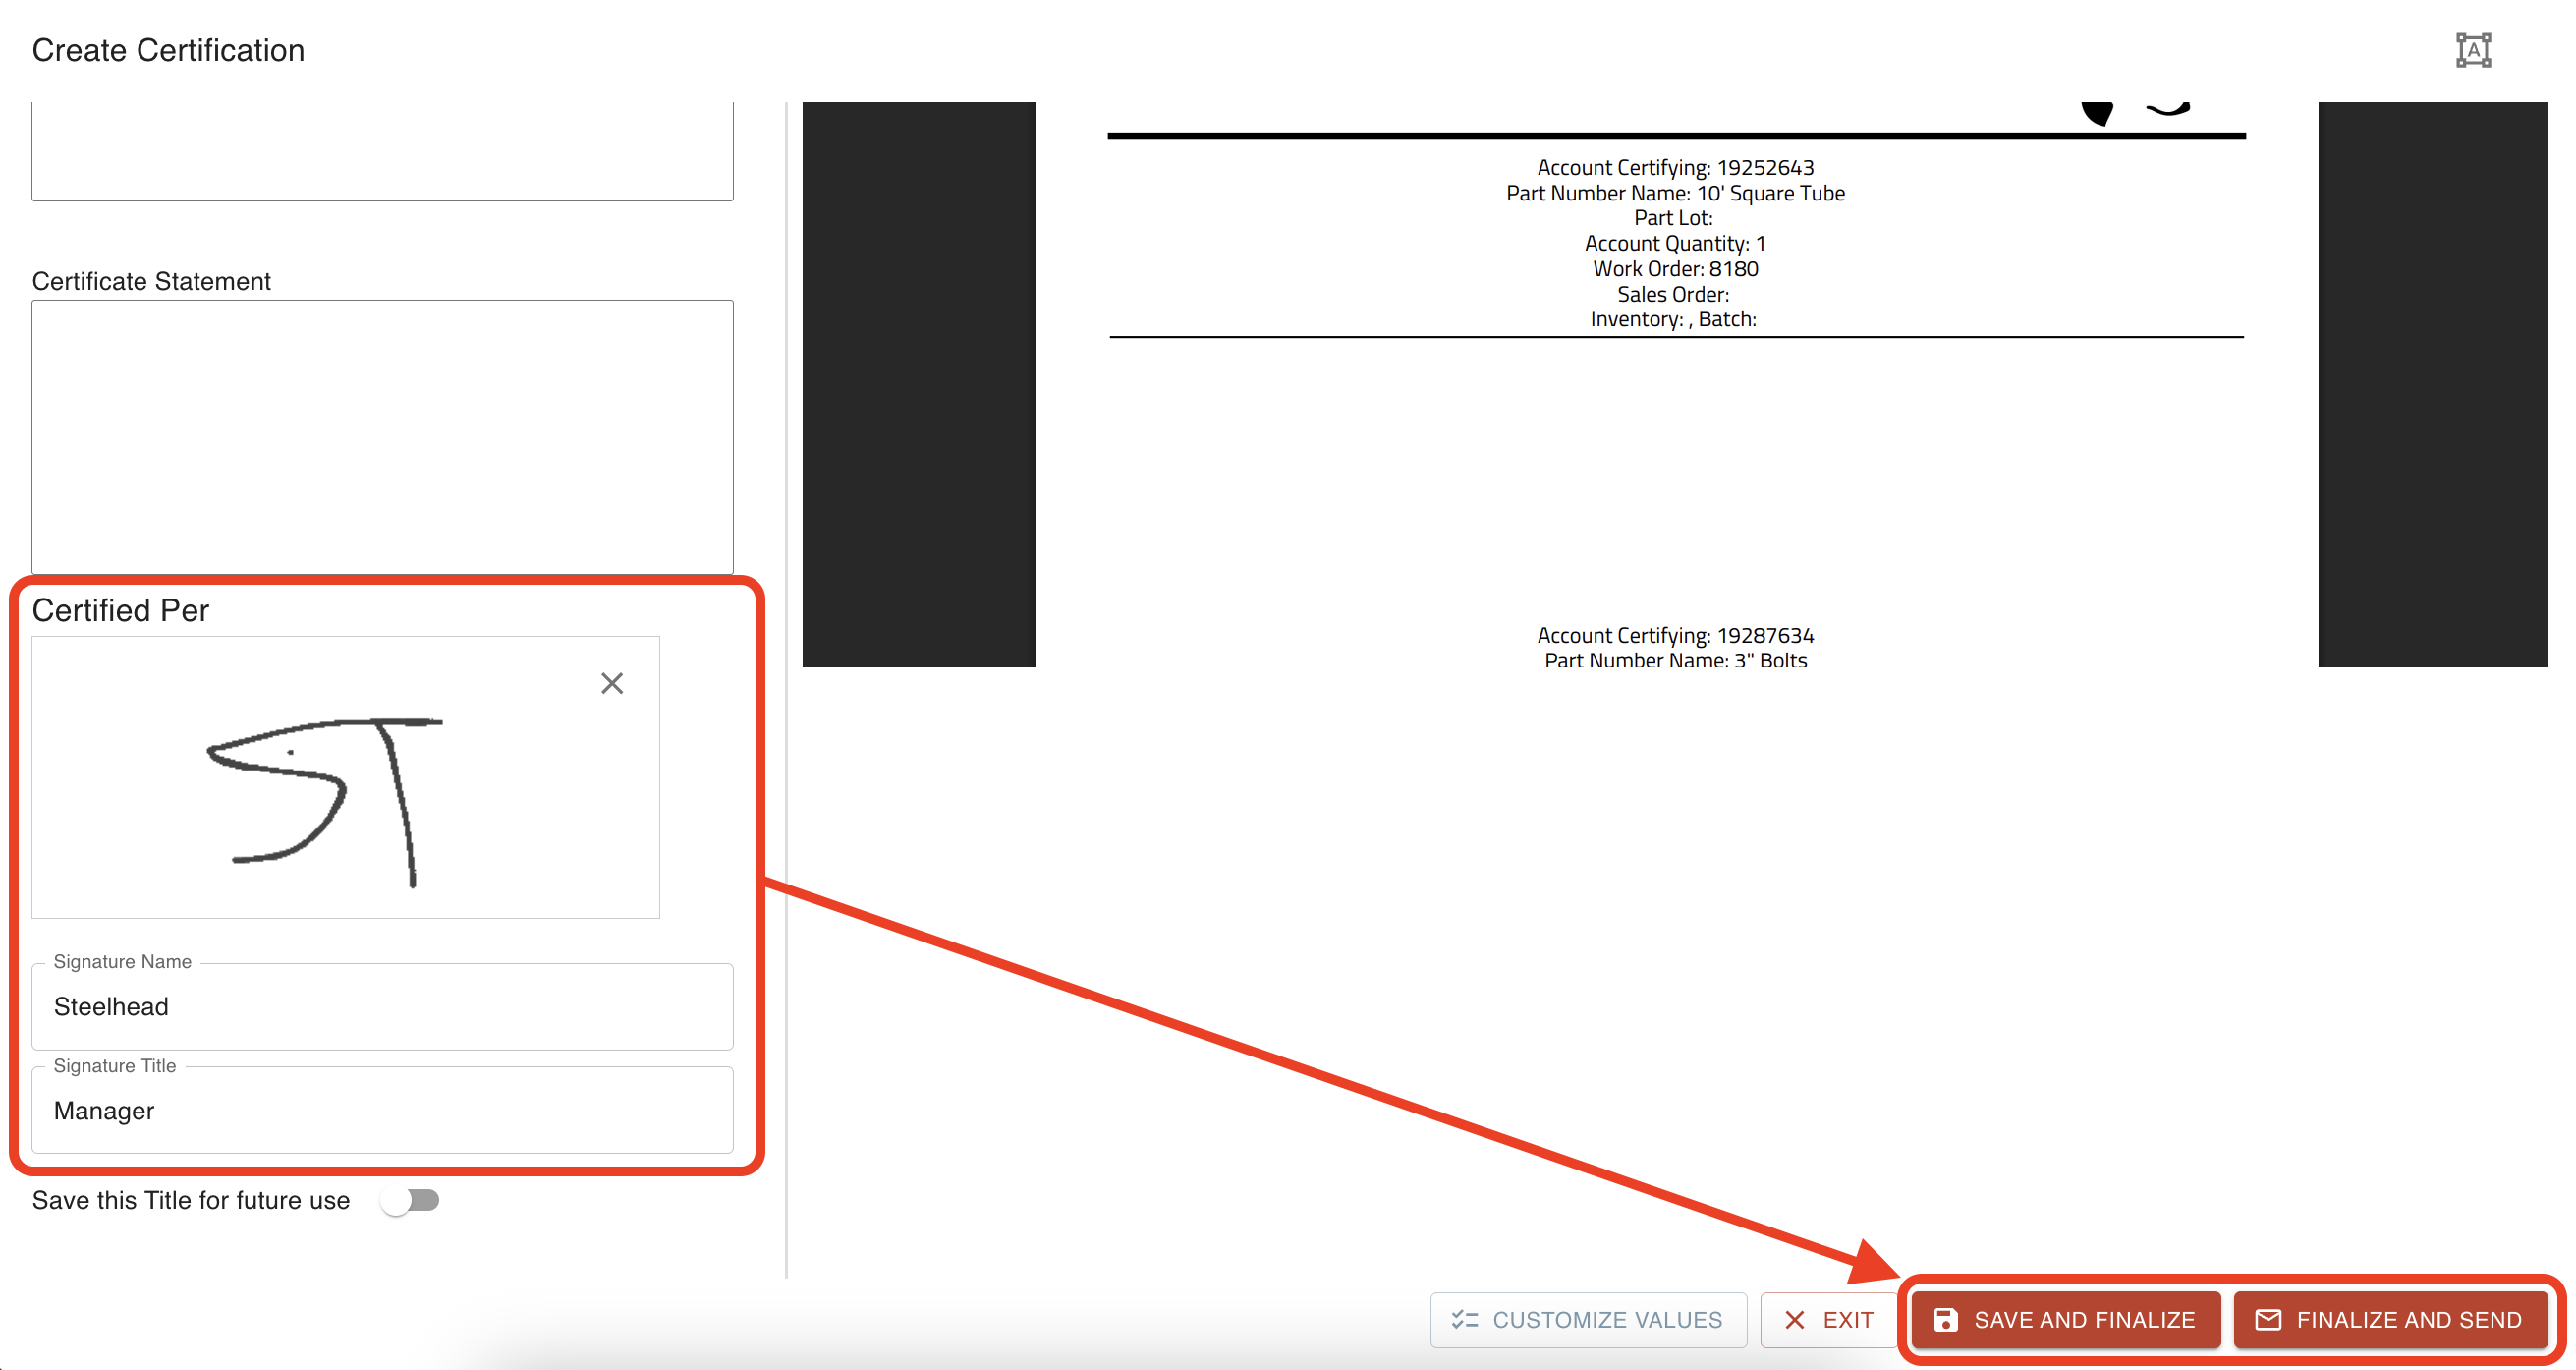
You may also sign the document, add a Signature Name and Title, and attach any relevant documents. After signing, you can click Save and Finalize.
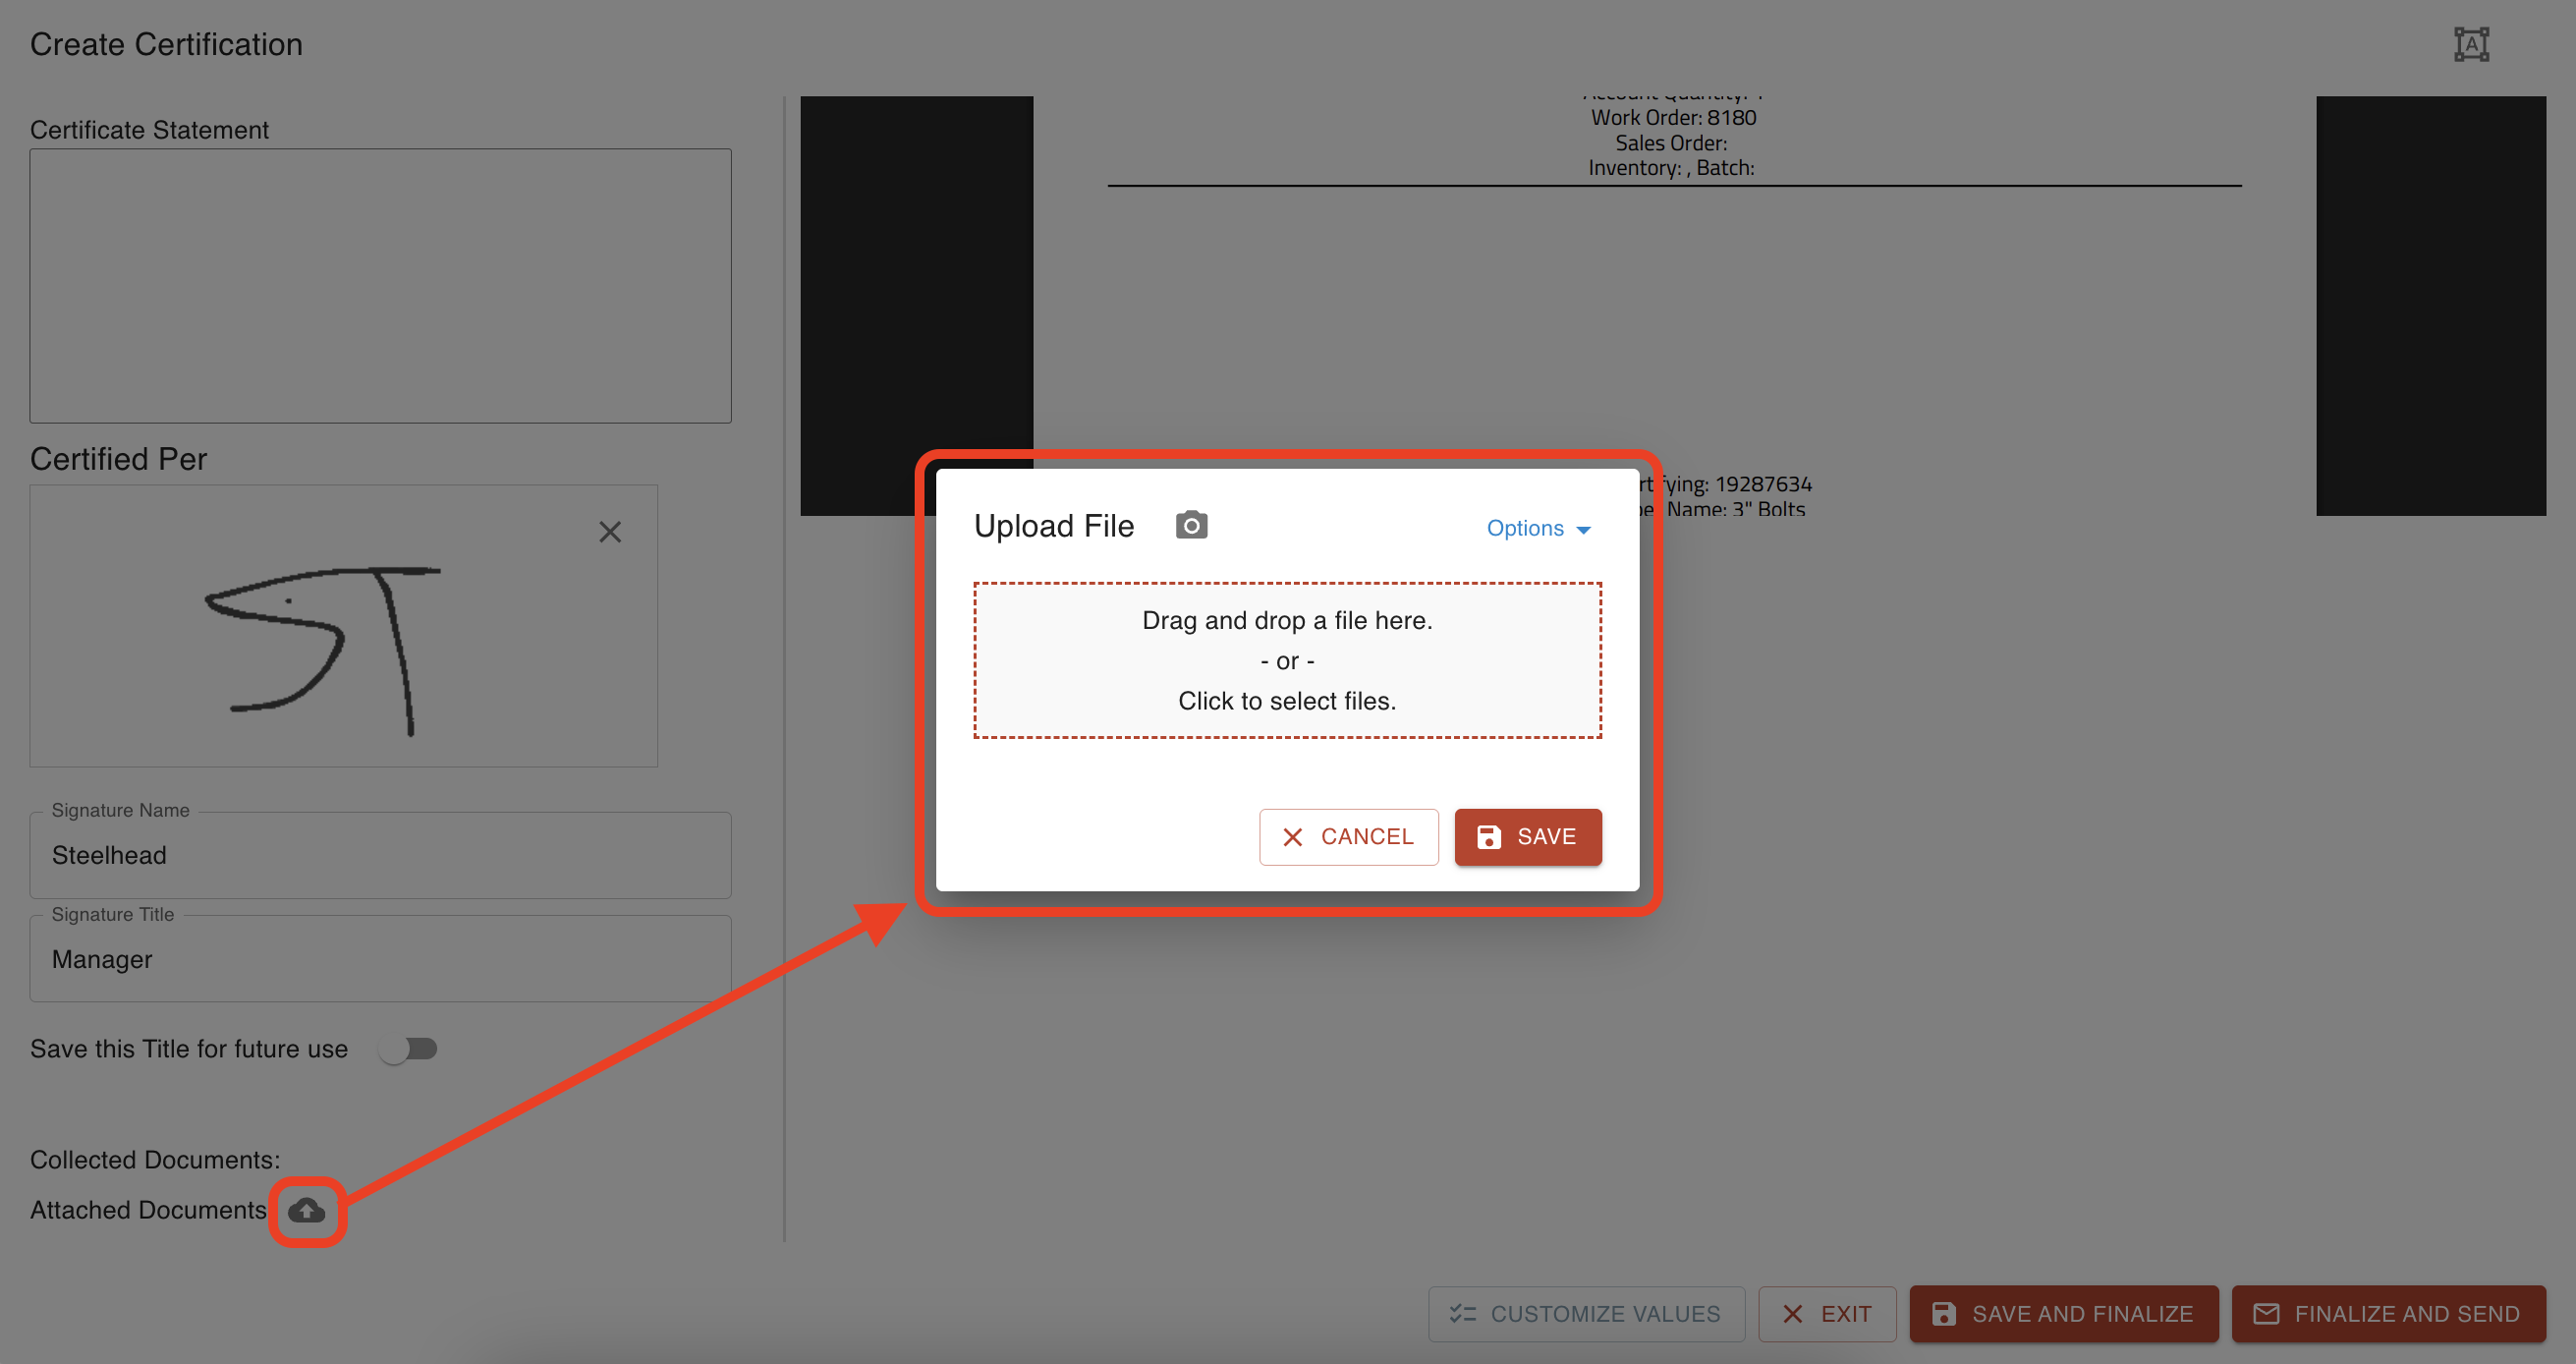
Upload files and click "SAVE".
Was this article helpful?