Shipping Containers
- Print
Shipping Containers
- Print
Article summary
Did you find this summary helpful?
Thank you for your feedback!
How to Containerize
Here's an example of how to Containerize your Parts. Starting with some groundwork, this feature begins in Racks.
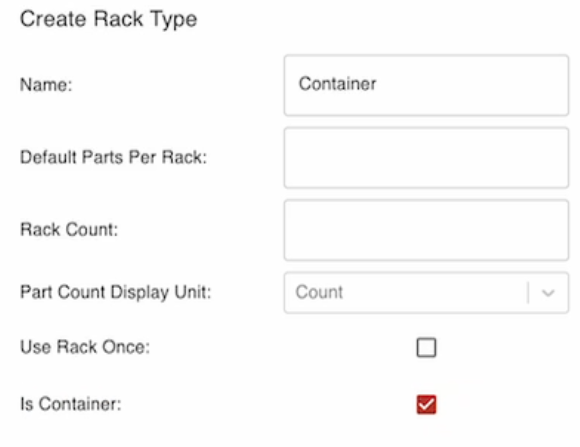
- First, create a new Rack Type.
- We'll call it "Container", and we need to click the checkbox called "is Container":
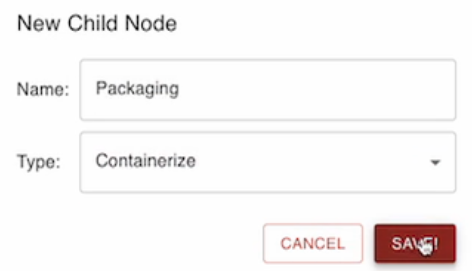
- Save, and then add a new Process Node to the Process that you want to Containerize your Parts from.
- We'll use "Simple Paint." Now go to +NEW CHILD NODE. We'll call it Packaging. And the Type must be Containerize:
- Once this is saved, it automatically goes to the end, so it's helpful to move it to the Node directly before Shipping.
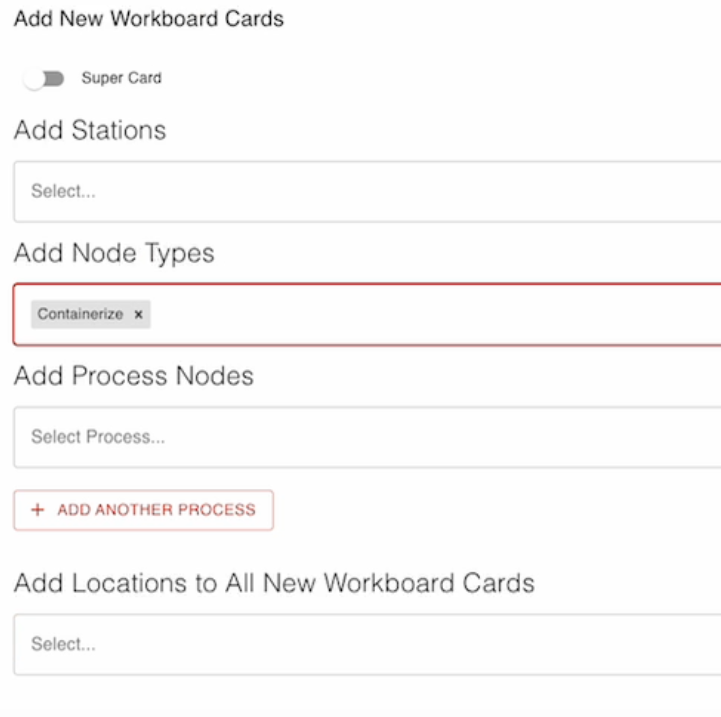
- Now the last step to properly set up this feature is to go to the Simple Paint Workboard and add a new Containerized Workboard card from the Node Type:
Best Practices
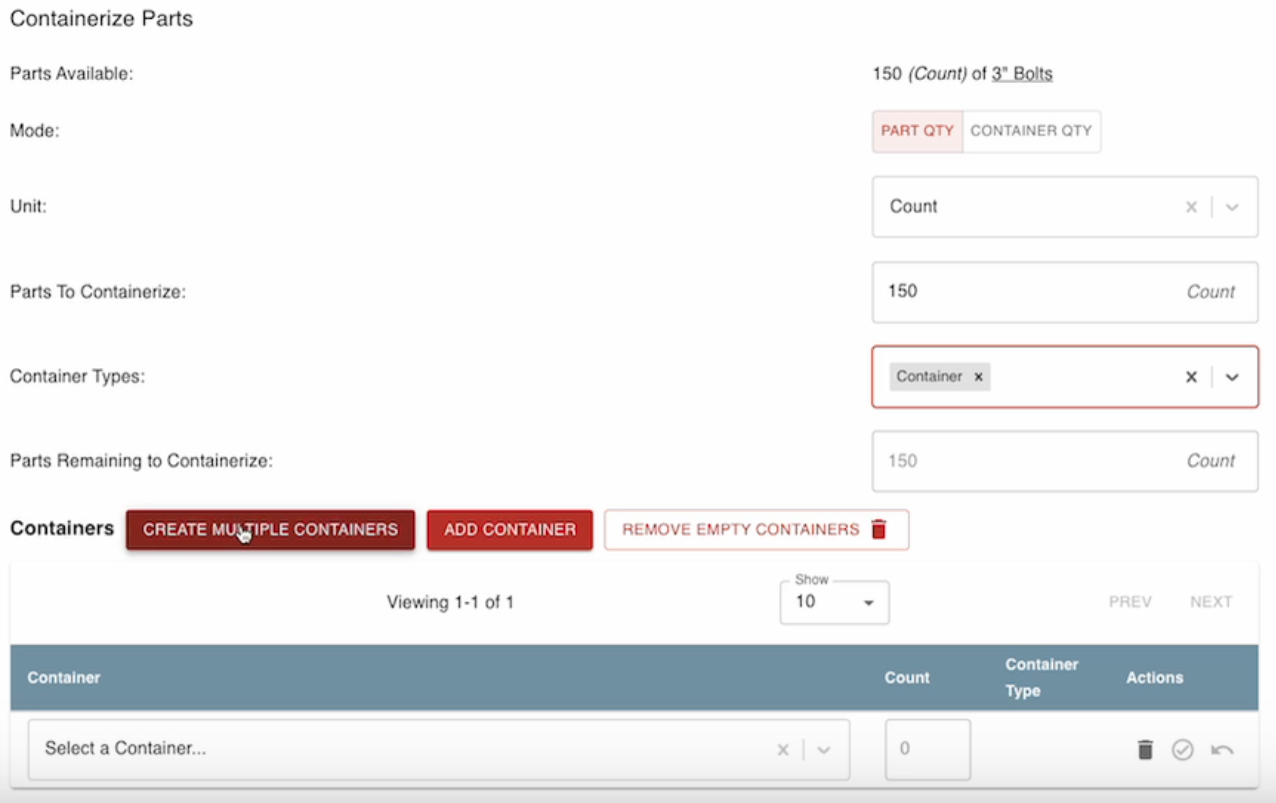
- We can move Parts in to the Containerize Node from the previous Node in the Process, and click this to Containerize the Parts.
- If you have more than one group of Parts, they will be grouped by their shipping address.
- Once Parts are selected, they can be Containerized all together, and we can also Containerize them into multiple.

Now the "Containerize" Rack Type that we created earlier can be used, we can put them into different Containers and we can also ungroup the Parts because they are currently grouped by the shipping address.
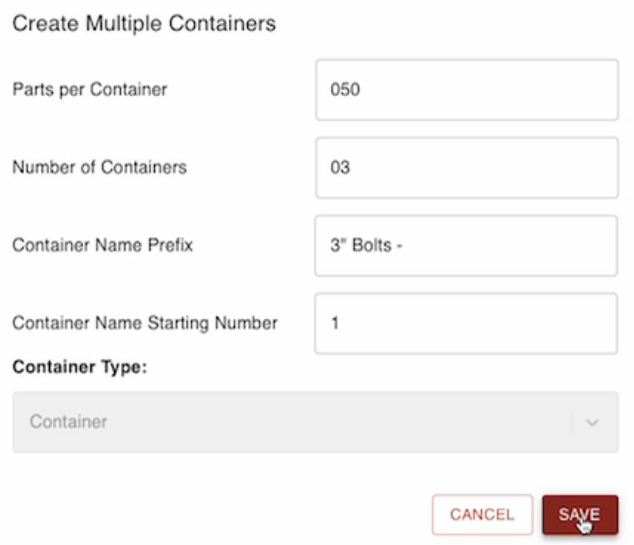
Containerize to Multiple
- First we'll select the Container Type, with 50 Parts per Container, and create three Containers. These can then be seen in the Containers ready to move section
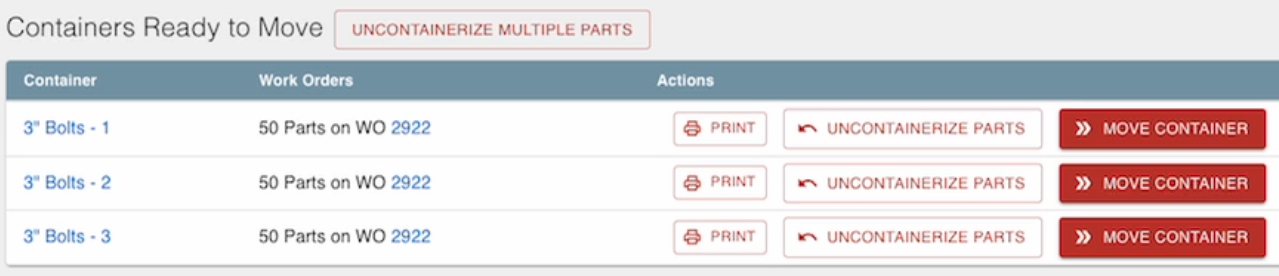
Containers Ready to Move:
You will see options to Uncontainerize or Print, but we will choose to MOVE CONTAINER into the Ready for Shipping Node, and then go to the Shipping Dashboard where we will find the Containers in the Ready to Ship Section.
Packing Slip for Parts in Container:
At this point we can't select this and to create a packing slip because it says that the parts are in container:

To make a packing slip, we have to select the container tab. Here we can select all of them to create one packing slip or we can select just the individual ones.
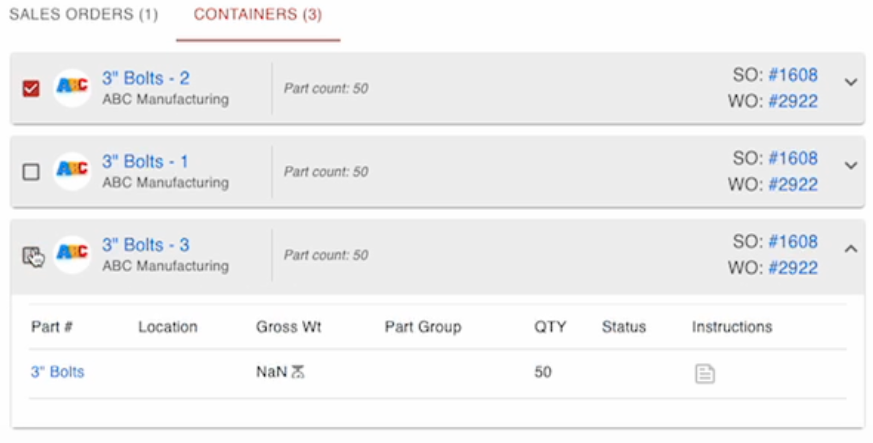
We will select all of them to create the packing slip which we can see the containers included in the packing slip.
Packing Slip per Container:
Users may create a packing slip per container on the create packing slip dialog:
- Have containers in ready for shipping.
- Select containers, click Create to create packing slip.
- Click 'Save Multiple' on the create packing slip dialog.
Was this article helpful?