Sensors
- Print
Sensors
- Print
Article summary
Did you find this summary helpful?
Thank you for your feedback!
Sensors
Sensors are physical devices that collect measurements and have a specific location or Station where they are installed.
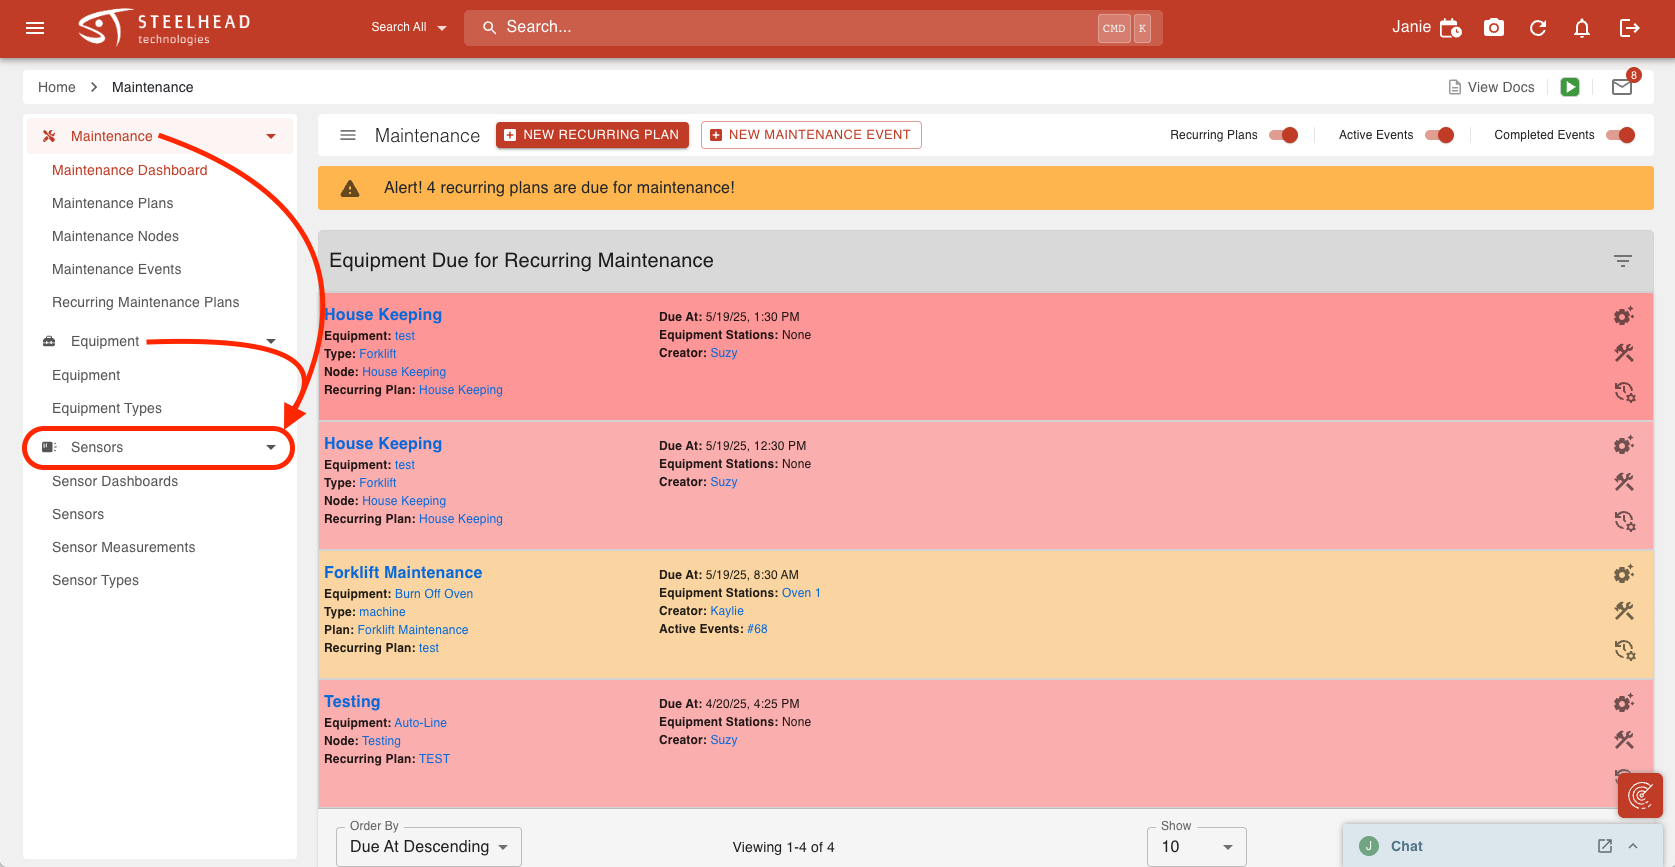
The Sensors Page can be found through various Pages in Steelhead:
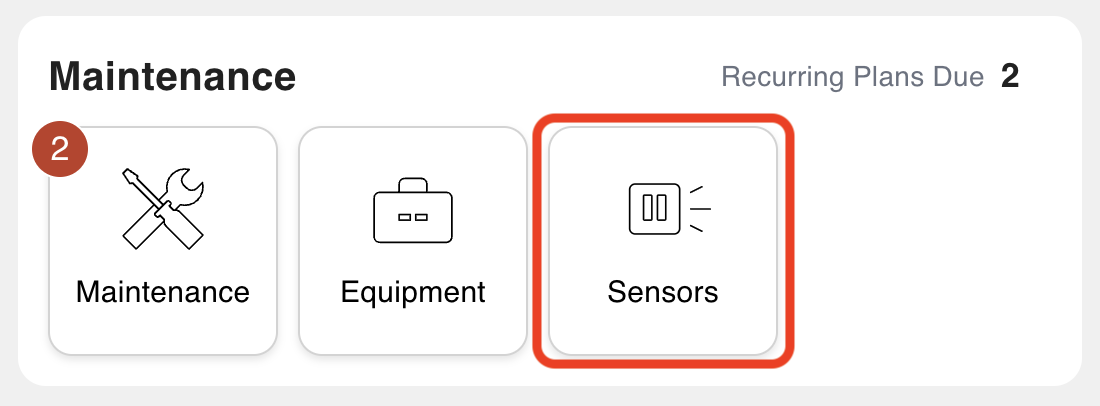
In the Sensors Tile in the "Maintenance" section on the Steelhead homescreen.
As a tab in the Maintenance Dashboard and the Equipment Dashboard.
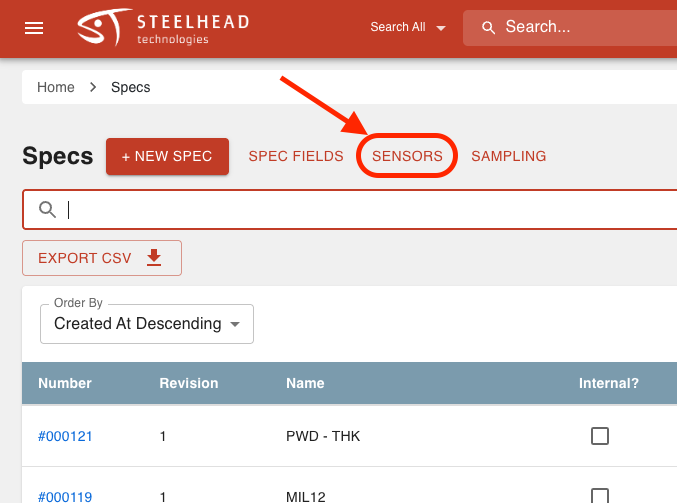
Through a button on the Specs Dashboard.
Create a Sensor
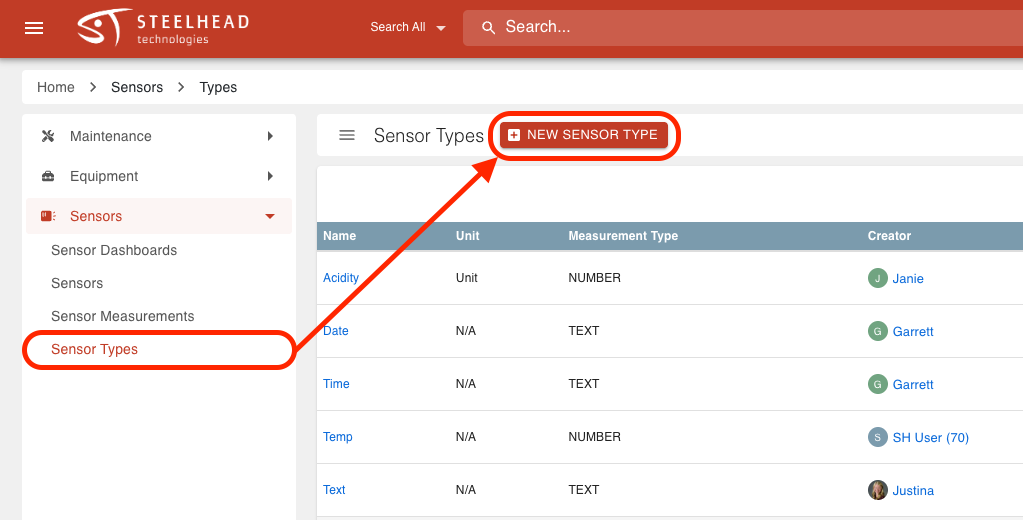
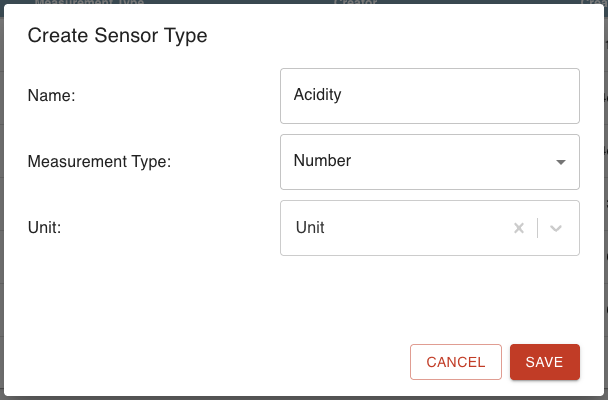
To create a Sensor, you first must create a Sensor Type. Sensor Types help Sensors measure data. For example, if you have a Sensor called "Temperature Oven 1", you would add a "Temperature" Sensor Type that will include a number field for users to input the temperature level.
To create a Sensor Type:
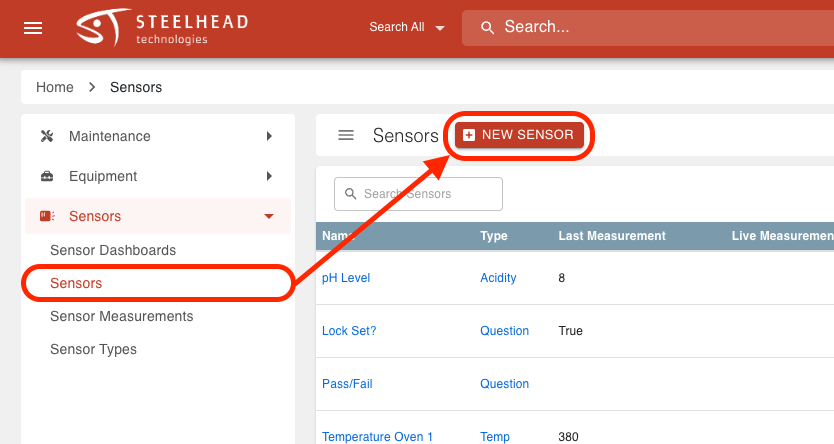
Navigate to Sensors Page from the Sensors Tile found in the "Maintenance" section of the Steelhead homescreen.
Click the "Sensor Types" tab on the left side of the screen.
Click + NEW SENSOR TYPE.
Enter a name.
Select a measurement type.
- If the measurement type is "Number", select a unit.
Click SAVE.
To create a new Sensor:
Navigate to Sensors Page.
Click the +NEW SENSOR button on the Sensors page.
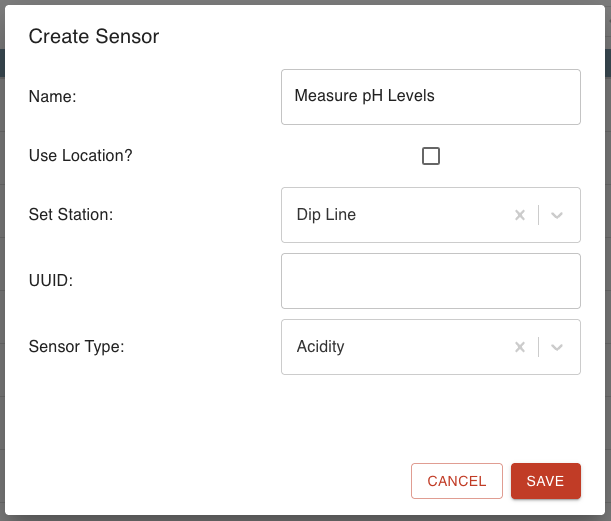
Enter a name for the Sensor.
Assign the Sensor to either a Station or Location.
Optionally, enter a UUID to uniquely identify the Sensor.
Select a Sensor Type from the drop-down.
Click SAVE.
Sensor Measurements
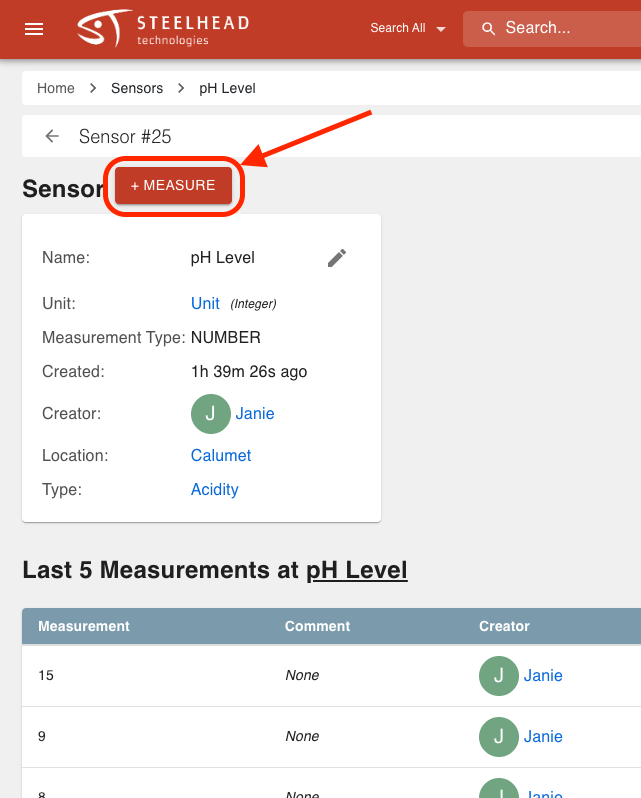
Once you create a Sensor, you can start to add measurements to the Sensor. This is to track and document certain Stations/Locations. For example, if you created a pH Level Sensor, you can go into the specific "pH Level" Sensor's Page and add a measurement of the pH Level to make sure it stays at the desired level.
Adding Measurements to Sensors
Sensors are created to track measurements for specific Stations, Nodes, Equipment, Etc. There are numerous pages in Steelhead where you can add Sensor measurements.
You can add measurements to Sensors from:
Specific Sensor Pages.
The Sensor Dashboard (if Sensor is in a Sensor Dashboard).
You can also add Sensor measurements using the Work Parts tool in Workboards; see also the section "Spec and Sensor Connections".
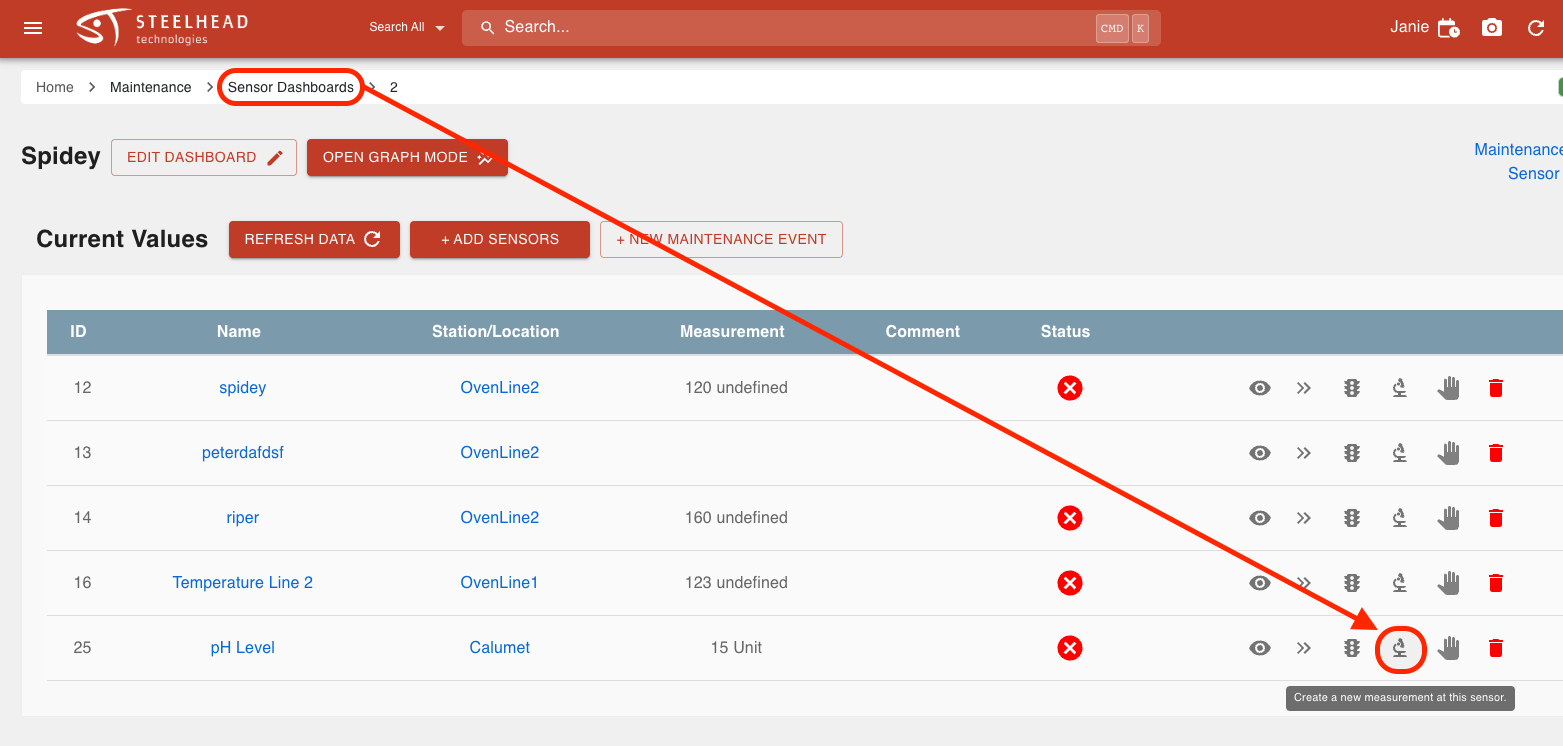
To add measurements to a Sensor within the Sensors Tile:
- Click either the "Create a new measurement at this sensor." icon
 or click the + MEASURE button.
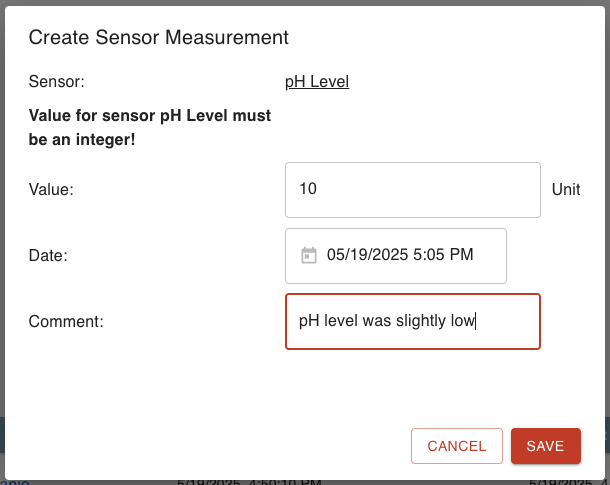
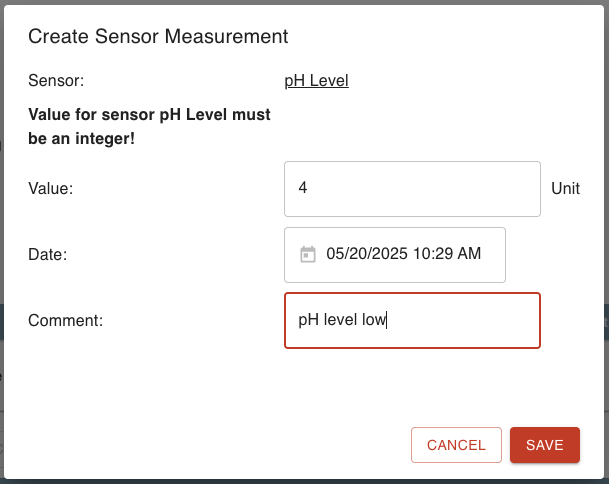
 - Enter the value.
- Confirm the date and time stamp are correct.
- Add comment, if desired.
- Click SAVE.
View Sensor Measurements
Once you add measurements to sensors, you can view the measurements from:
Specific Sensor Pages
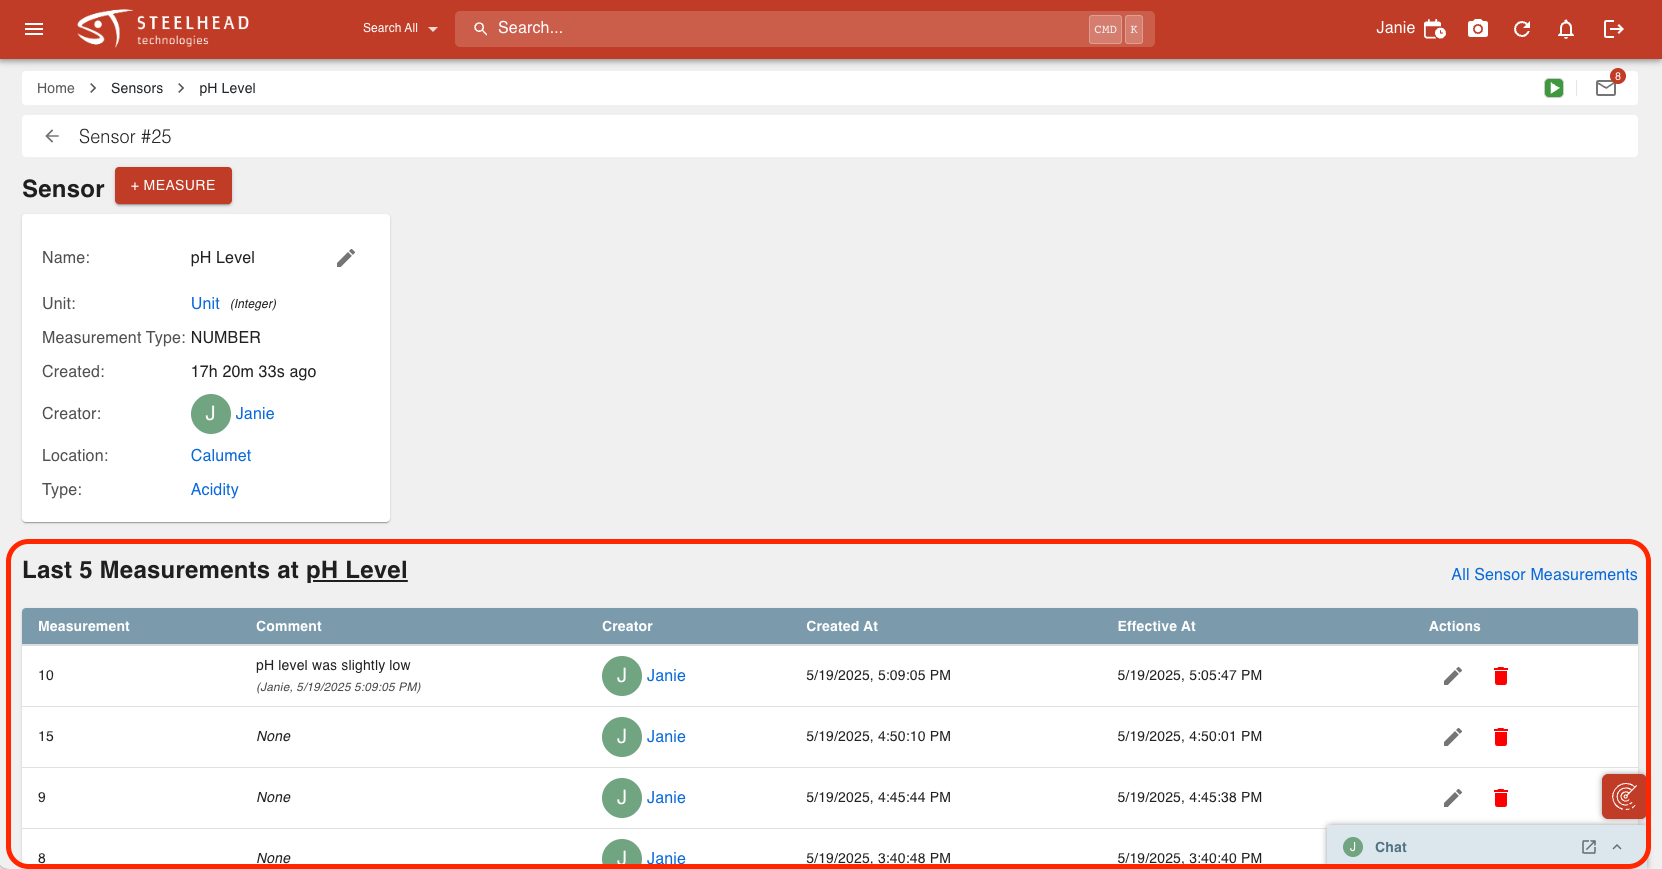
- View the five most recent measurements taken from the specific Sensor.
- View the measurement, comment, creator, created at and effective at time stamp, and edit/delete actions.
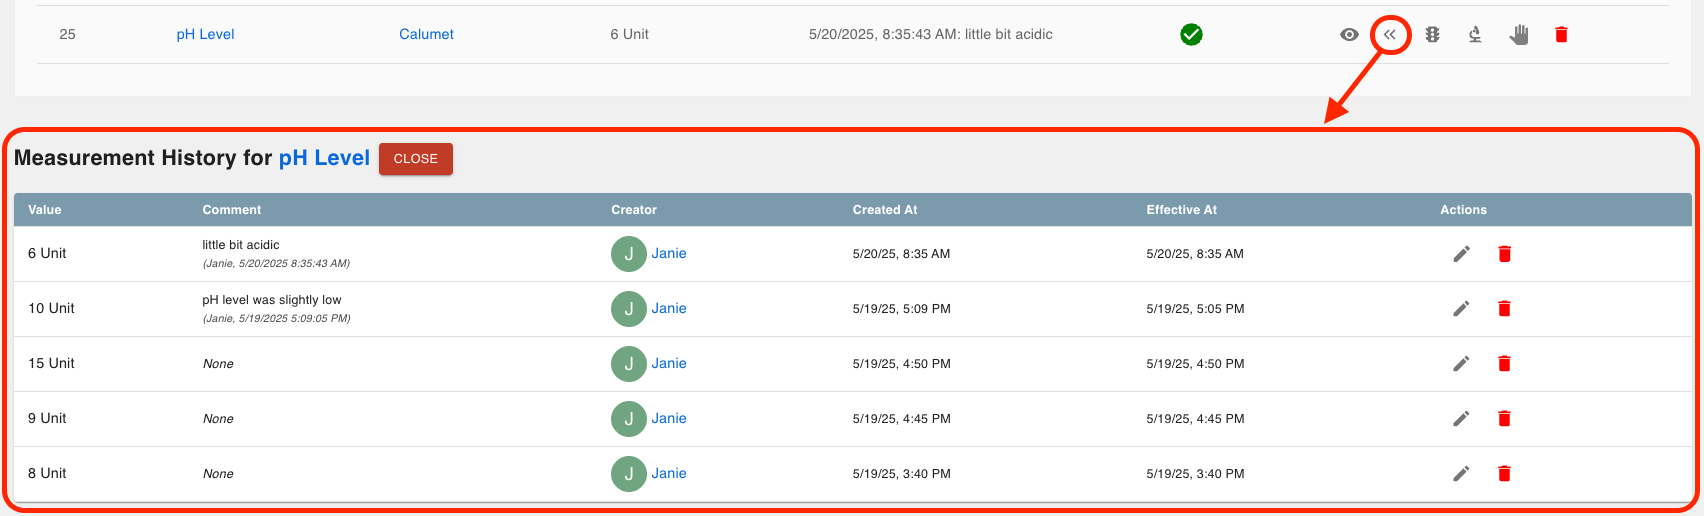
Sensor Measurements tab
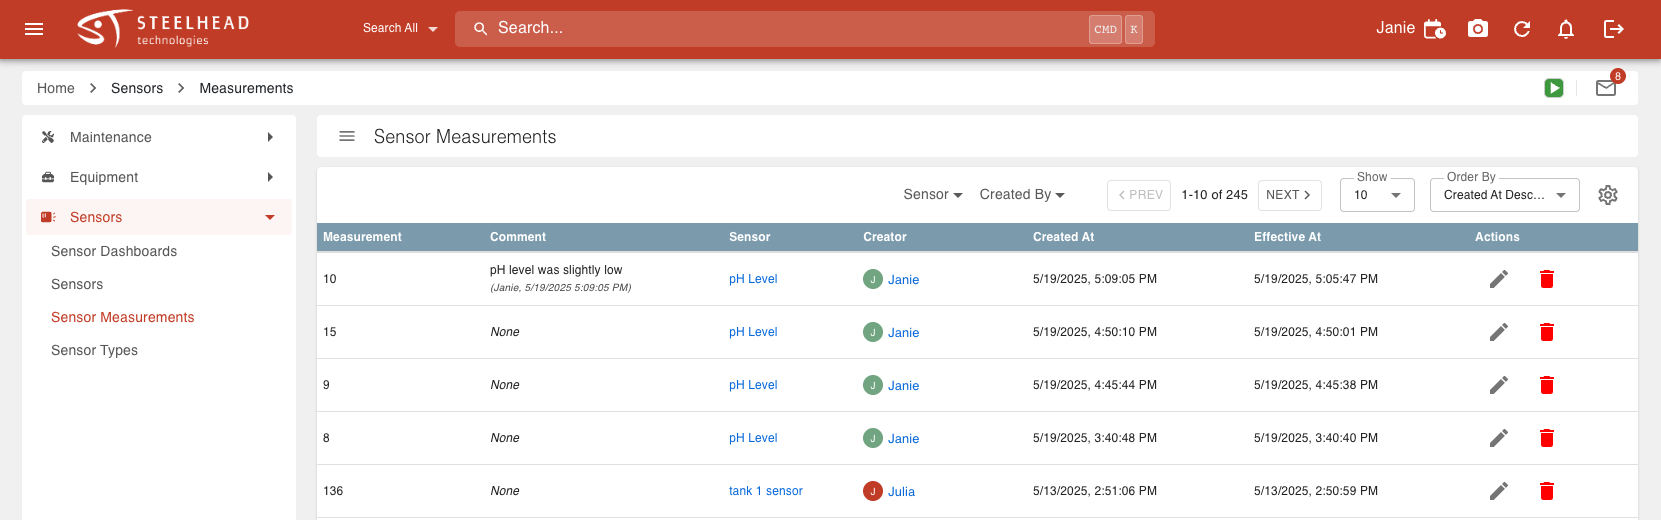
- View a Table View of all the Sensor Measurements taken, listed from most to least recent.
- View the measurement, comment, creator, created at and effective at time stamp, and edit/delete actions.
- Filter by Sensor and creator.
Sensor Dashboards tab
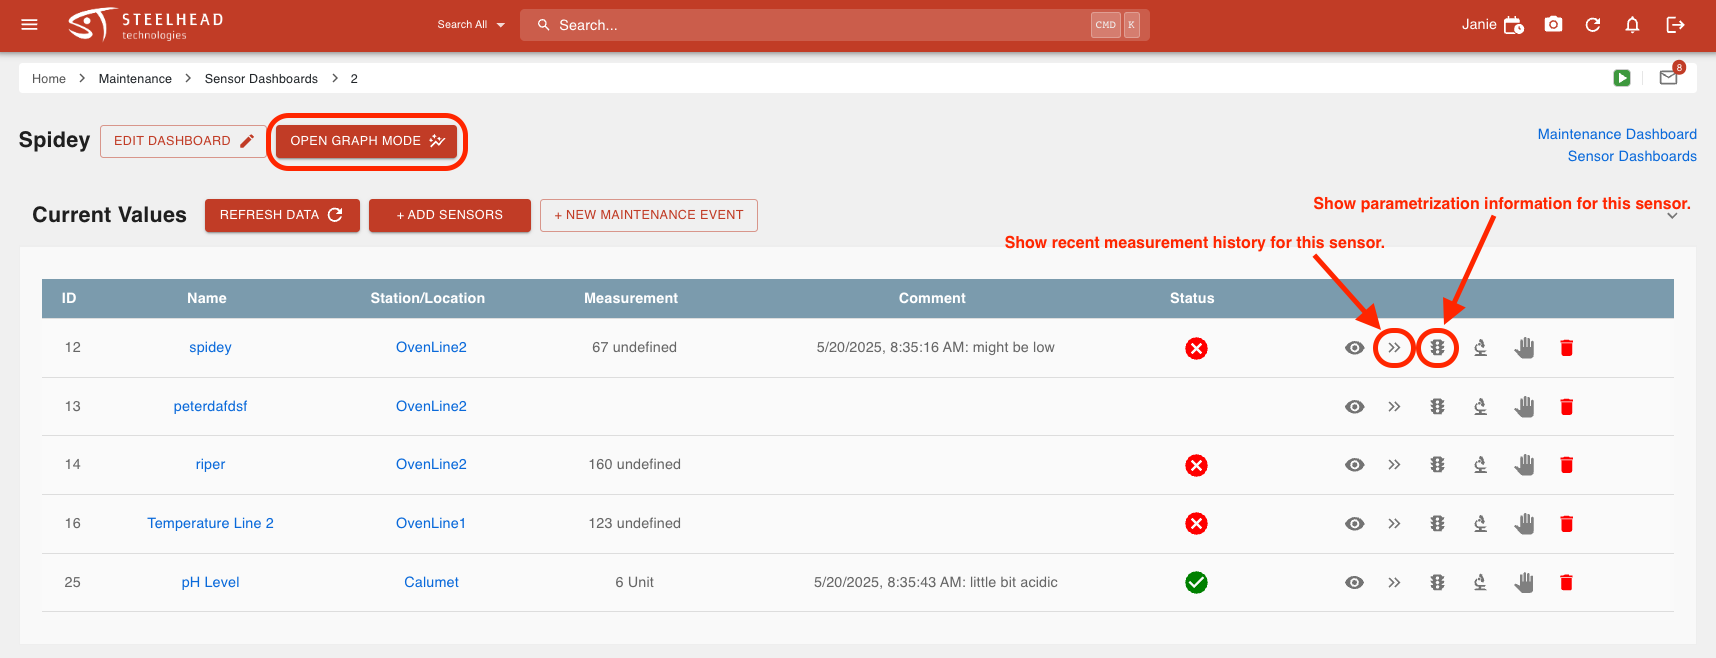
Enter into a Sensor Dashboard to view a list of all the Sensors in the Dashboard.
Use the Arrows icon
 to view recent history of measurements for a Sensor.
Use the Parameter icon
 to view parametrization information about a Sensor (more information in "Spec and Sensor Connections").

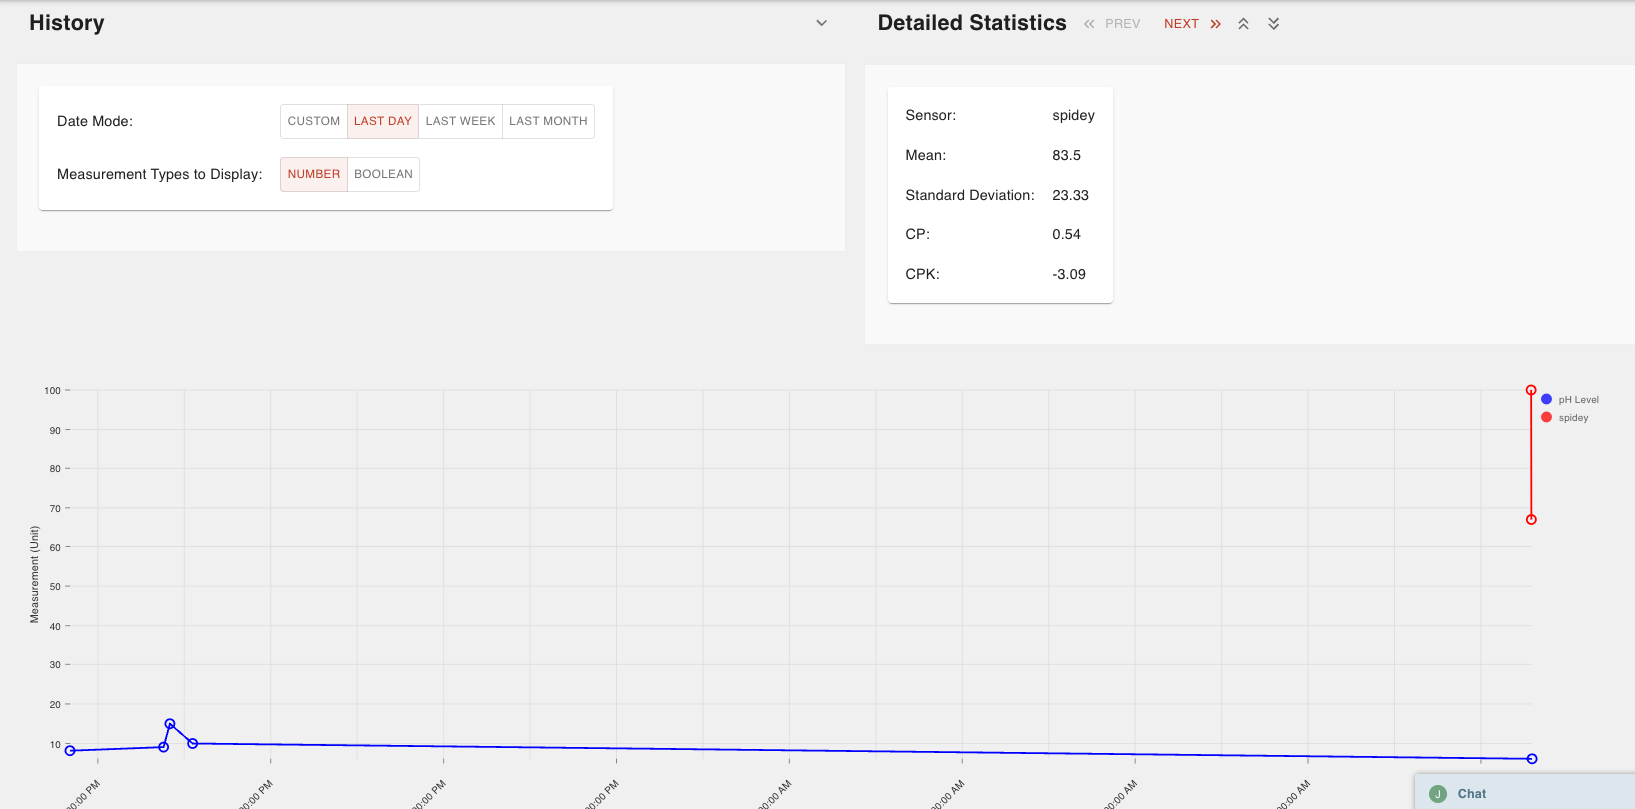
Click button OPEN GRAPH MODE to view just the graph.
Spec and Sensor Connections
Sensors can also be tied to Specs and Part Numbers through the Sensor Spec Field Type. A Sensor can provide time- and Station-specific data in fulfillment of Spec Field requirements that can be accessed through Workboards.
Sensor Spec Field Types work in tandem with the physical Sensor to futher track and document Sensor Measurements. When you connect a Sensor to Specs, the measurements can be validated against the defined parameters of the Spec.
To connect a Sensor to a spec:
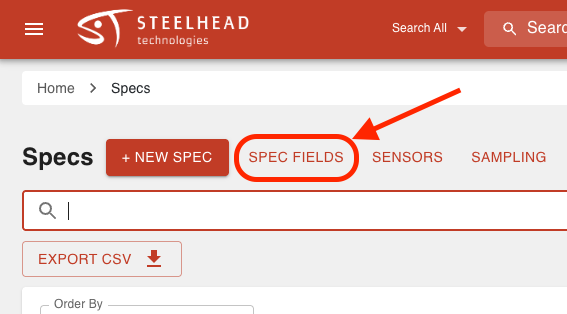
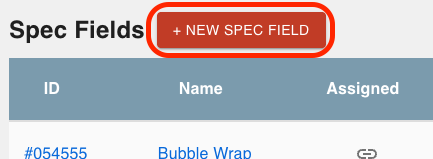
Navigate to the Specs Dashboard and click the "Spec Field" button.
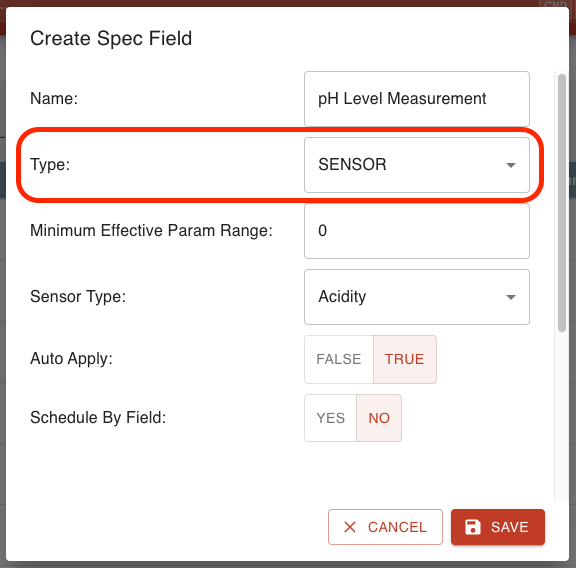
Click + NEW SPEC FIELD to create a Spec Field with the type "Sensor".
Add the Sensor Spec Field to a Spec by entering a Spec Page and clicking + NEW SPEC FIELD.
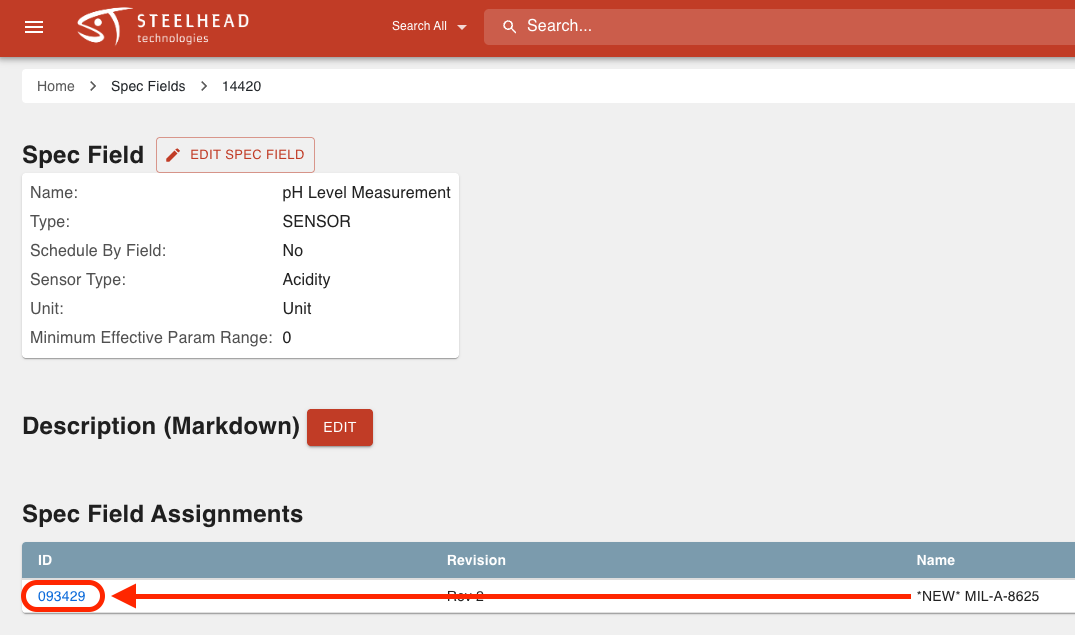
Enter the Spec Field page and click the Spec Field Assignment with the desired Spec.
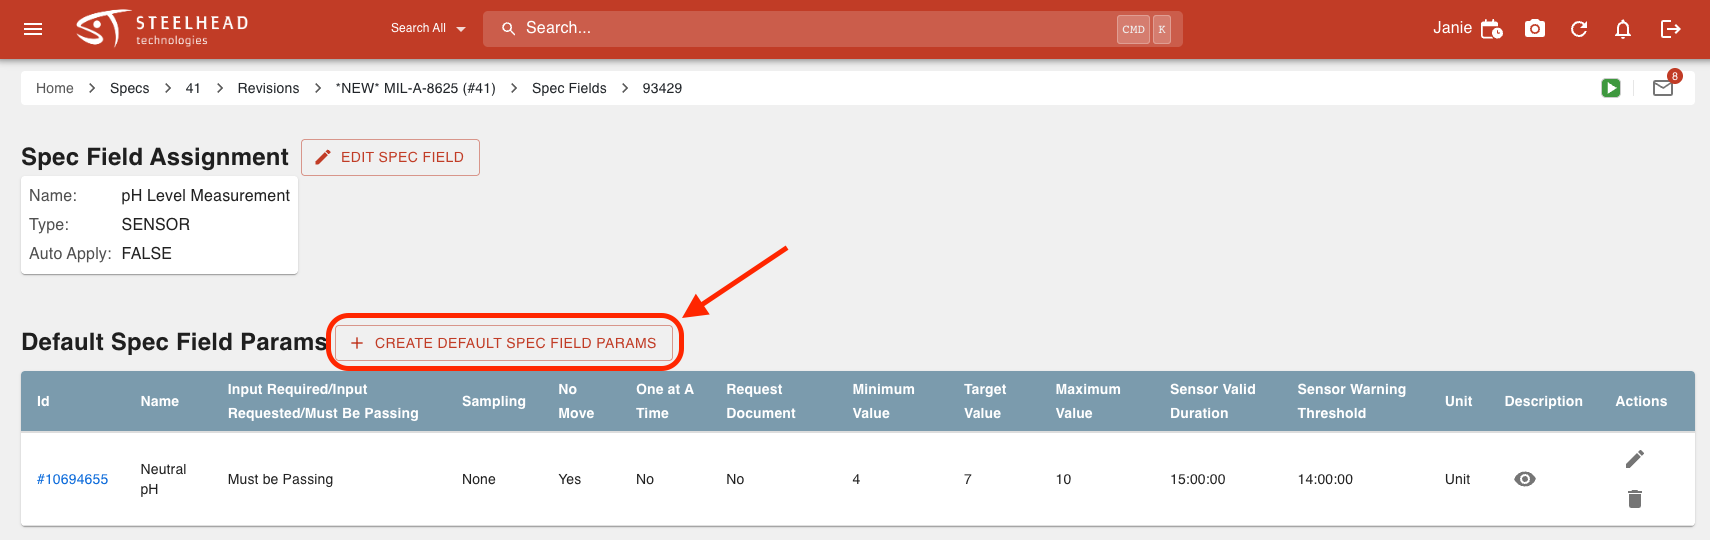
Add a parameter by clicking + CREATE DEFAULT SPEC FIELD PARAM.
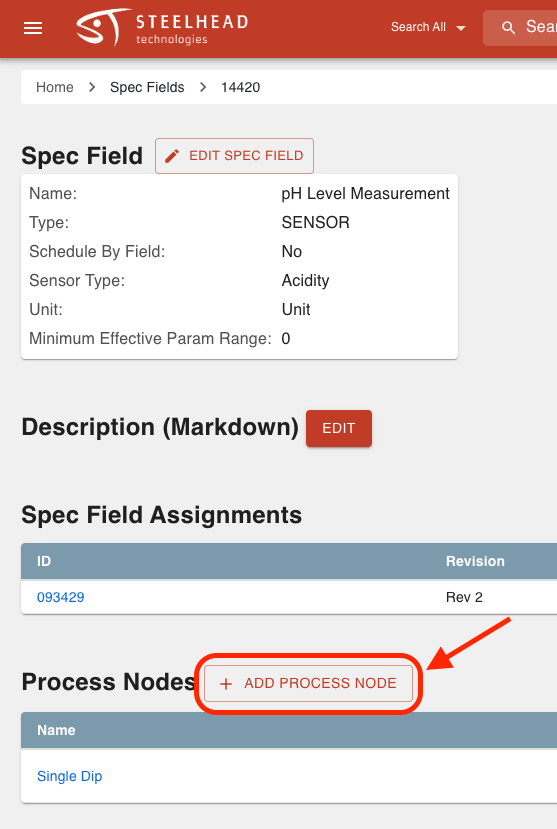
Enter back into the Spec Field page and click + ADD PROCESS NODE to attach the Spec Field to the Process Node where you will take the measurements.
- Assign the Spec Field to the Process Node that's connected to the Station that holds the physical Sensor.
- For example, if the "pH Level" Sensor is at the "Dip Line" Station which is attached to the "Single Dip" Process Node, connect the "pH Level Measurement" Spec Field to the "Single Dip" Process Node.
Once your Sensor Spec Field Type is set up, you can use the Work Parts tool to measure the Sensor on any Parts with the associated Spec.
To take Sensor measurements from Workboards:
Connect the associated Spec to a Part Number and put that Part Number through the Process with the Sensor.
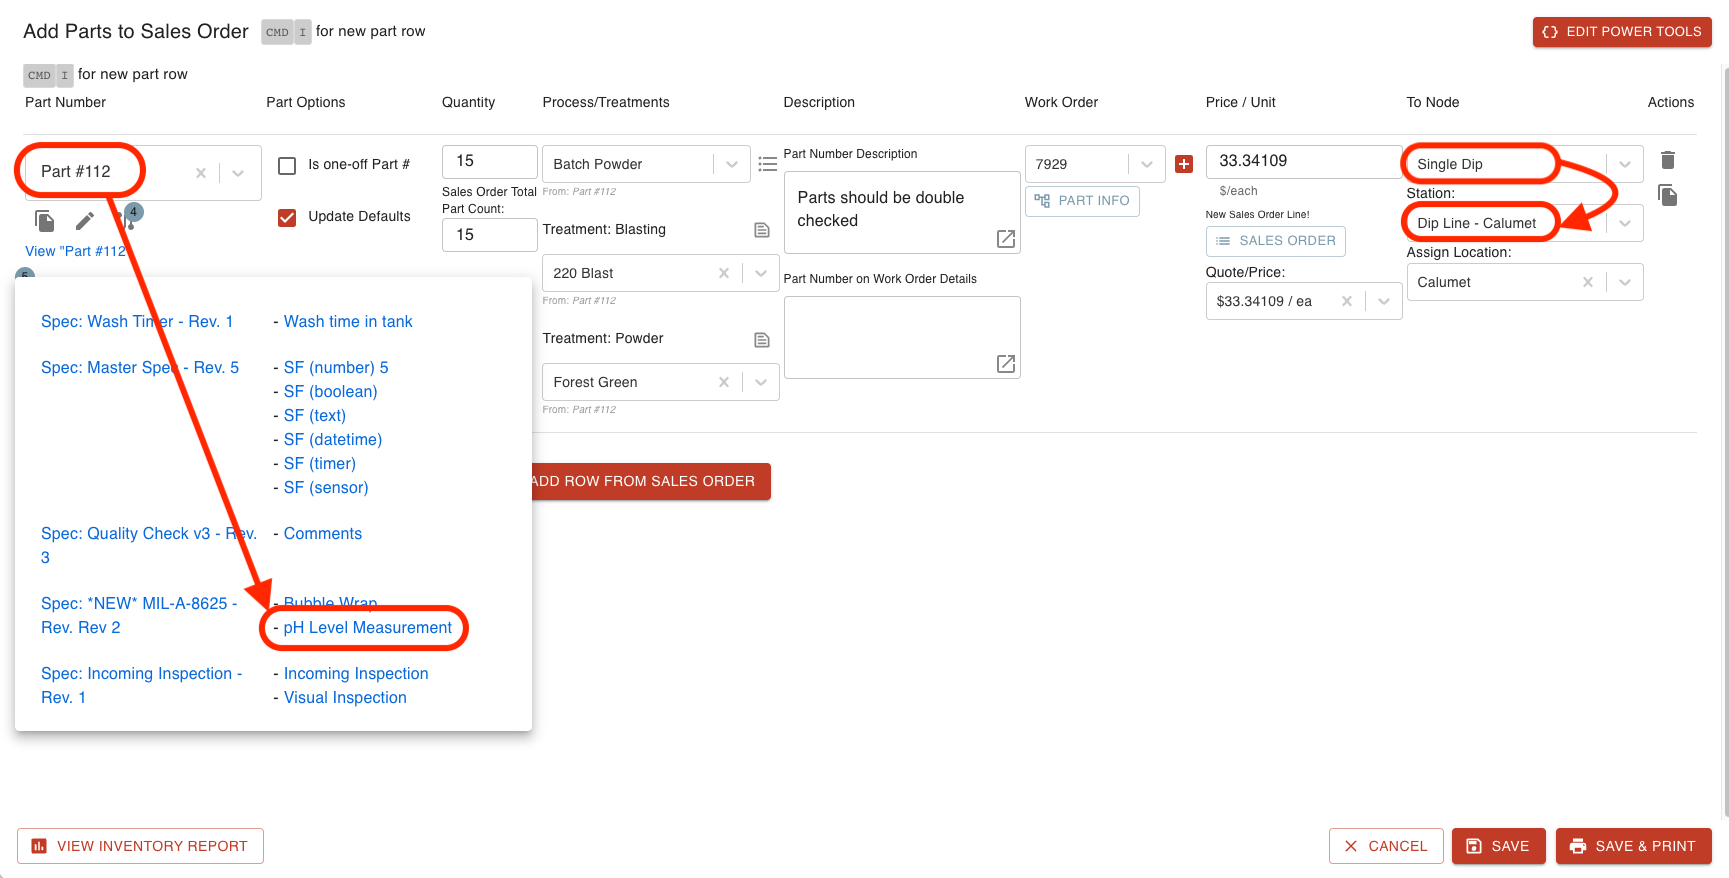
Once the Part Number is at the associated Station, enter Workboards and navigate to the Workboard Card holding the Parts.
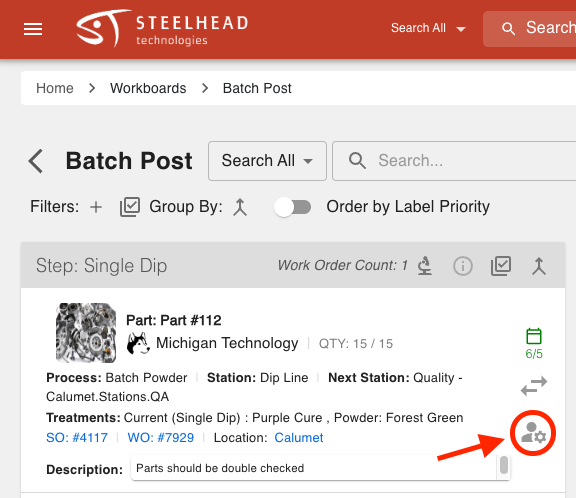
Use the Work Parts tool and enter into the Field Information dialog to enter the Sensor measurements.
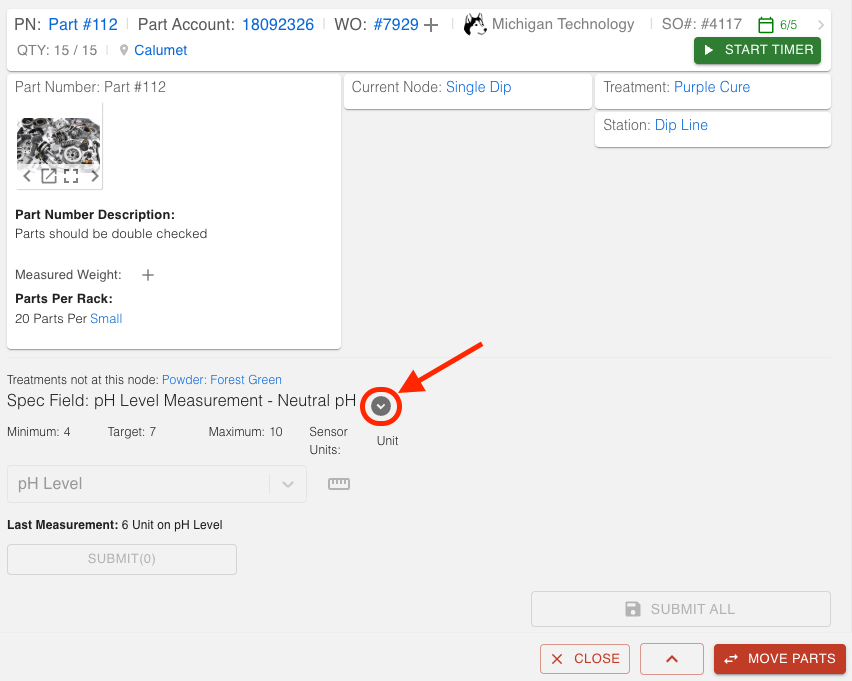
Click + ADD MEASUREMENT.
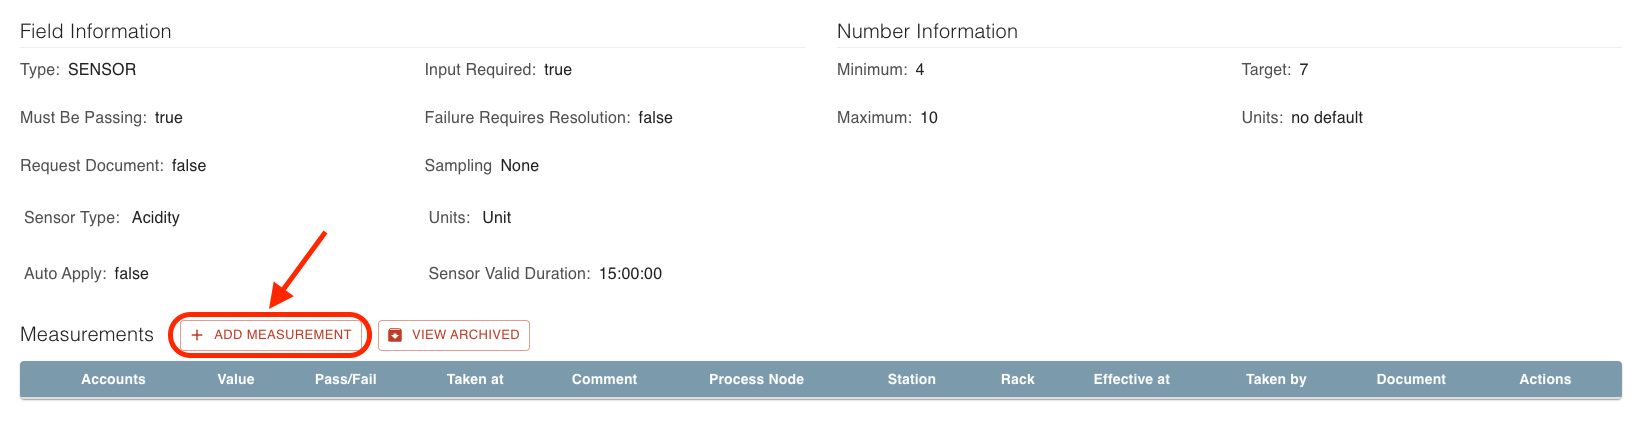
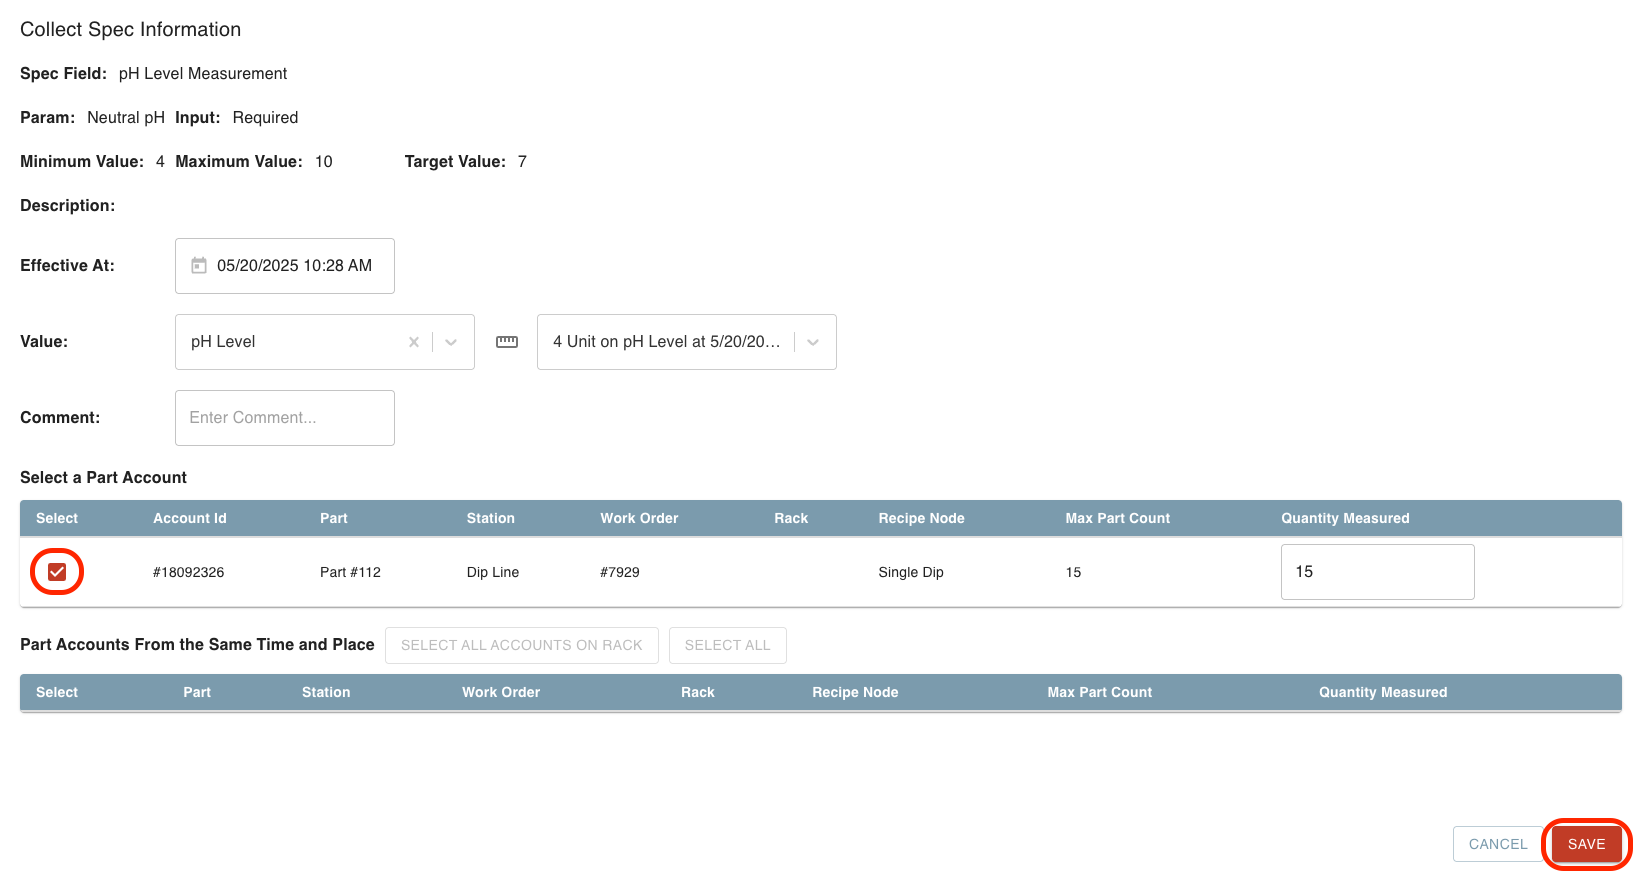
Select the Sensor from the "Value:" field drop-down and input the measurement.
Add an optional comment.
Select the associate Part Account.
Click SAVE.
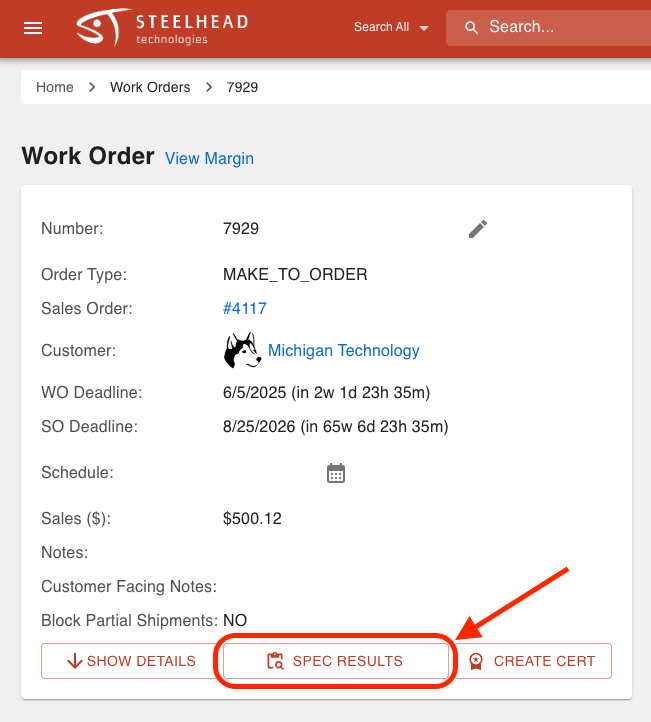
View Sensor measurements by viewing Spec Results on the Work Order or by entering the Sensors Tile, as shown in the "View Sensor Measurements" section above.
- To view Spec Field measurements from the Sensors Dashboards, use the "Show parametrization information about this sensor" icon .
- To view Spec Field measurements from the Sensors Dashboards, use the "Show parametrization information about this sensor" icon
Connecting Sensors to Specs gives you more functionality than just measuring the Sensor. When you connect a Sensor to a Sensor Spec Field Type, you can validate your measurements against Spec Field Parameters, create Certs, and add Sensor measurements from Workboards.
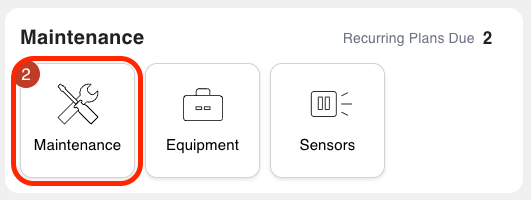
Sensors in Maintenance
You can add Sensors to Maintenance Nodes and Maintenance Plans to add Sensor measurements during Maintenance Events. For example, a Maintenance event occurs when an oven breaks down and you use a Sensor to measure the temperature after fixing the oven.
To add a Sensor to a Maintenance Node/Plan:
Navigate to the Maintenance Tile from the "Maintenance" section on the Steelhead homescreen.
Click the Maintenance Node/Maintenance Plan tab and enter into the desired specific Node/Plan's page.
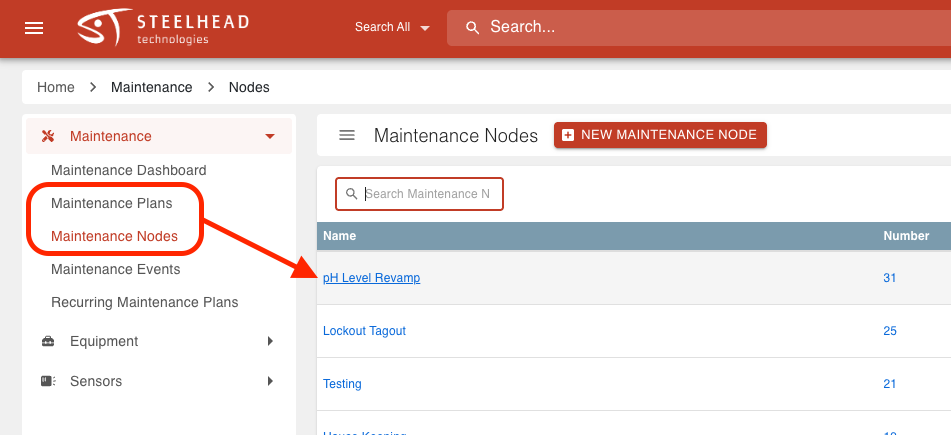
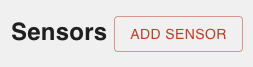
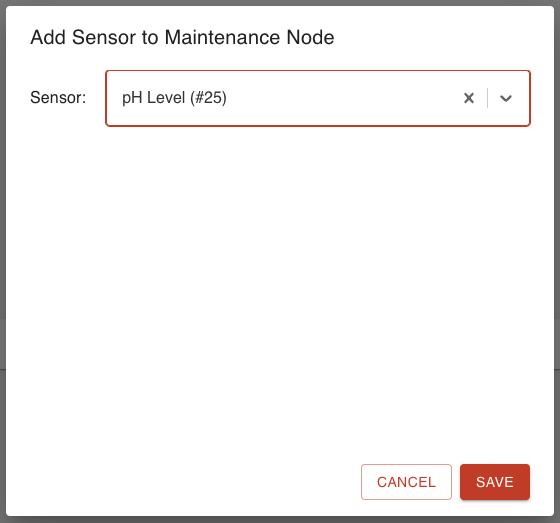
Click the ADD SENSOR button.
Select the desired Sensor from the drop-down and click SAVE.
To add Sensor measurements to Maintenance Nodes/Plans:
Navigate to the Maintenance Tile from the "Maintenance" section on the Steelhead homescreen.
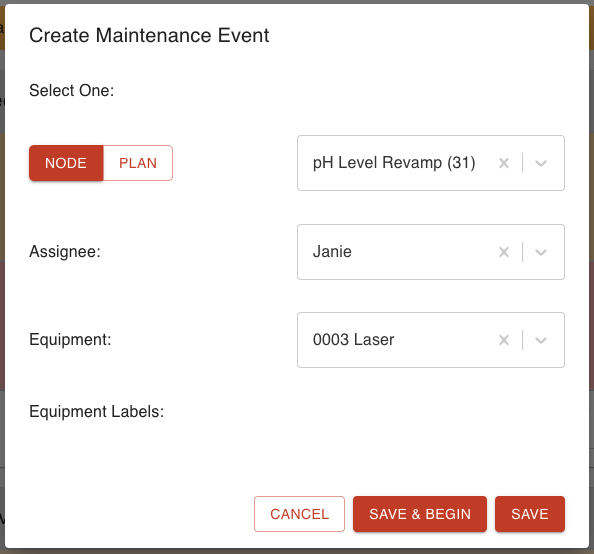
Create a Maintenance Event by clicking + CREATE NEW MAINTENANCE EVENT from the Maintenance Dashboard or the Maintenance Events tab.


Select a Maintenance Node/Plan associated with a Sensor.
Assign an employee and add Equipment to the Maintenance Event, if desired.
Click SAVE & BEGIN.
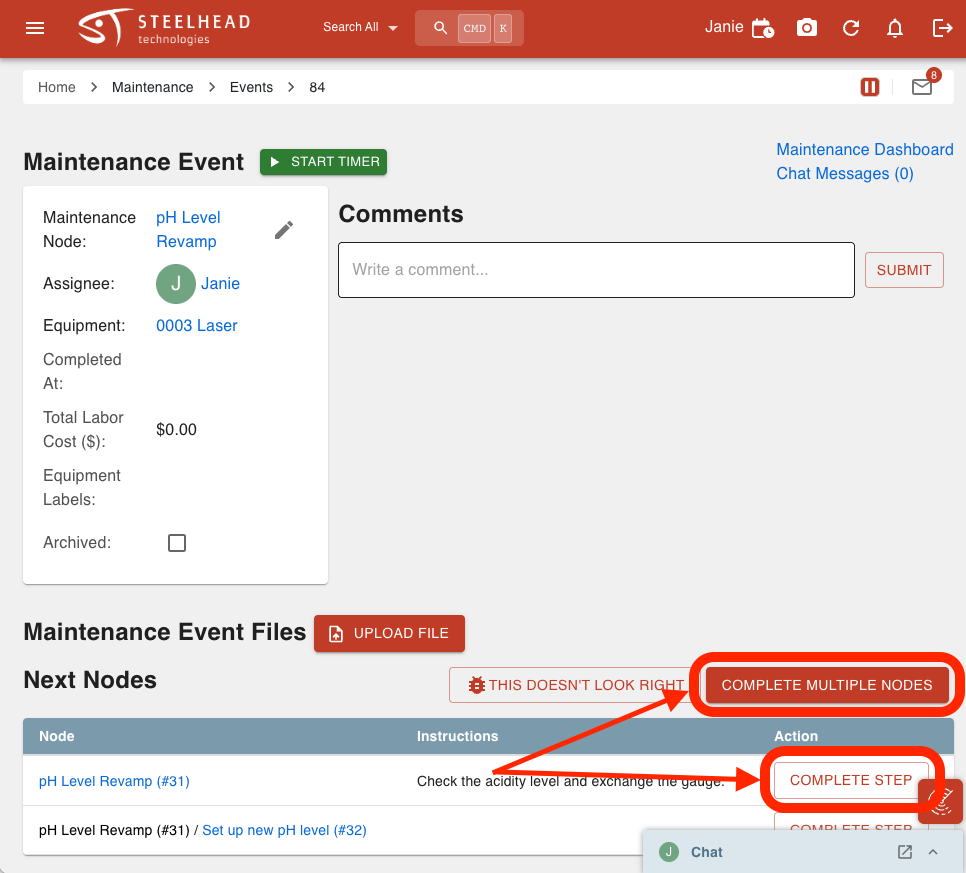
You can click COMPLETE MULTIPLE NODES to input every measurement for all the related Nodes, or click COMPLETE STEP to add a measurement to one specific Sensor.
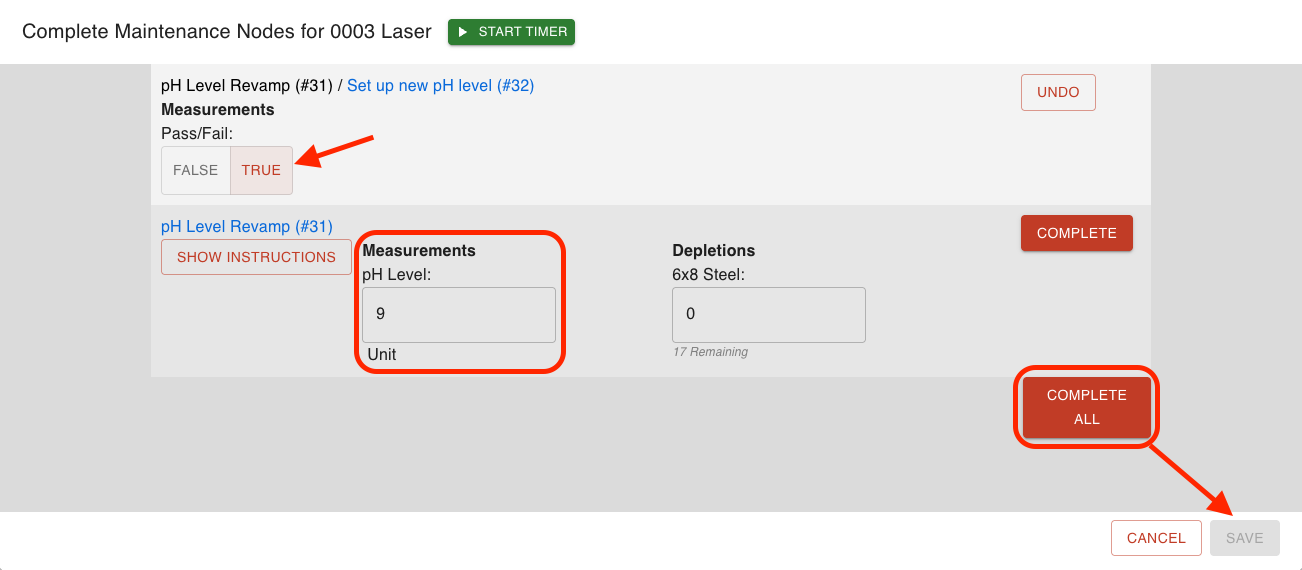
Fill out the Sensor measurement(s) and click COMPLETE or COMPLETE ALL and then click SAVE.
Sensor Integrations
- Integrations module > NEW Sensor Integrations displayed in left menu
- Click New Sensor Integration > Super Systems
- Enter a name and save
- Download Integration on a Windows PC
- Open your PCs downloaded files display
- Run the connector by clicking into the .exe file (keep the connector open to keep the live measurements running)
- Back in Steelhead, click into the integration and see live updated measurements for sensors
- Go to Sensors
- Add a new sensor
- Click the dropdown “From Integration” and select an integrated sensor
- Add remaining details and save
- See live measurement value updates in “Live Measurements” column in table
- Click into a live sensor
- Can save a live value from the information box inside of an integrated sensor
- Live values will auto-populate when creating a sensor measurement
- Can view and save live measurements on sensor specs from a Work Order or Work Parts dialog
Was this article helpful?