Guide to Cutting Parts (Cutting Step 3)
- Print
Guide to Cutting Parts (Cutting Step 3)
- Print
Article summary
Did you find this summary helpful?
Thank you for your feedback!
Cutting Step 3 - Cut Parts
From the Steelhead Homepage, open the Cutting dashboard.
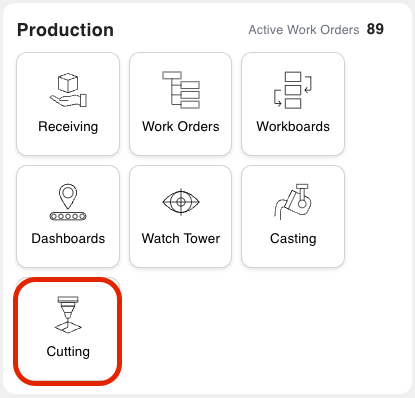
You can also access the Cutting Dashboard by clicking "Cutting".
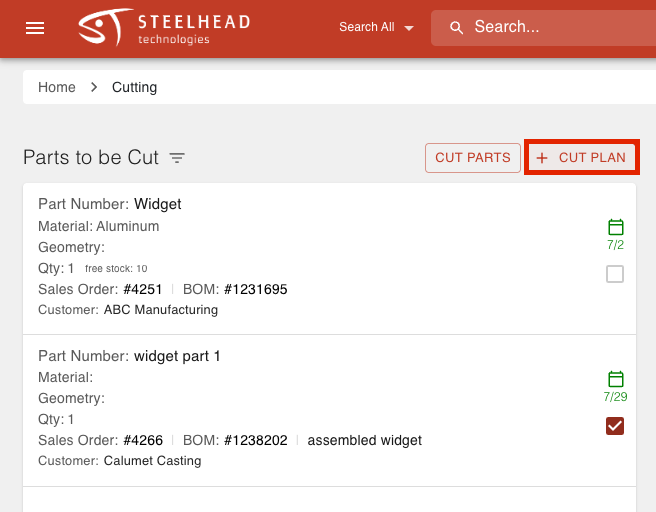
On the left there is a list of Parts to be Cut. Click the checkboxes next to the Parts you want to cut.
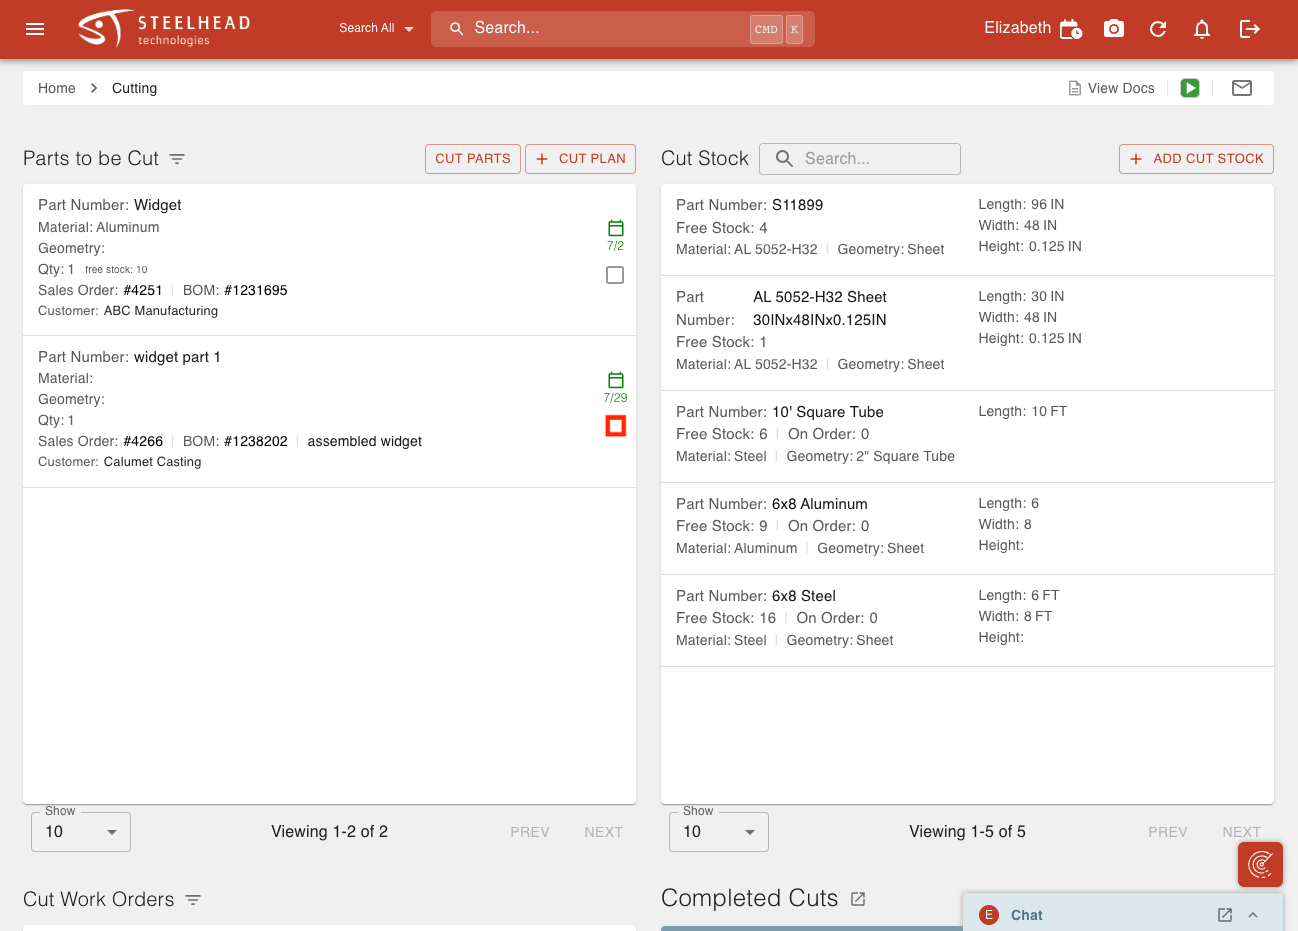
Checking the box will automatically filter the list of Parts to be Cut and Cut Stock by all Parts sharing the same Material and Geometry Type.
Click "CUT PARTS" if you're ready to cut, or "+ CUT PLAN" to set up the plan before cutting.
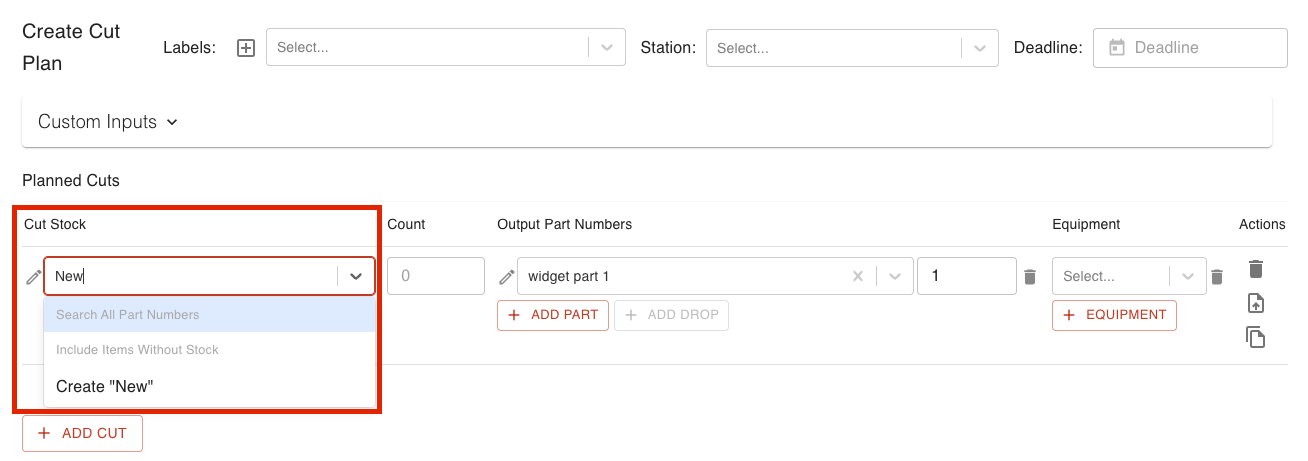
Select a Cut Stock or type in a new Cut Stock and click "Create."
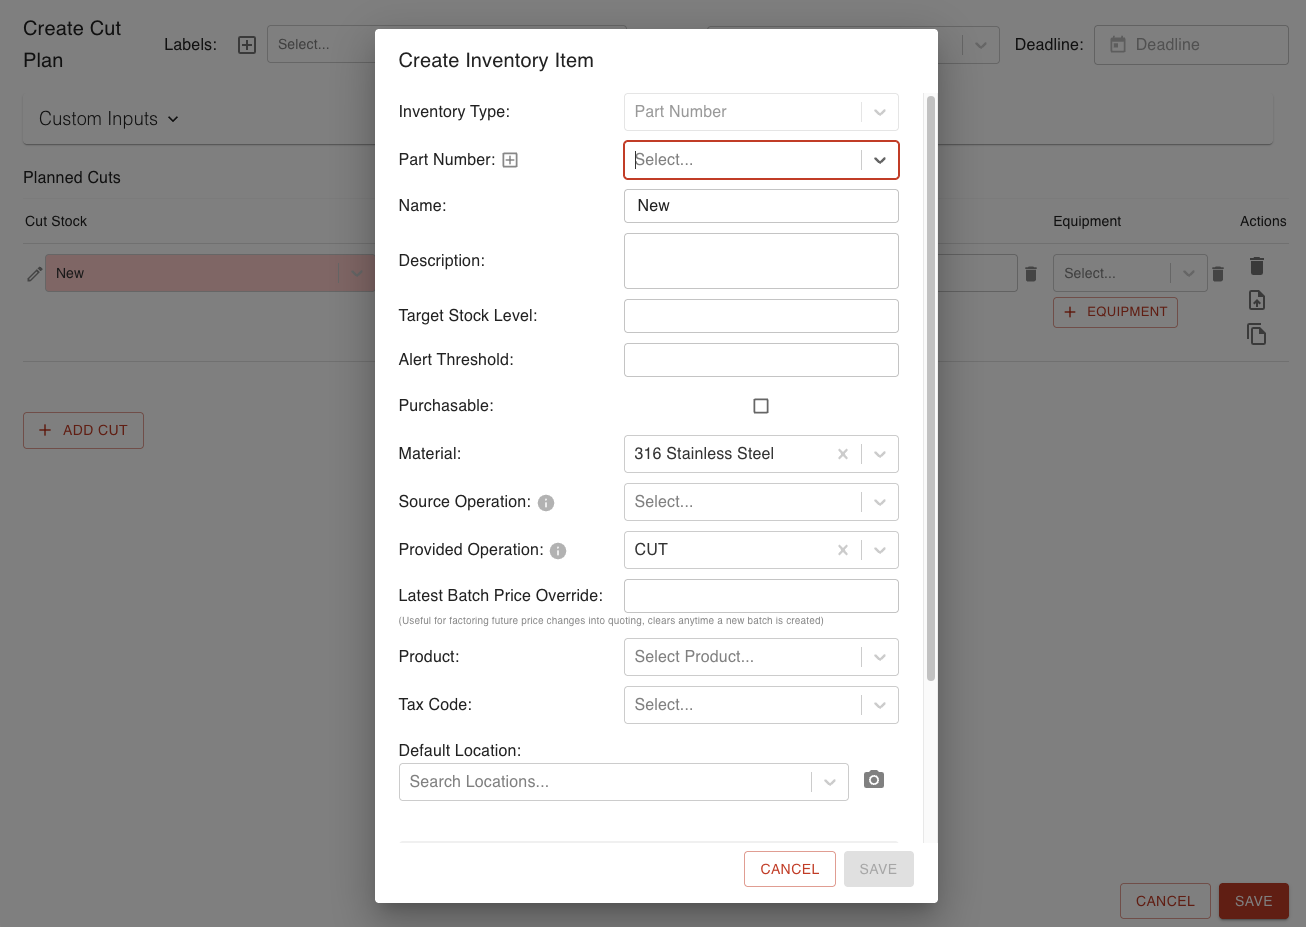
When creating a Cut Stock, fill in any desired information and click "SAVE."
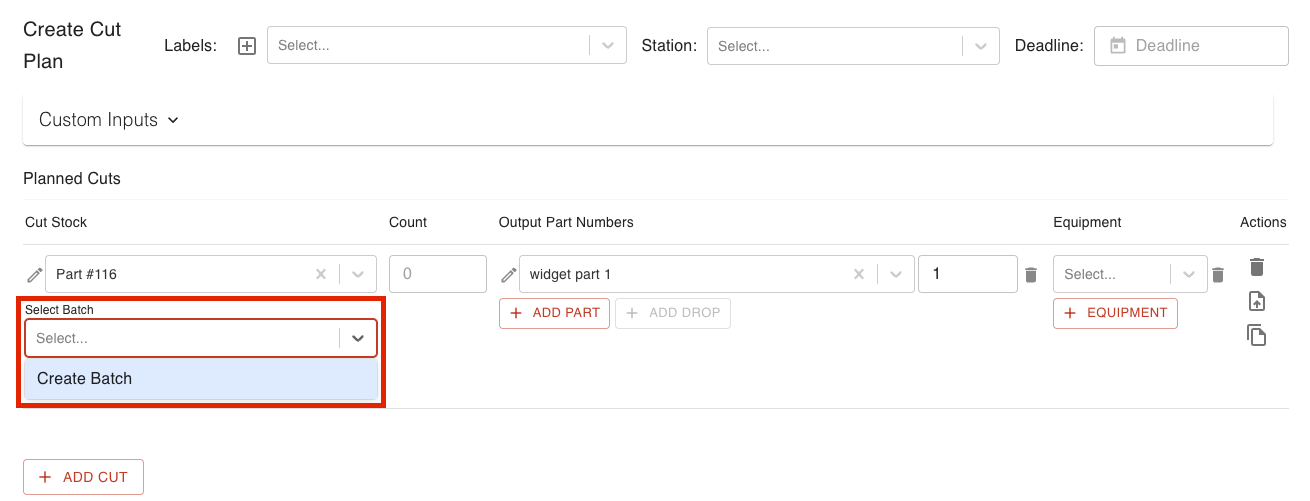
Select a Batch or Create a new Batch.
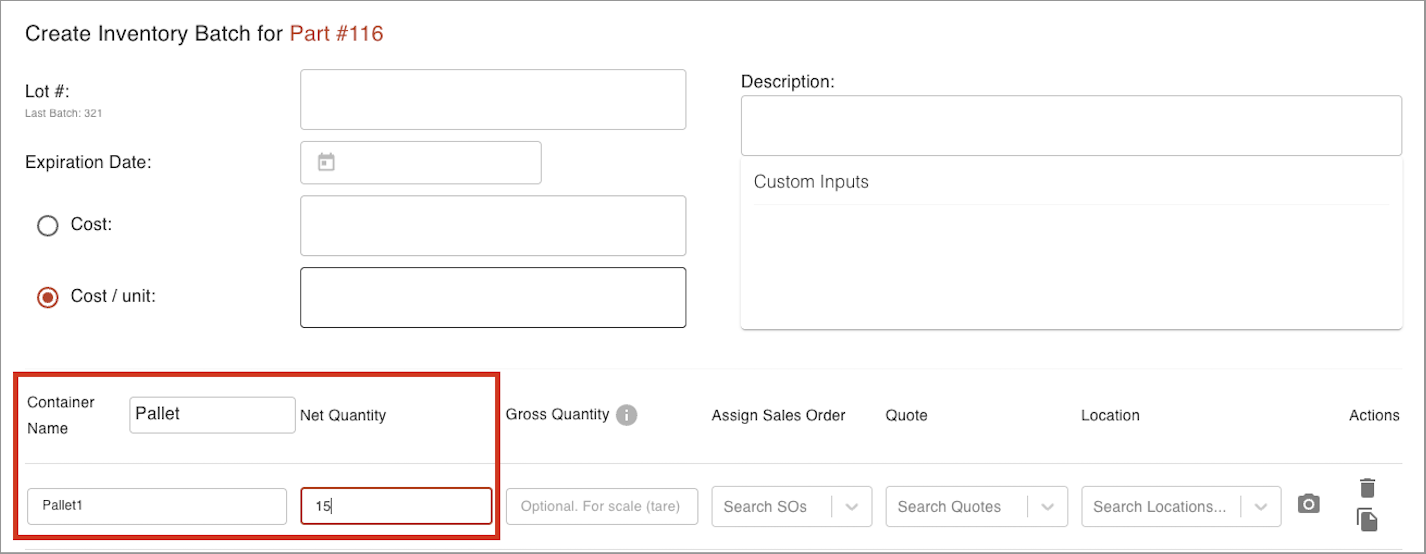
If creating a new Batch, fill in a Container Name, Net Quantity and any other desired information and click "SAVE."
Click "SAVE" to save your Cut Plan.
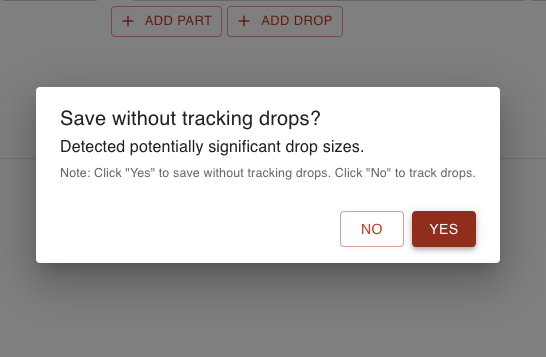
Click "YES", you can add the drops later.
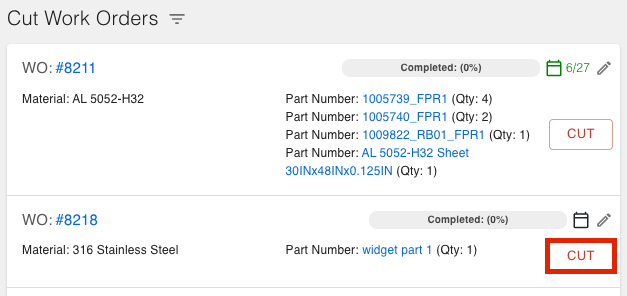
Scroll down and select "CUT" next to the Work Order you're ready to cut.
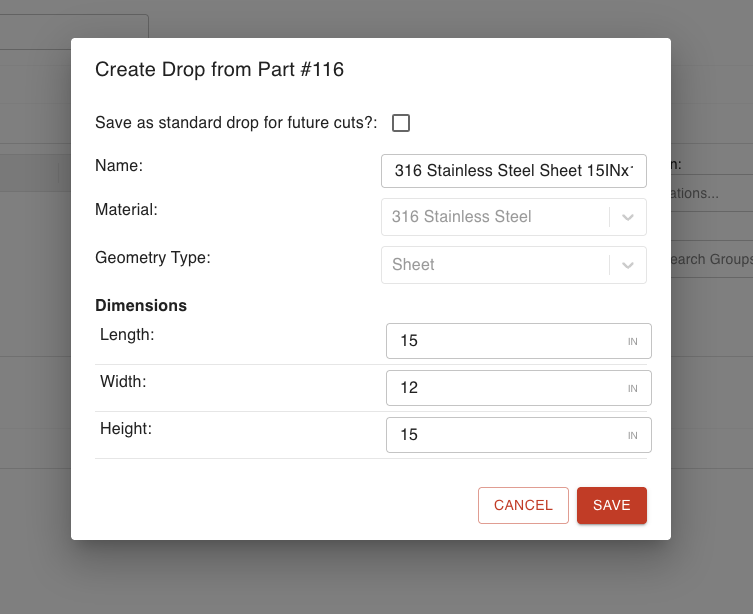
Click "+ ADD DROP."

Fill in the dimensions of the size of the drop. Select the checkbox if the drop will be used as inventory for future cuts. Click "SAVE."
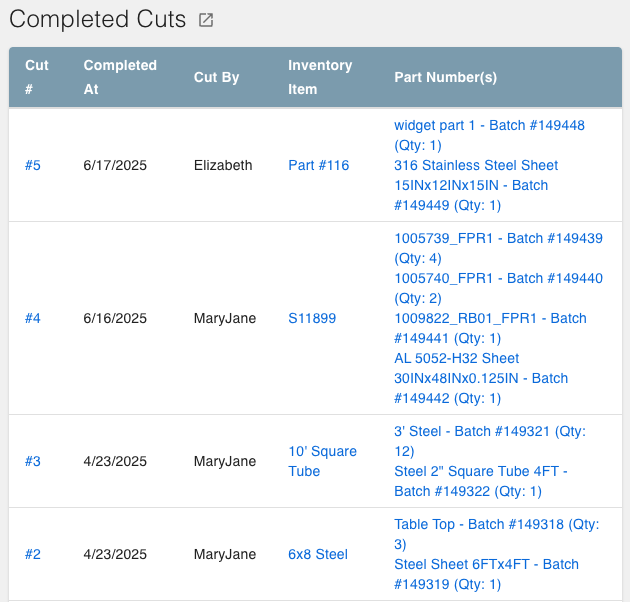
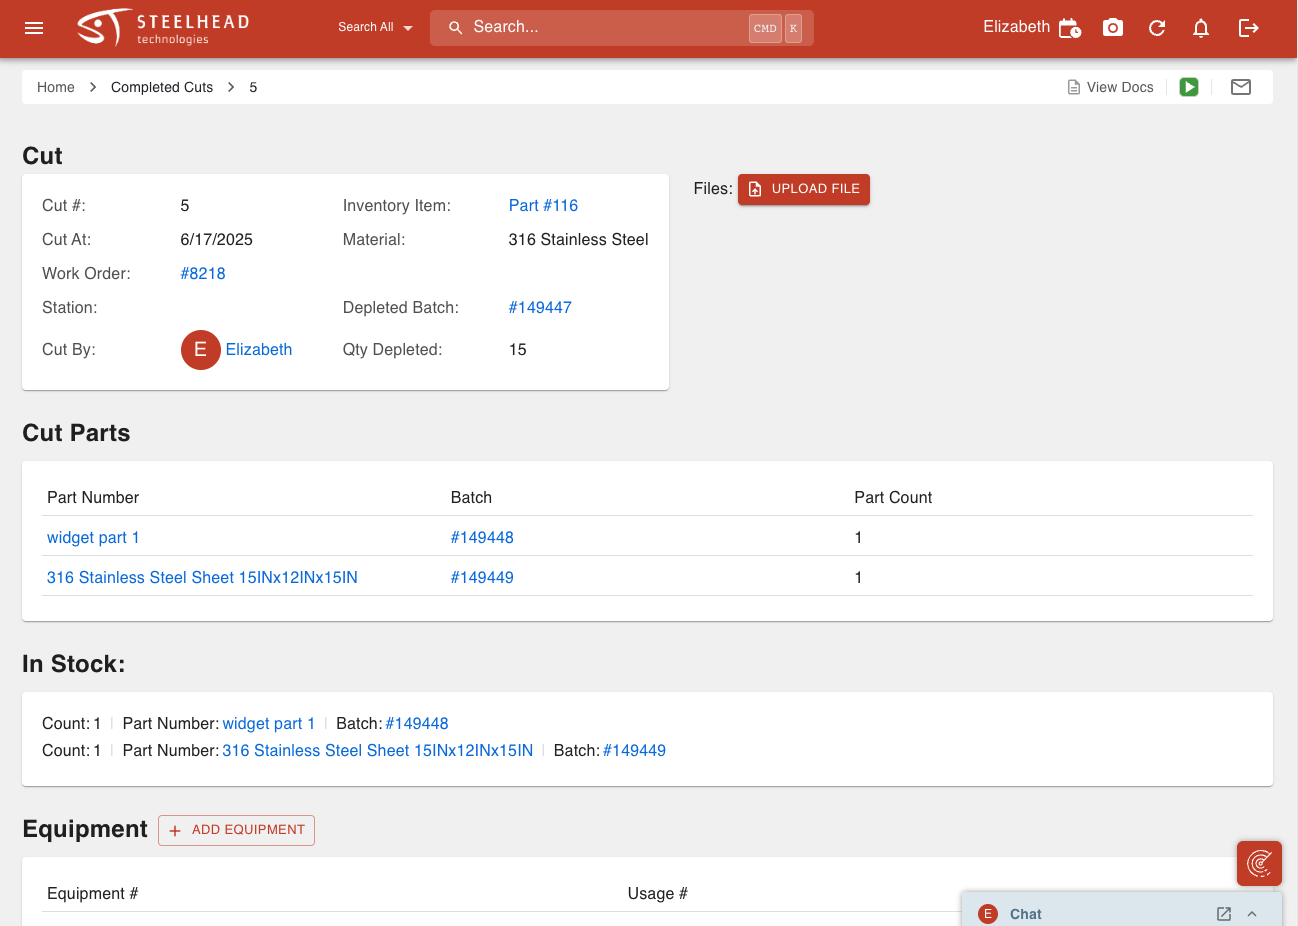
Under the Completed Cuts section at the bottom of the Cutting page, the most recent cut will be at the top of the list. Click the Cut# to view the cut information.
All information for that Cut can be seen on this page, including what was depleted and what was created. You can track the cut to the Batch level which is related to Purchasing information, and go up and down the chain to see how everything is connected.
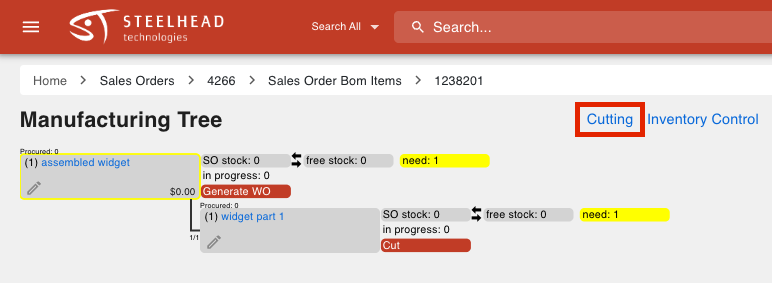
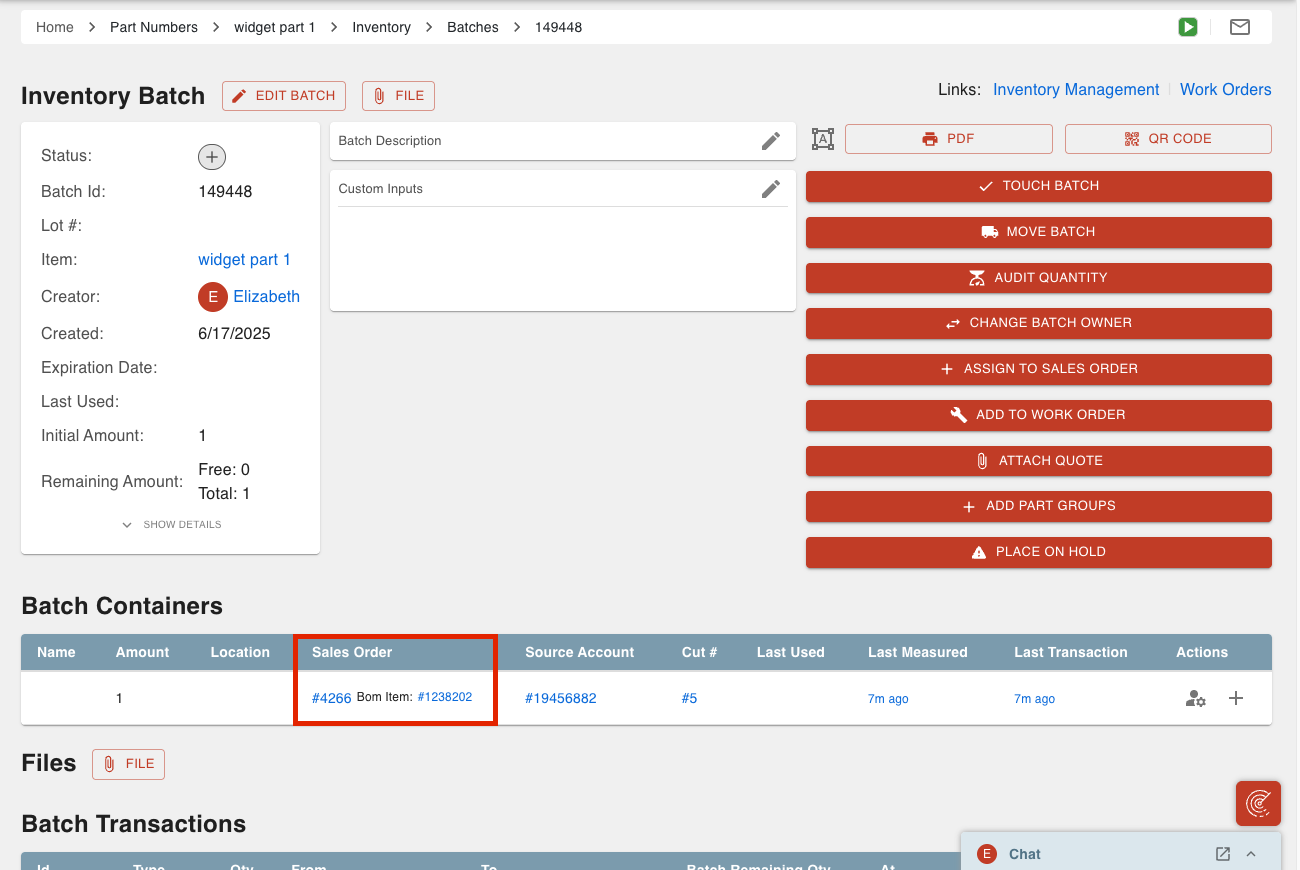
Click the Sales Order number under Batch Accounts.
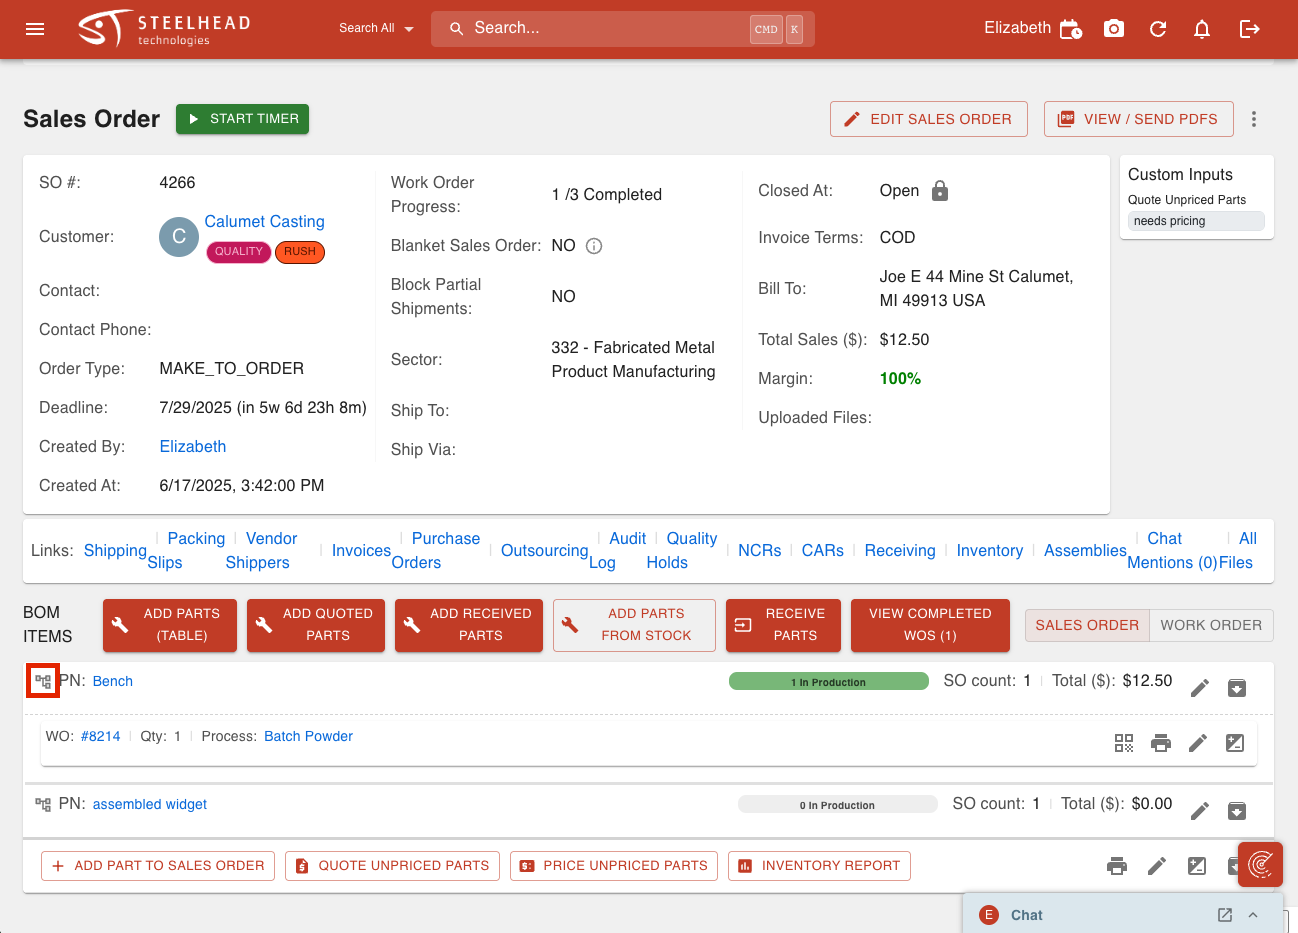
Click the Process Tree icon under BOM ITEMS.
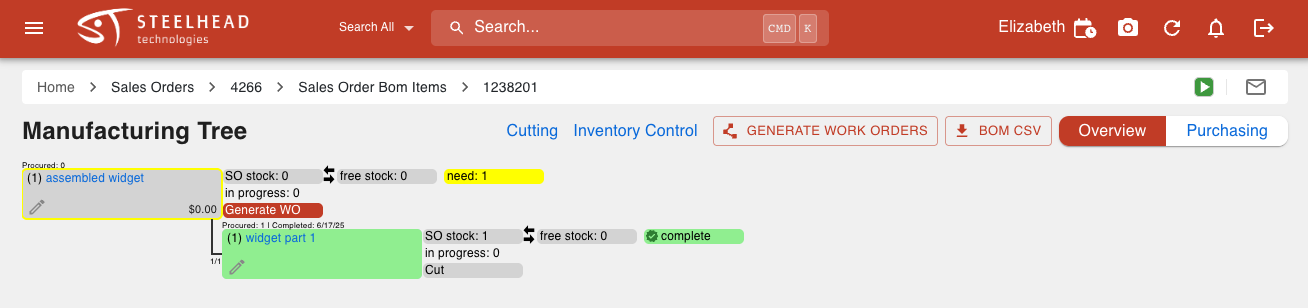
On the Manufacturing Tree you can see the workflow of In Progress and Completed steps. The Parts that are completed will be highlighted in green.
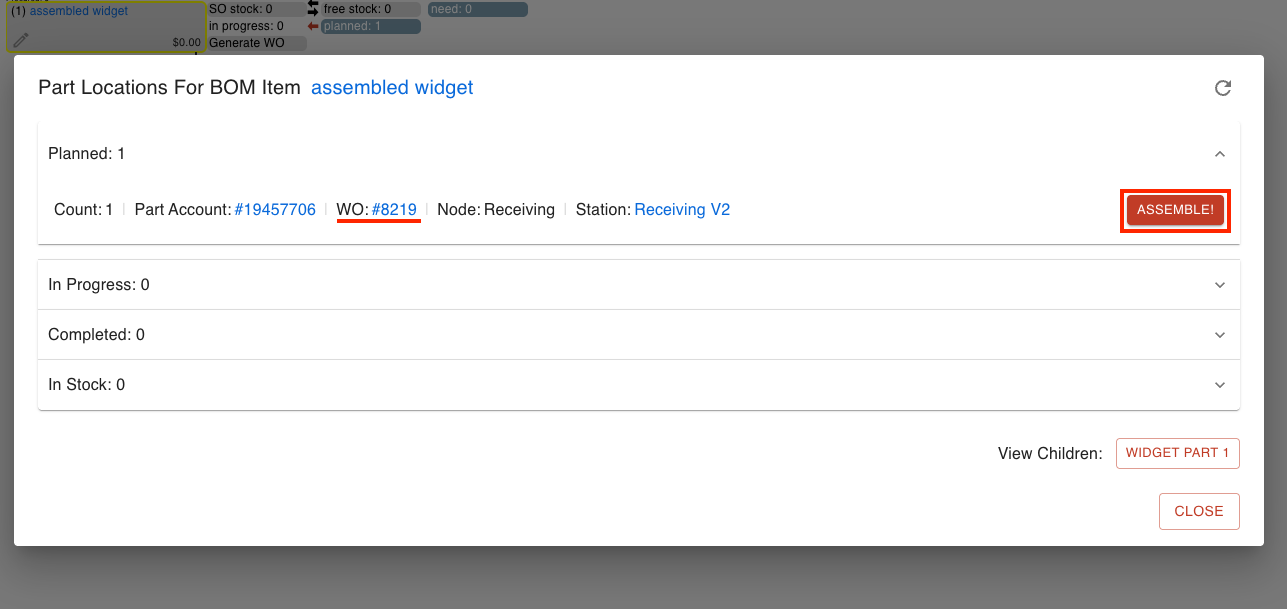
From here you can click on the Planned Work Orders to view more information.
Run the Parts through their Process to completion from the dialog box, or open the Work Order.
--
Was this article helpful?