- Print
Creating and Finalizing Certs
- Print
For Work Orders that include Part Numbers with Spec data, you can generate Certifications (Certs) that display the results of production measurements taken during processing.
The related article to "Configure PDF Templates" helps with the appearance of documents you can send to your customers. Steelhead Customer Support is able to help customize PDFs.
If you'd like to alter the PDF layouts that are set as defaults in your Domain you can do so by clicking the PDF Editor icon in your Certification Templates "Active Templates" list (the same is true of Packing Slips, Invoices, Quotes, etc., when you work in those modules):
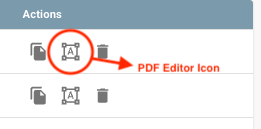
In addition to changing the layout of fields within PDFs, the editor allows you to add the display of any field that is available in the Work Order at hand. Users who are comfortable with Expression language in a PDF Generator API can refer to guidance at https://support.pdfgeneratorapi.com/en/article/functions-srekaa/ for command reference help.
Creating Certs from the Work Order Page
- Go to the Work Order page for the Work Order that you want to create the Cert for.
- Click the "Create Cert" button.
- Choose the Specs to include in the Cert.
- Choose the template for the Cert.
- Template PDFs can be customized in Domain Settings.
- Preview the Cert to make sure that it appears as expected.
- Click the "Save" button to save the draft of the Cert.
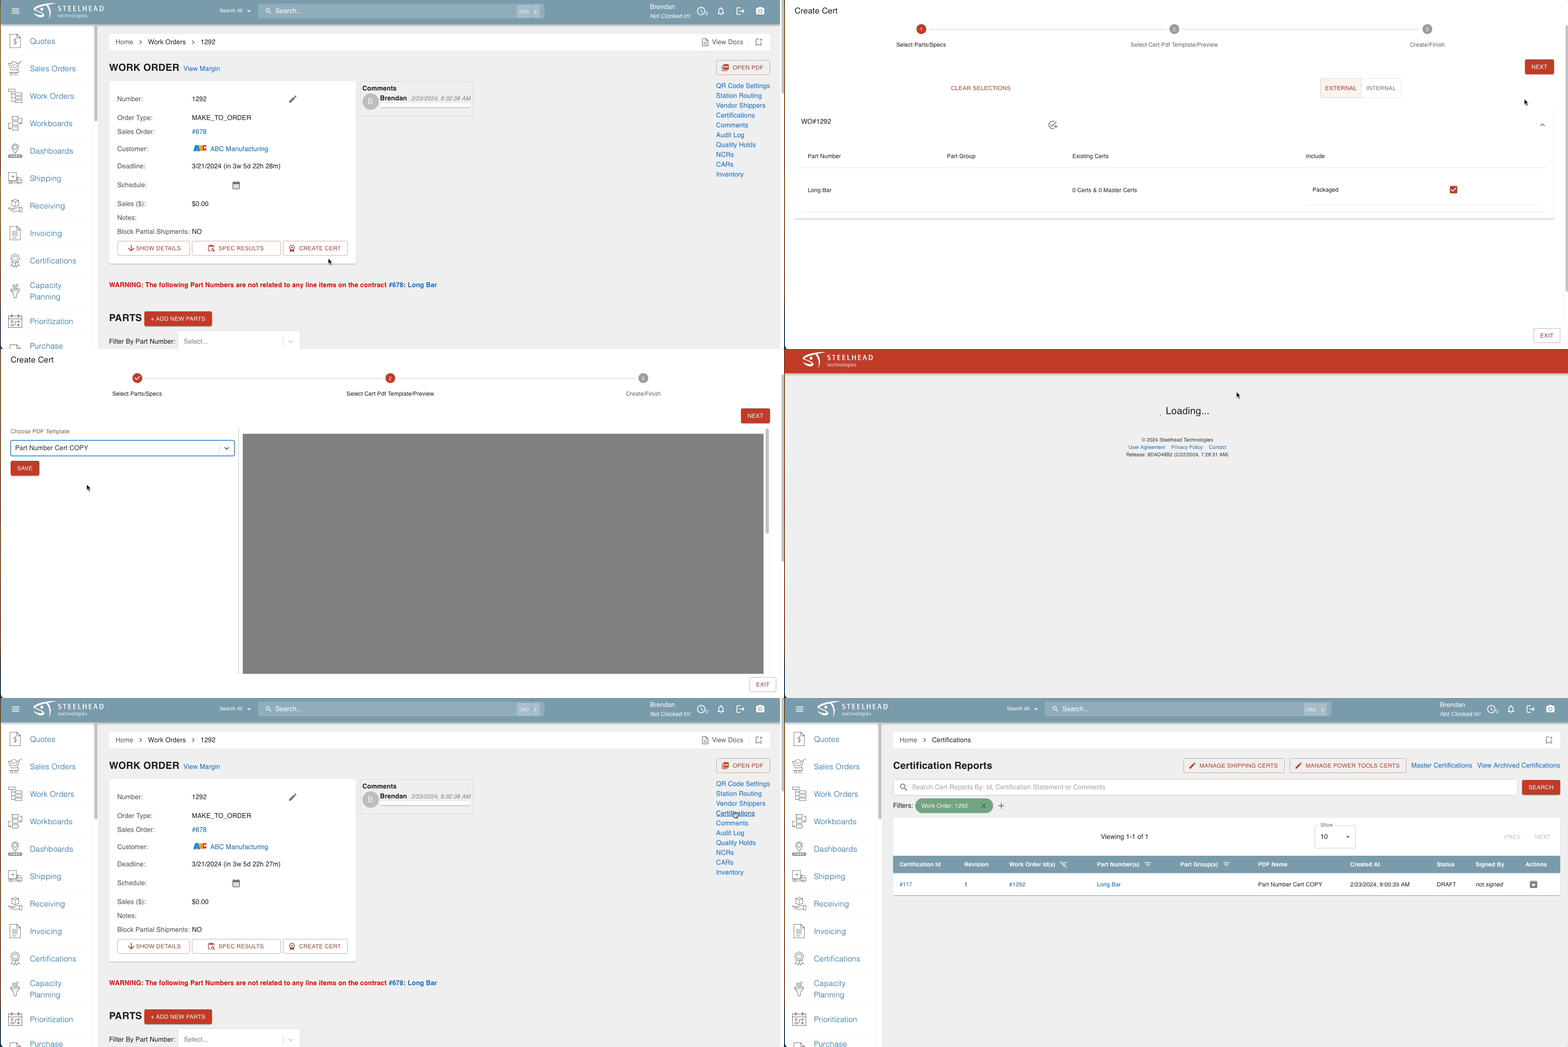
There are some newer techniques available for Cert creation as well, please check out this video to see them.
Additional Cert Creation Functions
March 2025 Updates
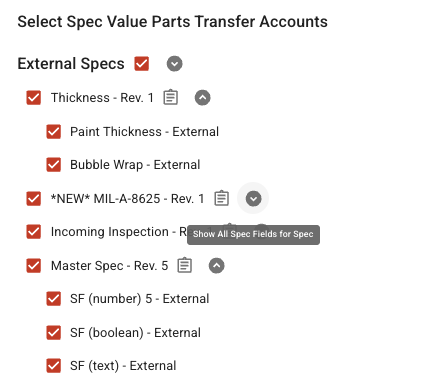
When you create a Cert and use the CUSTOMIZE VALUES button to show or reveal various results, there are sorting options available to show only the Specs and Spec Fields that you wish. These are especially useful when the options become numerous:
- The circled arrow icons next to "External Specs", "Internal Specs", and the individual Specs can be used to control drop-down lists containing those categories.
- By default, External Specs and External Spec Fields (along with their values) are selected for inclusion on Certs, but Internal Specs and Spec Fields are not, from either column. To include Internal Specs, click the checkbox on a Spec Title to select all immediately associated Spec Fields; or click the checkbox next to "External Specs" or "Internal Specs" to select all associated Fields and values, whether External or Internal. If you click a checkbox a second time, all associated options will be deselected, to begin selecting again individually.
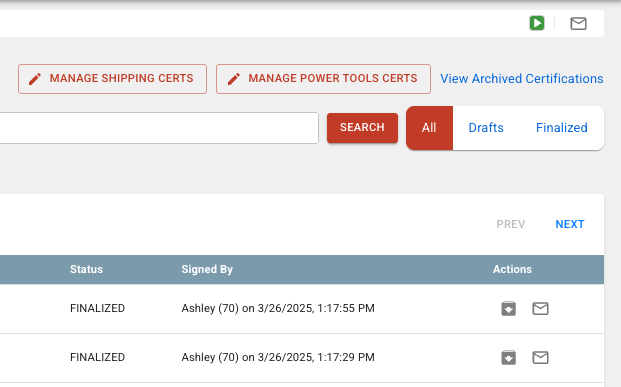
- In the Certification Reports Dashboard, Certs to view may be sorted by All, Drafts, or Finalized with the buttons in the upper right.
Creating Certs from the Shipping Dashboard
- On the Shipping Dashboard, click the CREATE CERTS medallion icon next to the Packing Slip that contains the Parts that you want to create the Cert for.
- Red badges indicate that a Cert has already been created.
- A Cert in your default Cert PDF template will be populated in the "Create Certification" dialog. You may CREATE DRAFT to save, or CUSTOMIZE VALUES (to eliminate otherwise applicable value(s) from showing on the Cert).
- You may edit the PDF if you are a Power Tools User, or choose another template to apply, with the edit icon in the upper right.
- You can toggle on "Multiple Certs" in the upper left to divide the available Spec data into individual pages.
- Add any optional Miscellaneous Comments or Certificate Statement you'd like to add.
- Sign the Cert, include your Name and Title, and click SAVE AND FINALIZE. Note: A Cert must be signed before it can be sent! If necessary, save one signature, such as that of a Quality Manager, as the default for every Cert.
- If needed, move parts onto different Work Orders to get the part number to show as you would like.
- You can add comments before creating the Cert and they will show up on the pdf.
- When doing so, don't forget to use "save text" button at the bottom.
- The only way to set your quantity on a certification to something other than the full part amount of an order would be to split your parts into groups.
- If you do this, you can create a Cert for the part group, which would put the part group quantity.
Cert PDFs can also use the PN-WO description and the SO shipping method.
Rework Certs:
If needed, you can put Certs on rework Work Orders, even when there are no ENTRANCE part transfers.
- Add parts with Specs to a Work Order.
- Take some measurements on that Work Order.
- Rework the parts to a new Work Order.
- Take some measurements on the rework Work Order.
- Click create Cert on both Work Orders and evaluate.
Video: Part Count on Certs to certify a partial order of Parts.
Duplicate Spec Result Titles
Typically the Spec and the Spec Parameter have different names, so that titles on a Cert PDF are not duplicated.
- If you change a Spec Parameter name for clarity, the change will be active for future Work Orders with that Specc.
Finalizing Certs
- Navigate to the Cert draft that you want to finalize through one of the following options:
- Using the "Certifications" link from the Work Order page.
- From the "Certifications" page, by searching, filtering, or scrolling.
- Select the Customer address to include it on the cert.
- Enter any miscellaneous comments regarding the Work Order, Parts, or Cert.
- Provide a Certification Statement, if applicable.
- Save the entered text by clicking the Save Text button.
- Click the "Convert Draft to Finalized" button.
- Sign the Cert and save.
In addition, you can search for a previously entered addresses when creating a Cert.
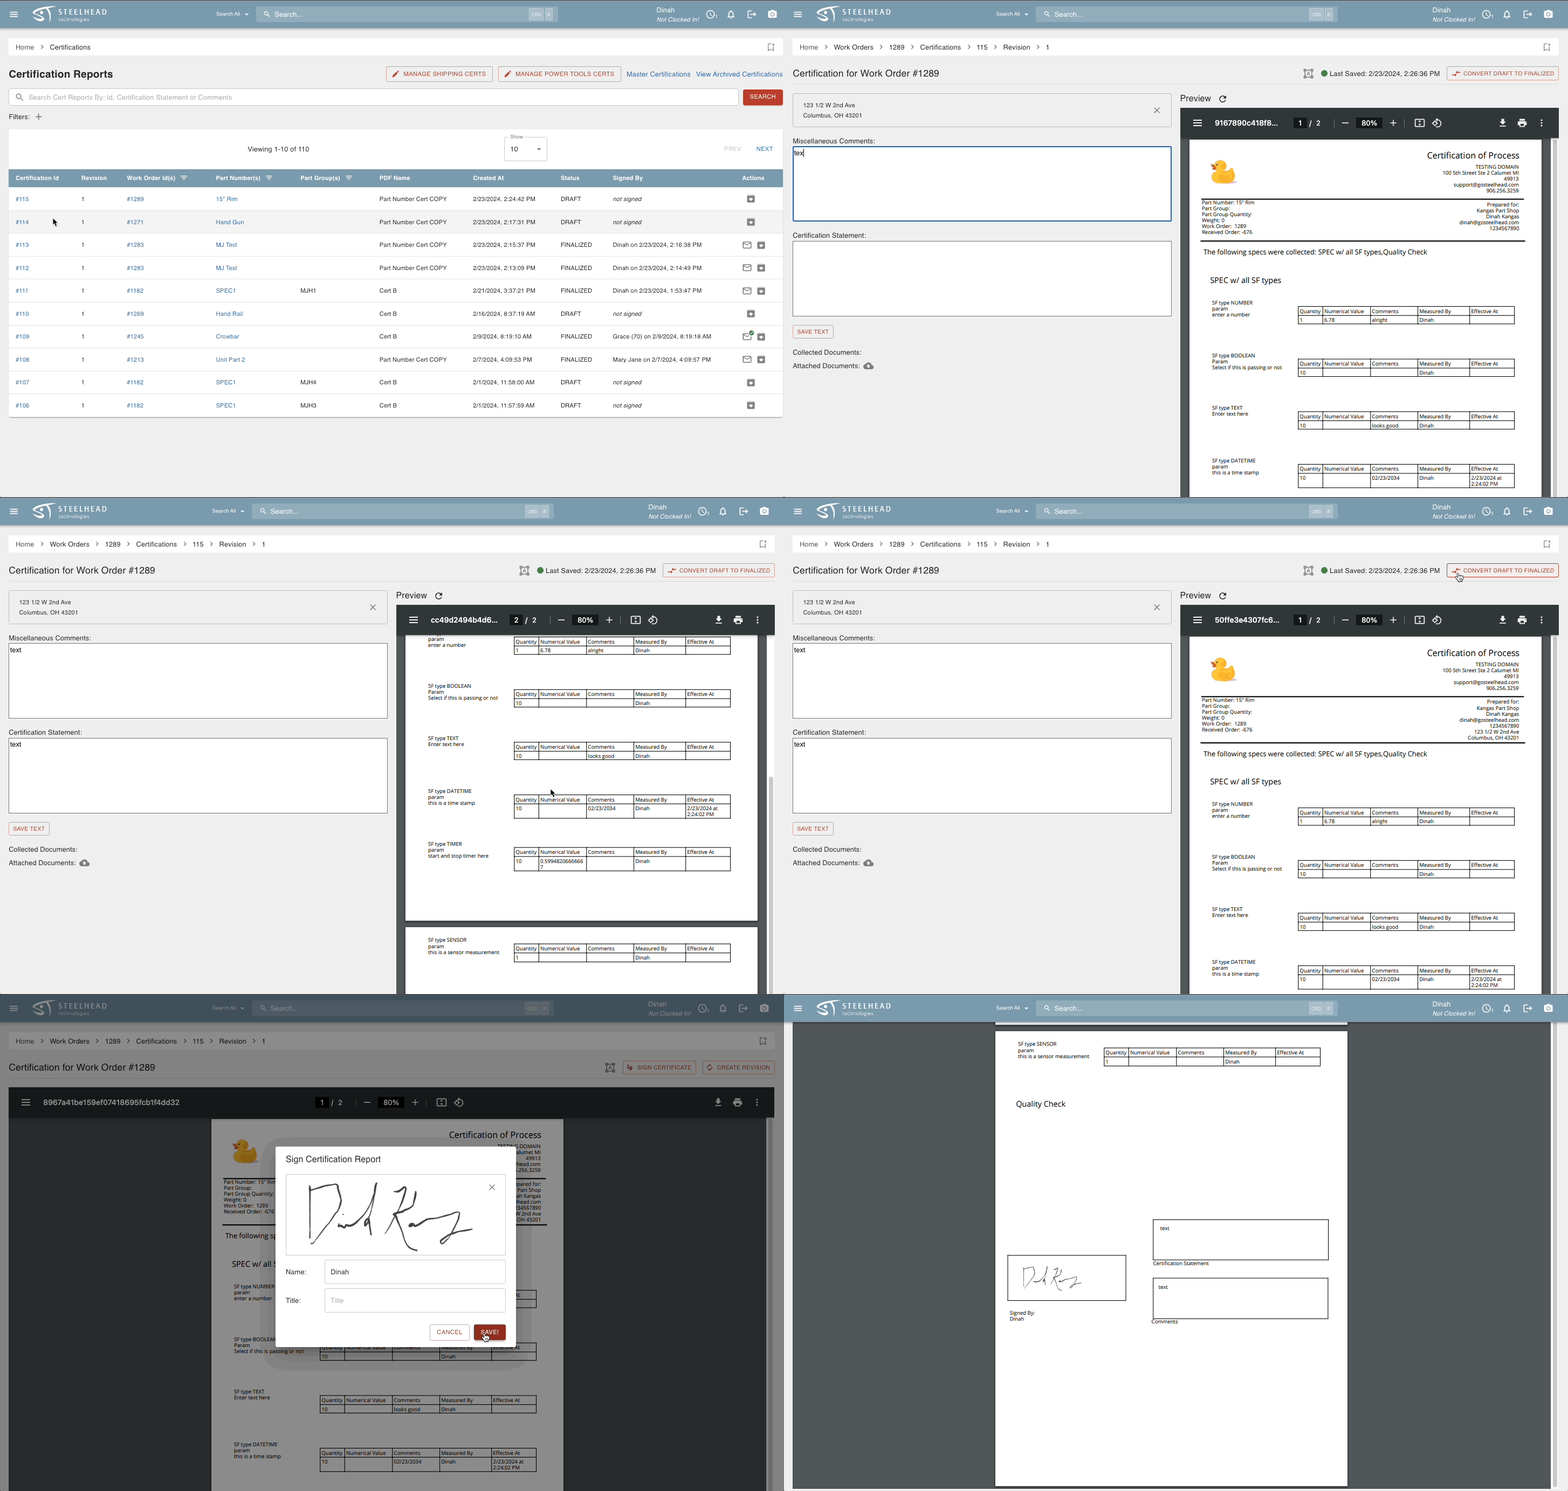
- Certs can automatically be generated with production data and will automatically integrate material usage data from Inventory.
- Images may be attached before they are sent away to the appropriate Customer.
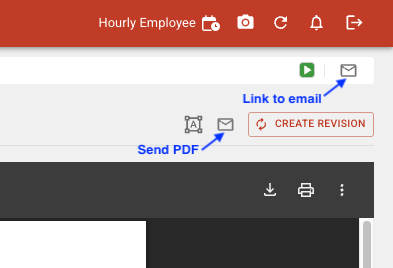
- A Cert that has been Finalized can be sent to the Customer by clicking the envelope email icon from its line in the Certs Dashboard, or just above the PDF when opened.
- Be aware that the envelope email icon which keeps position in the upper right, on the Title Bar, links to your Steelhead Mail interface (if available). The icon to send the PDF is next to the PDF Editor icon:
Once a Cert is created with your Part quantity, job number, and Purchase Order details, and the Specifications are taken, it is locked in and can't be edited. The only way to get that information to change would be to create a new Work Order or move all the Parts back to the beginning and start over.
As long as you do not restart any timers, moving Parts back on a Work Order won't change the margins. If you reduce Part quantity, Margins will report on the original amount of time spent on the Parts.

